

Grow Peppers at Home and unlock a world of flavor right outside your door! Imagine plucking vibrant, sun-ripened peppers straight from your garden, ready to spice up your favorite dishes. Forget those bland, store-bought peppers – with a few simple tricks and a little DIY spirit, you can cultivate a thriving pepper patch, even if you’re short on space or experience.
The history of pepper cultivation stretches back thousands of years, with evidence suggesting their use in South America as early as 6,000 BC. From ancient civilizations to modern kitchens, peppers have been prized for their culinary and medicinal properties. Today, the joy of growing your own food, especially something as versatile as peppers, is experiencing a huge resurgence.
Why should you learn how to grow peppers at home? Well, for starters, it’s incredibly rewarding! Plus, you’ll have complete control over the growing process, ensuring your peppers are free from harmful pesticides and bursting with flavor. I’m going to share some easy-to-follow DIY hacks that will help you maximize your pepper yield, troubleshoot common problems, and enjoy a bountiful harvest. Whether you’re a seasoned gardener or a complete beginner, these tips will empower you to cultivate a pepper paradise in your own backyard. Let’s get started!
Growing Peppers Like a Pro: My DIY Guide to a Bountiful Harvest
Hey there, fellow gardening enthusiasts! I’m so excited to share my tried-and-true method for growing peppers at home. Forget those expensive grocery store peppers – with a little patience and these simple steps, you’ll be harvesting your own delicious peppers in no time. I’ve learned a lot over the years, and I’m here to guide you through every stage, from seed to salsa!
Choosing Your Pepper Varieties
Before we dive into the nitty-gritty, let’s talk about pepper varieties. The world of peppers is vast and exciting! Consider these factors when making your choice:
* Spice Level: Do you crave the fiery heat of a habanero, or prefer the mild sweetness of a bell pepper? There’s a pepper for every palate!
* Size and Shape: From tiny Thai chilies to large bell peppers, the size and shape can influence how you use them in the kitchen.
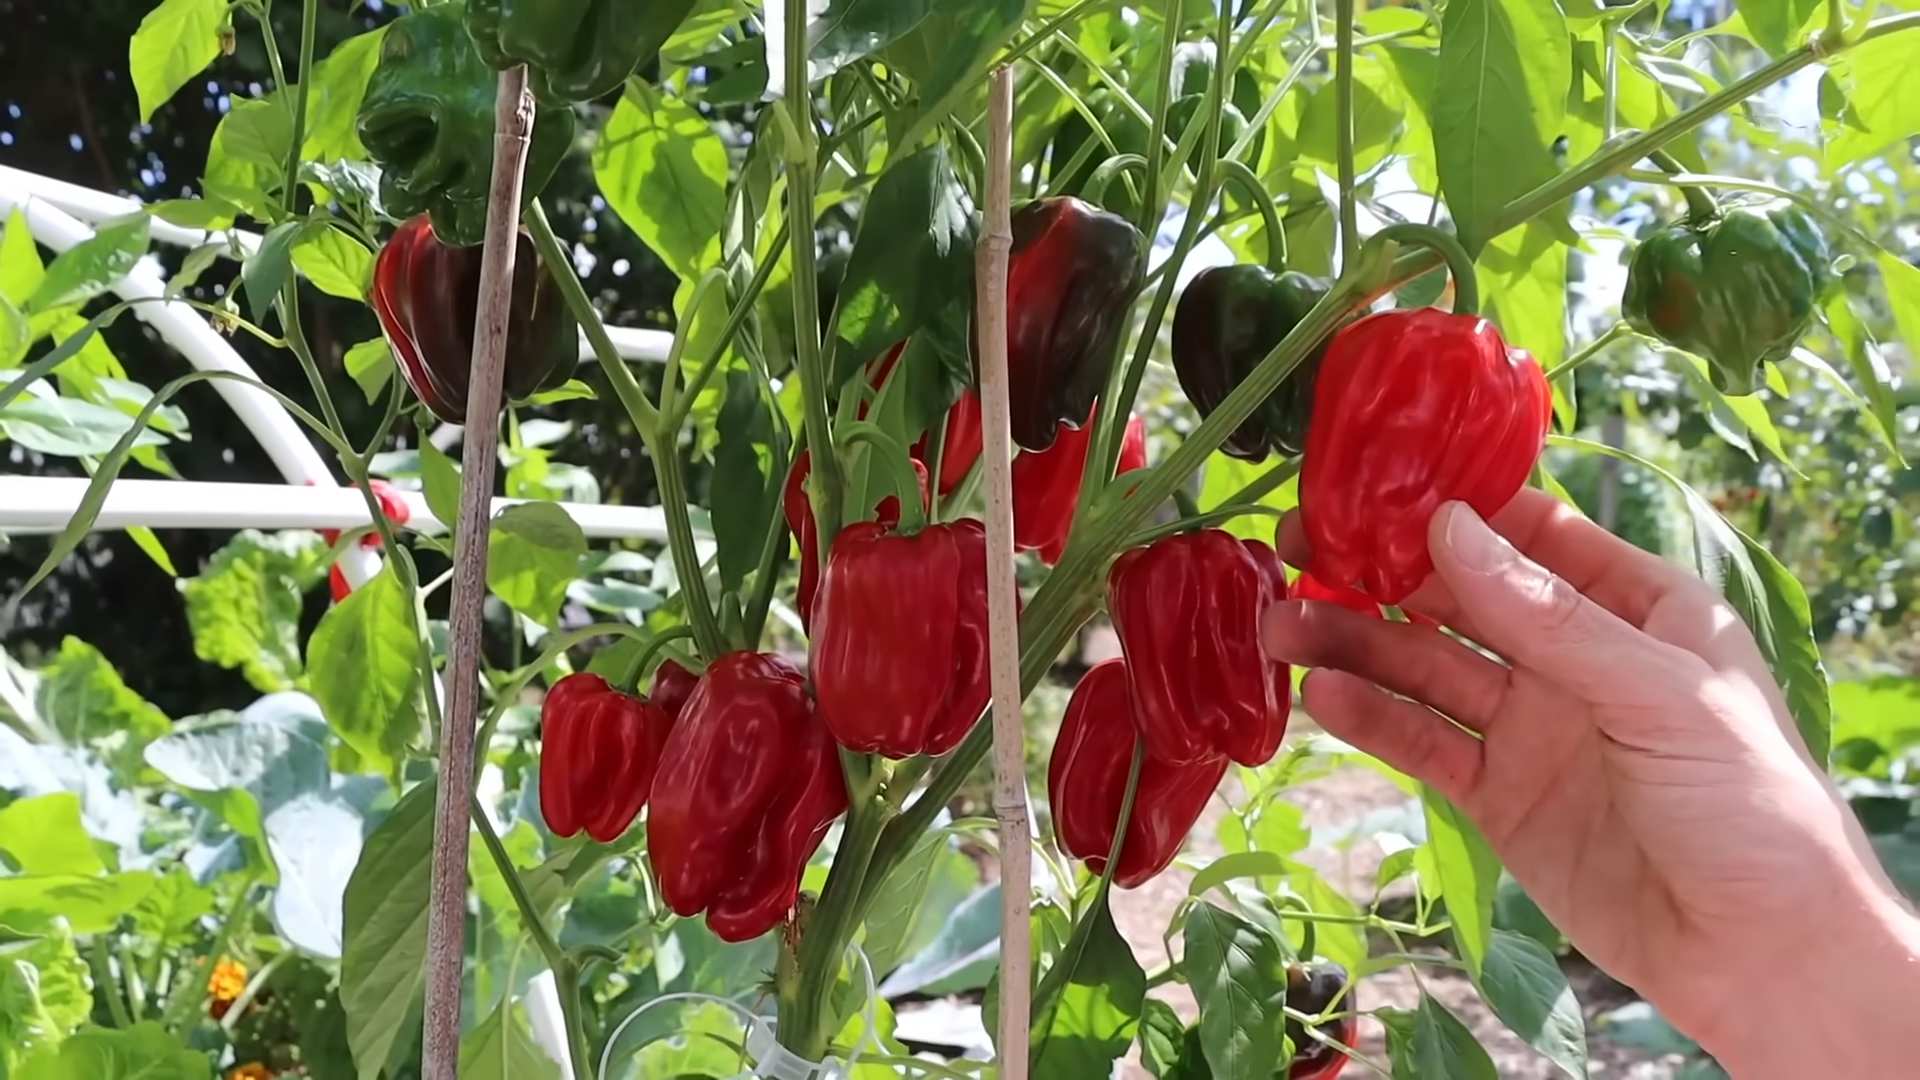
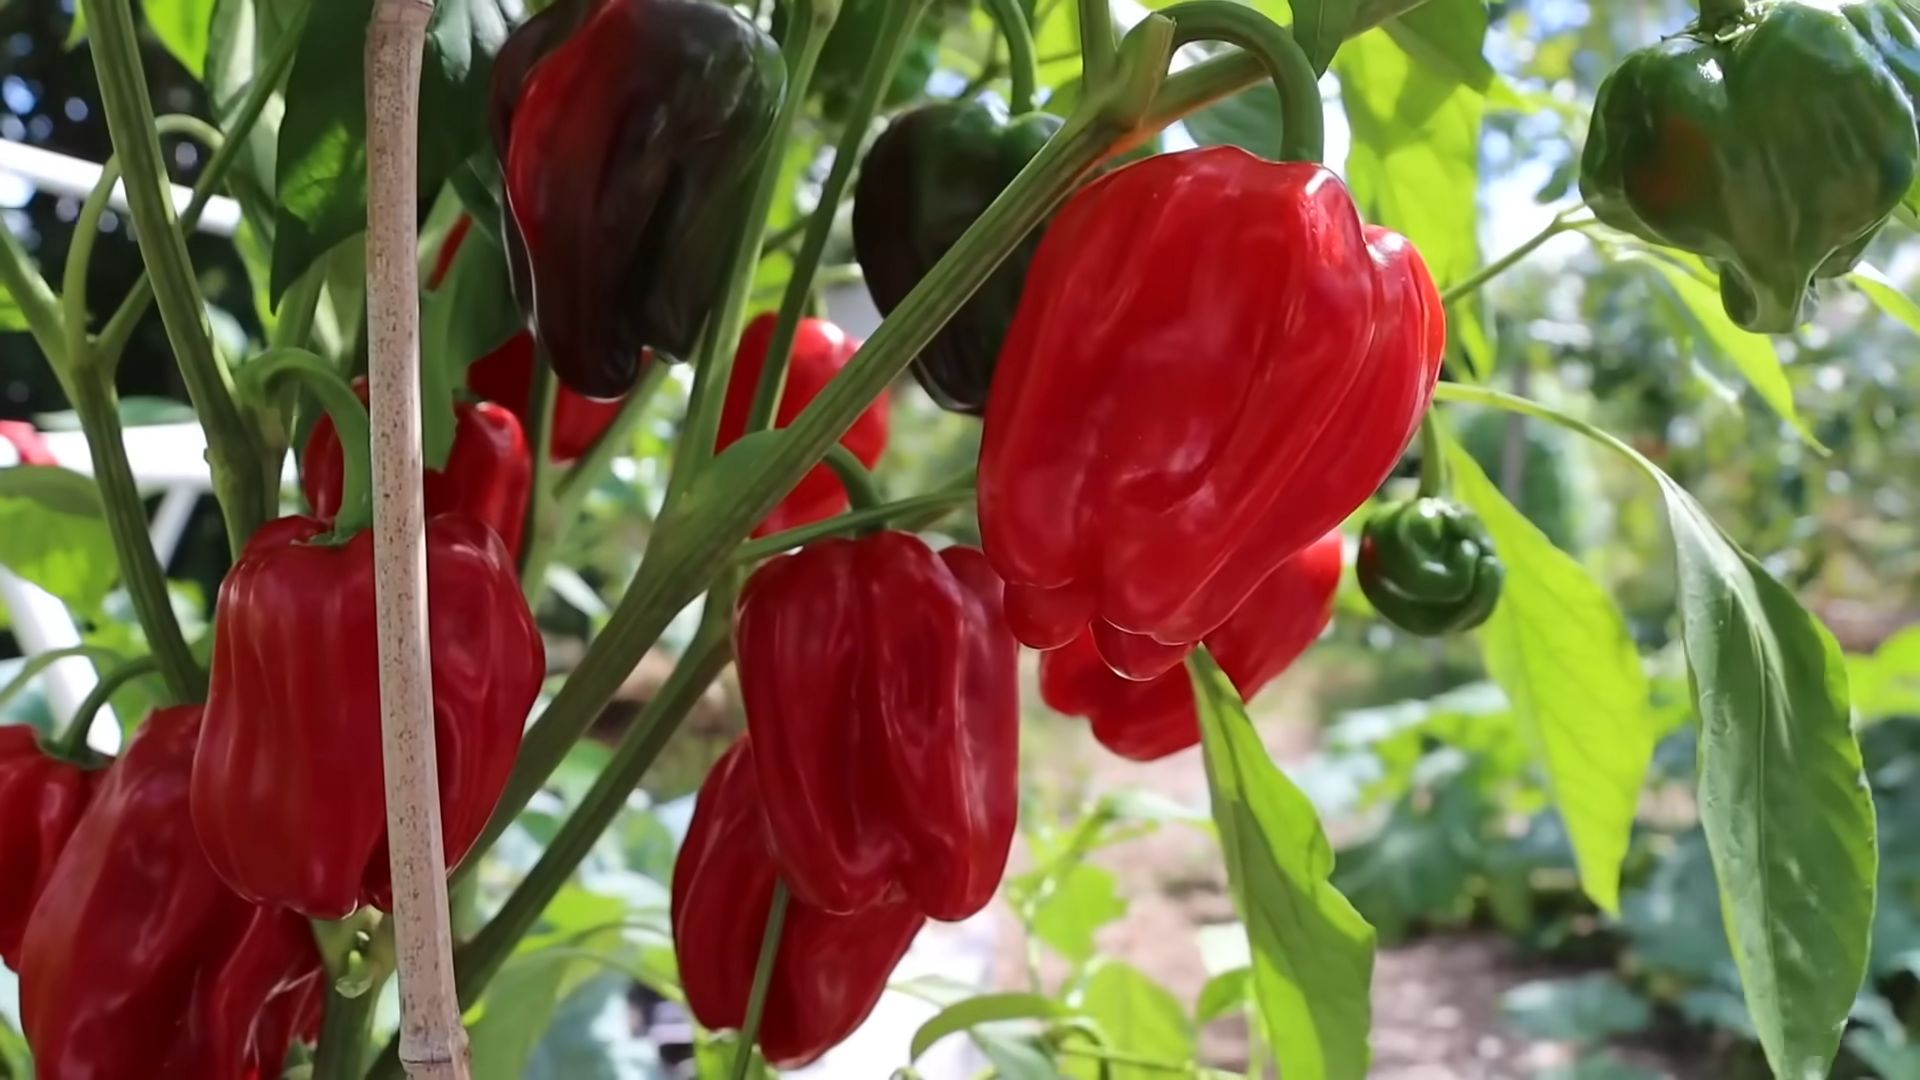
* Color: Peppers come in a rainbow of colors – red, yellow, orange, green, purple, and even brown! Choose varieties that appeal to your aesthetic sense.
* Growing Conditions: Some peppers are more tolerant of cooler temperatures or shorter growing seasons than others. Check the seed packet or plant label for specific requirements.
Some of my personal favorites include:
* Jalapeño: A classic for adding a moderate kick to dishes.
* Bell Pepper: Versatile and perfect for stuffing, roasting, or adding to salads.
* Serrano: A bit hotter than jalapeño, great for salsas and sauces.
* Habanero: For those who like it hot, hot, hot! Handle with care!
* Poblano: Milder and perfect for making chile rellenos.
Starting Your Pepper Seeds Indoors
Starting your pepper seeds indoors is crucial, especially if you live in a region with a shorter growing season. Peppers need a head start to mature and produce a good harvest. I usually start mine about 6-8 weeks before the last expected frost.
Here’s what you’ll need:
* Pepper seeds
* Seed starting trays or small pots
* Seed starting mix (a light, well-draining mix is essential)
* Heat mat (optional, but highly recommended)
* Grow light (also optional, but provides optimal light)
* Spray bottle with water
Now, let’s get started!
1. Prepare Your Seed Starting Trays: Fill your seed starting trays or pots with seed starting mix. Gently tap the trays to settle the mix.
2. Sow the Seeds: Make a small indentation (about ¼ inch deep) in the center of each cell or pot. Place 2-3 seeds in each indentation. This increases the chances of at least one seed germinating.
3. Cover the Seeds: Gently cover the seeds with seed starting mix.
4. Water Thoroughly: Use a spray bottle to thoroughly moisten the soil. Avoid overwatering, which can lead to damping off (a fungal disease that can kill seedlings).
5. Provide Warmth: Place the seed starting trays on a heat mat. Peppers germinate best at temperatures between 75-85°F (24-29°C).
6. Provide Light: Place the trays under a grow light. If you don’t have a grow light, place them in a sunny window, but be aware that seedlings may become leggy (tall and spindly) if they don’t receive enough light.
7. Maintain Moisture: Keep the soil consistently moist, but not soggy. Check the soil daily and water as needed.
8. Be Patient: Pepper seeds can take anywhere from 7-21 days to germinate, so don’t get discouraged if you don’t see sprouts right away.
Transplanting Your Pepper Seedlings
Once your pepper seedlings have developed their first set of true leaves (the leaves that look like miniature pepper leaves, not the initial seed leaves), it’s time to transplant them into larger pots. This gives them more room to grow and develop a strong root system.
Here’s what you’ll need:
* Larger pots (at least 4 inches in diameter)
* Potting mix (a good quality potting mix is essential)
* Trowel or spoon
* Water
Follow these steps:
1. Prepare the Pots: Fill the larger pots with potting mix, leaving about an inch of space at the top.
2. Gently Remove the Seedlings: Carefully remove the seedlings from the seed starting trays. Use a trowel or spoon to gently loosen the soil around the roots. Be careful not to damage the delicate roots.
3. Transplant the Seedlings: Make a hole in the center of the potting mix in the larger pot. Place the seedling in the hole, making sure the top of the root ball is level with the soil surface.
4. Fill with Soil: Gently fill the hole with potting mix, and lightly pat the soil around the seedling.
5. Water Thoroughly: Water the seedlings thoroughly after transplanting.
6. Provide Light and Warmth: Place the transplanted seedlings under a grow light or in a sunny window. Continue to provide warmth, especially at night.
Hardening Off Your Pepper Plants
Before you can plant your pepper plants outdoors, you need to “harden them off.” This process gradually acclimates them to the outdoor environment, reducing the risk of shock and sunburn.
Here’s how to do it:
1. Start Slowly: Begin by placing your pepper plants outdoors in a sheltered location (e.g., a porch or patio) for just a few hours each day.
2. Increase Exposure Gradually: Gradually increase the amount of time the plants spend outdoors each day, over a period of 1-2 weeks.
3. Protect from Extreme Weather: Protect the plants from strong winds, direct sunlight, and frost.
4. Monitor the Plants: Watch for signs of stress, such as wilting or sunburn. If you see any signs of stress, bring the plants back indoors or provide shade.
Planting Your Pepper Plants Outdoors
Once your pepper plants are hardened off and the danger of frost has passed, it’s time to plant them in your garden or in containers.
Here’s what you’ll need:
* Your hardened-off pepper plants
* Garden soil or potting mix (if planting in containers)
* Trowel
* Water
* Fertilizer (optional, but recommended)
* Mulch (optional, but helps retain moisture and suppress weeds)
* Stakes or cages (for taller varieties)
Follow these steps:
1. Choose a Sunny Location: Peppers need at least 6-8 hours of sunlight per day.
2. Prepare the Soil: Amend the soil with compost or other organic matter to improve drainage and fertility.
3. Dig Holes: Dig holes that are slightly larger than the root balls of your pepper plants. Space the plants about 18-24 inches apart, depending on the variety.
4. Plant the Peppers: Gently remove the pepper plants from their pots and place them in the holes. Make sure the top of the root ball is level with the soil surface.
5. Fill with Soil: Fill the holes with soil and lightly pat the soil around the plants.
6. Water Thoroughly: Water the plants thoroughly after planting.
7. Fertilize: Apply a balanced fertilizer according to the package directions.
8. Mulch: Apply a layer of mulch around the plants to help retain moisture and suppress weeds.
9. Stake or Cage: If you’re growing taller varieties, provide support with stakes or cages.
Caring for Your Pepper Plants
Once your pepper plants are planted, it’s important to provide them with proper care to ensure a bountiful harvest.
Here are some tips:
* Water Regularly: Water your pepper plants regularly, especially during hot, dry weather. Aim to keep the soil consistently moist, but not soggy.
* Fertilize Regularly: Fertilize your pepper plants every 2-3 weeks with a balanced fertilizer.
* Pinch Off Flowers (Early On): For the first few weeks after transplanting, pinch off any flowers that appear. This encourages the plant to focus on vegetative growth, resulting in a stronger, more productive plant later on.
* Control Pests and Diseases: Monitor your pepper plants regularly for pests and diseases. Common pests include aphids, whiteflies, and spider mites. Common diseases include blossom end rot and fungal infections. Treat any problems promptly with appropriate organic or chemical controls.
* Provide Support: As your pepper plants grow, they may need additional support. Use stakes or cages to prevent the plants from falling over.
* Prune (Optional): Pruning can help improve air circulation
Conclusion
So, there you have it! Growing peppers at home, especially with these simple DIY tricks, is not just a gardening endeavor; it’s an investment in flavor, freshness, and a rewarding connection to your food. We’ve explored how to bypass common pitfalls and maximize your pepper yield, all while keeping things budget-friendly and accessible, even for those with limited space.
Why is this a must-try? Because store-bought peppers, while convenient, often lack the vibrant taste and satisfying crunch of homegrown varieties. Plus, you have complete control over the growing process, ensuring your peppers are free from unwanted chemicals and pesticides. Imagine the satisfaction of harvesting a basket overflowing with colorful bell peppers, fiery jalapeños, or exotic habaneros, all nurtured by your own hands. That’s an experience that simply can’t be replicated by a trip to the grocery store.
But the benefits extend beyond just taste and control. Gardening, in general, is a fantastic stress reliever. The simple act of tending to your plants, watching them grow, and nurturing them to maturity can be incredibly therapeutic. And let’s not forget the educational aspect! Growing peppers at home is a wonderful way to teach children about the origins of their food and the importance of sustainable practices.
Ready to take your pepper growing to the next level? Consider these variations and suggestions:
* Experiment with different pepper varieties: Don’t limit yourself to just one type of pepper. Explore the vast world of peppers, from sweet bell peppers to scorching ghost peppers. Each variety has its unique flavor profile and growing requirements, so do your research and choose peppers that suit your taste and climate.
* Try companion planting: Certain plants, like basil, marigolds, and carrots, can help deter pests and improve the growth of your pepper plants. Research companion planting strategies to create a thriving and balanced garden ecosystem.
* Utilize vertical gardening techniques: If you’re short on space, consider growing your peppers in containers on a balcony or patio. Vertical gardening systems, such as hanging baskets or stacked planters, can maximize your growing area and add visual appeal to your outdoor space.
* Save your seeds: Once you’ve successfully grown your peppers, consider saving the seeds for future planting. This is a great way to preserve your favorite varieties and become more self-sufficient. Just be sure to choose seeds from open-pollinated varieties, as hybrid varieties may not produce true-to-type offspring.
* Ferment your peppers: Transform your pepper harvest into delicious and healthy fermented products like hot sauce or pepper paste. Fermentation not only preserves your peppers but also enhances their flavor and adds beneficial probiotics.
We’re confident that with a little effort and these DIY tricks, you’ll be enjoying a bountiful harvest of homegrown peppers in no time. Don’t be afraid to experiment, learn from your mistakes, and most importantly, have fun!
Now, we want to hear from you! Have you tried growing peppers at home? What are your favorite tips and tricks? Share your experiences in the comments below. We’re eager to learn from your successes and challenges. Let’s build a community of passionate pepper growers and inspire others to embark on this rewarding journey. So, grab your gardening gloves, get your hands dirty, and start growing those peppers! We can’t wait to see what you create.
Frequently Asked Questions (FAQ)
What is the best time to start growing peppers at home?
The best time to start growing peppers depends on your climate. In general, peppers need warm temperatures to thrive. If you live in a region with a long growing season, you can start your seeds indoors 6-8 weeks before the last expected frost. If you live in a colder climate, you may need to start your seeds even earlier. You can also purchase pepper seedlings from a local nursery or garden center. Transplanting seedlings outdoors should occur after the danger of frost has passed and the soil has warmed up. Aim for soil temperatures consistently above 60°F (15°C).
What kind of soil is best for growing peppers?
Peppers prefer well-draining soil that is rich in organic matter. A slightly acidic to neutral pH (around 6.0 to 7.0) is ideal. You can amend your soil with compost, aged manure, or other organic materials to improve its fertility and drainage. Avoid heavy clay soils, as they can become waterlogged and inhibit root growth. If you’re growing peppers in containers, use a high-quality potting mix specifically formulated for vegetables.
How much sunlight do peppers need?
Peppers need at least 6-8 hours of direct sunlight per day to thrive. Choose a sunny location in your garden or on your patio where your pepper plants will receive ample sunlight. If you’re growing peppers indoors, you may need to supplement with grow lights to provide sufficient light. Rotate your pepper plants regularly to ensure that all sides receive equal exposure to sunlight.
How often should I water my pepper plants?
Water your pepper plants regularly, especially during hot, dry weather. The soil should be kept consistently moist but not waterlogged. Water deeply at the base of the plant, avoiding wetting the foliage, which can increase the risk of fungal diseases. Check the soil moisture regularly by sticking your finger into the soil. If the top inch of soil feels dry, it’s time to water. Mulching around your pepper plants can help retain moisture and suppress weeds.
What are some common pests and diseases that affect pepper plants?
Common pests that affect pepper plants include aphids, spider mites, whiteflies, and pepper weevils. Diseases that can affect pepper plants include blossom end rot, fungal leaf spot, and viral diseases. Regularly inspect your pepper plants for signs of pests or diseases. Treat infestations promptly with insecticidal soap, neem oil, or other appropriate treatments. Prevent diseases by providing good air circulation, avoiding overwatering, and using disease-resistant varieties.
How do I prevent blossom end rot in my peppers?
Blossom end rot is a common problem in peppers caused by a calcium deficiency. To prevent blossom end rot, ensure that your soil has adequate calcium levels. You can amend your soil with lime or bone meal before planting. Water your pepper plants consistently to prevent fluctuations in soil moisture, which can also contribute to blossom end rot. Avoid over-fertilizing with nitrogen, as this can interfere with calcium uptake.
When should I harvest my peppers?
The timing of pepper harvest depends on the variety and your personal preference. Bell peppers are typically harvested when they are fully colored and firm to the touch. Hot peppers can be harvested at any stage of maturity, depending on the desired level of heat. Use pruning shears or a sharp knife to cut the peppers from the plant, leaving a small stem attached.
Can I grow peppers in containers?
Yes, peppers can be successfully grown in containers. Choose a container that is at least 12 inches in diameter and has good drainage holes. Use a high-quality potting mix specifically formulated for vegetables. Water your container-grown peppers regularly and fertilize them with a balanced fertilizer every few weeks. Place your containers in a sunny location that receives at least 6-8 hours of direct sunlight per day.
How do I fertilize my pepper plants?
Fertilize your pepper plants with a balanced fertilizer every few weeks, starting after they have been transplanted outdoors. Look for a fertilizer with a ratio of 5-10-10 or similar. Avoid over-fertilizing with nitrogen, as this can promote excessive foliage growth at the expense of fruit production. You can also use organic fertilizers, such as compost tea or fish emulsion.
How can I increase the yield of my pepper plants?
To increase the yield of your pepper plants, provide them with optimal growing conditions, including plenty of sunlight, well-draining soil, and regular watering and fertilization. Prune your pepper plants to encourage branching and fruit production. Remove any suckers that grow from the base of the plant. Support your pepper plants with stakes or cages to prevent them from falling over under the weight of the fruit. Consider using Epsom salts as a foliar spray to provide magnesium, which can help improve fruit set.
Leave a Comment