

Grow Potatoes in Your Backyard – imagine harvesting a bounty of fresh, earthy potatoes right from your own garden! Forget those bland, store-bought spuds; we’re diving into the wonderful world of homegrown potatoes, and I’m here to show you how surprisingly easy it is to cultivate them, even if you have limited space.
For centuries, potatoes have been a staple food around the globe, originating in the Andes Mountains and playing a crucial role in feeding populations. From simple peasant fare to gourmet dishes, their versatility is unmatched. But beyond their culinary uses, growing your own potatoes connects you to this rich history and offers a unique sense of accomplishment.
Why should you embark on this potato-growing adventure? Well, for starters, the taste of freshly dug potatoes is simply incomparable. Plus, you have complete control over what goes into your food, ensuring it’s free from harmful pesticides and chemicals. In today’s world, where healthy eating and sustainable living are more important than ever, learning to grow potatoes in your backyard is a fantastic way to take control of your food source and enjoy the fruits (or rather, tubers!) of your labor. So, let’s get our hands dirty and discover some simple DIY tricks and hacks to make your potato-growing dreams a reality!
Grow Your Own Delicious Potatoes: A Beginner’s Guide
Okay, so you want to grow potatoes in your backyard? Awesome! It’s surprisingly easy and incredibly rewarding. There’s nothing quite like digging up your own homegrown spuds for a delicious meal. I’m going to walk you through everything you need to know, from choosing the right potatoes to harvesting your bounty. Let’s get started!
Choosing Your Seed Potatoes
First things first, you can’t just plant any old potato from the grocery store. Those are often treated to prevent sprouting. You need “seed potatoes.” These are potatoes specifically grown for planting. You can find them at your local garden center or online.
* Variety is Key: Consider what kind of potatoes you like to eat. Do you prefer russets for baking, Yukon Golds for mashing, or red potatoes for boiling? Choose a variety that suits your taste.
* Certified Disease-Free: Make sure your seed potatoes are certified disease-free. This will help prevent problems later on.
* Size Matters (Sort Of): You don’t need huge seed potatoes. Smaller ones, about the size of a chicken egg, are perfectly fine. Larger ones can be cut into pieces, but more on that later.
Preparing Your Seed Potatoes
This step is crucial for getting a good head start. It’s called “chitting” or “sprouting.”
* What is Chitting?: Chitting encourages the seed potatoes to sprout before planting. This gives them a jumpstart and results in earlier and more abundant harvests.
* How to Chit:
1. About 4-6 weeks before your last expected frost, place your seed potatoes in a cool, bright location. An unheated garage or shed works well.
2. Stand them upright in egg cartons or trays, with the “eyes” (those little indentations where sprouts will emerge) facing upwards.
3. Avoid direct sunlight, which can dry them out.
4. Over the next few weeks, you’ll see small, green sprouts emerging from the eyes. These are what you want!
Preparing Your Garden Bed
Potatoes need loose, well-drained soil. They also prefer slightly acidic soil (pH 6.0-6.5).
* Sunlight is Essential: Choose a location that gets at least 6-8 hours of sunlight per day.
* Soil Preparation:
1. Clear the area of any weeds, rocks, and debris.
2. Amend the soil with plenty of organic matter, such as compost or well-rotted manure. This will improve drainage and provide nutrients.
3. Till or dig the soil to a depth of at least 12 inches. This will loosen it up and make it easier for the potato roots to grow.
4. Consider adding a slow-release fertilizer formulated for potatoes. Follow the instructions on the package.
* Mounding or Trenching?: There are two main methods for planting potatoes: mounding and trenching. I prefer trenching, as it’s easier to manage.
Planting Your Potatoes
Now for the fun part!
* When to Plant: Plant your potatoes about 2-3 weeks after the last expected frost, when the soil has warmed up to at least 45°F (7°C).
* Cutting Seed Potatoes (If Necessary): If you have large seed potatoes, you can cut them into pieces.
1. Make sure each piece has at least 2-3 “eyes.”
2. Let the cut pieces dry for a day or two before planting. This will help prevent rot.
* Planting Instructions (Trenching Method):
1. Dig trenches that are about 6-8 inches deep and 2-3 feet apart.
2. Place the seed potatoes (or cut pieces) in the trenches, with the sprouts facing upwards. Space them about 12 inches apart.
3. Cover the seed potatoes with about 3-4 inches of soil.
4. Water thoroughly.
Hilling Your Potatoes
This is a crucial step for maximizing your potato harvest.
* What is Hilling?: Hilling involves gradually adding soil around the potato plants as they grow. This encourages the plants to produce more potatoes along the stems.
* When to Hill:
1. When the potato plants are about 6-8 inches tall, use a hoe or shovel to pull soil from the sides of the trench up around the stems, leaving only the top few inches of the plants exposed.
2. Repeat this process every 2-3 weeks, until the mounds are about 12 inches high.
* Why Hill?: Potatoes form along the underground stems of the plant. By hilling, you’re creating more space for them to grow and develop. Hilling also helps protect the potatoes from sunlight, which can cause them to turn green and produce solanine, a toxic compound.
Caring for Your Potato Plants
* Watering: Potatoes need consistent moisture, especially during flowering and tuber formation. Water deeply whenever the soil feels dry to the touch. Avoid overwatering, which can lead to rot.
* Fertilizing: If your soil is poor, you may need to fertilize your potato plants. Use a balanced fertilizer (e.g., 10-10-10) or a fertilizer specifically formulated for potatoes. Follow the instructions on the package.
* Weeding: Keep the area around your potato plants free of weeds. Weeds compete with the potatoes for nutrients and water.
* Pest and Disease Control: Keep an eye out for pests and diseases. Common potato pests include potato beetles, aphids, and flea beetles. Common diseases include early blight, late blight, and scab. Treat any problems promptly with appropriate insecticides or fungicides. Organic options are available!
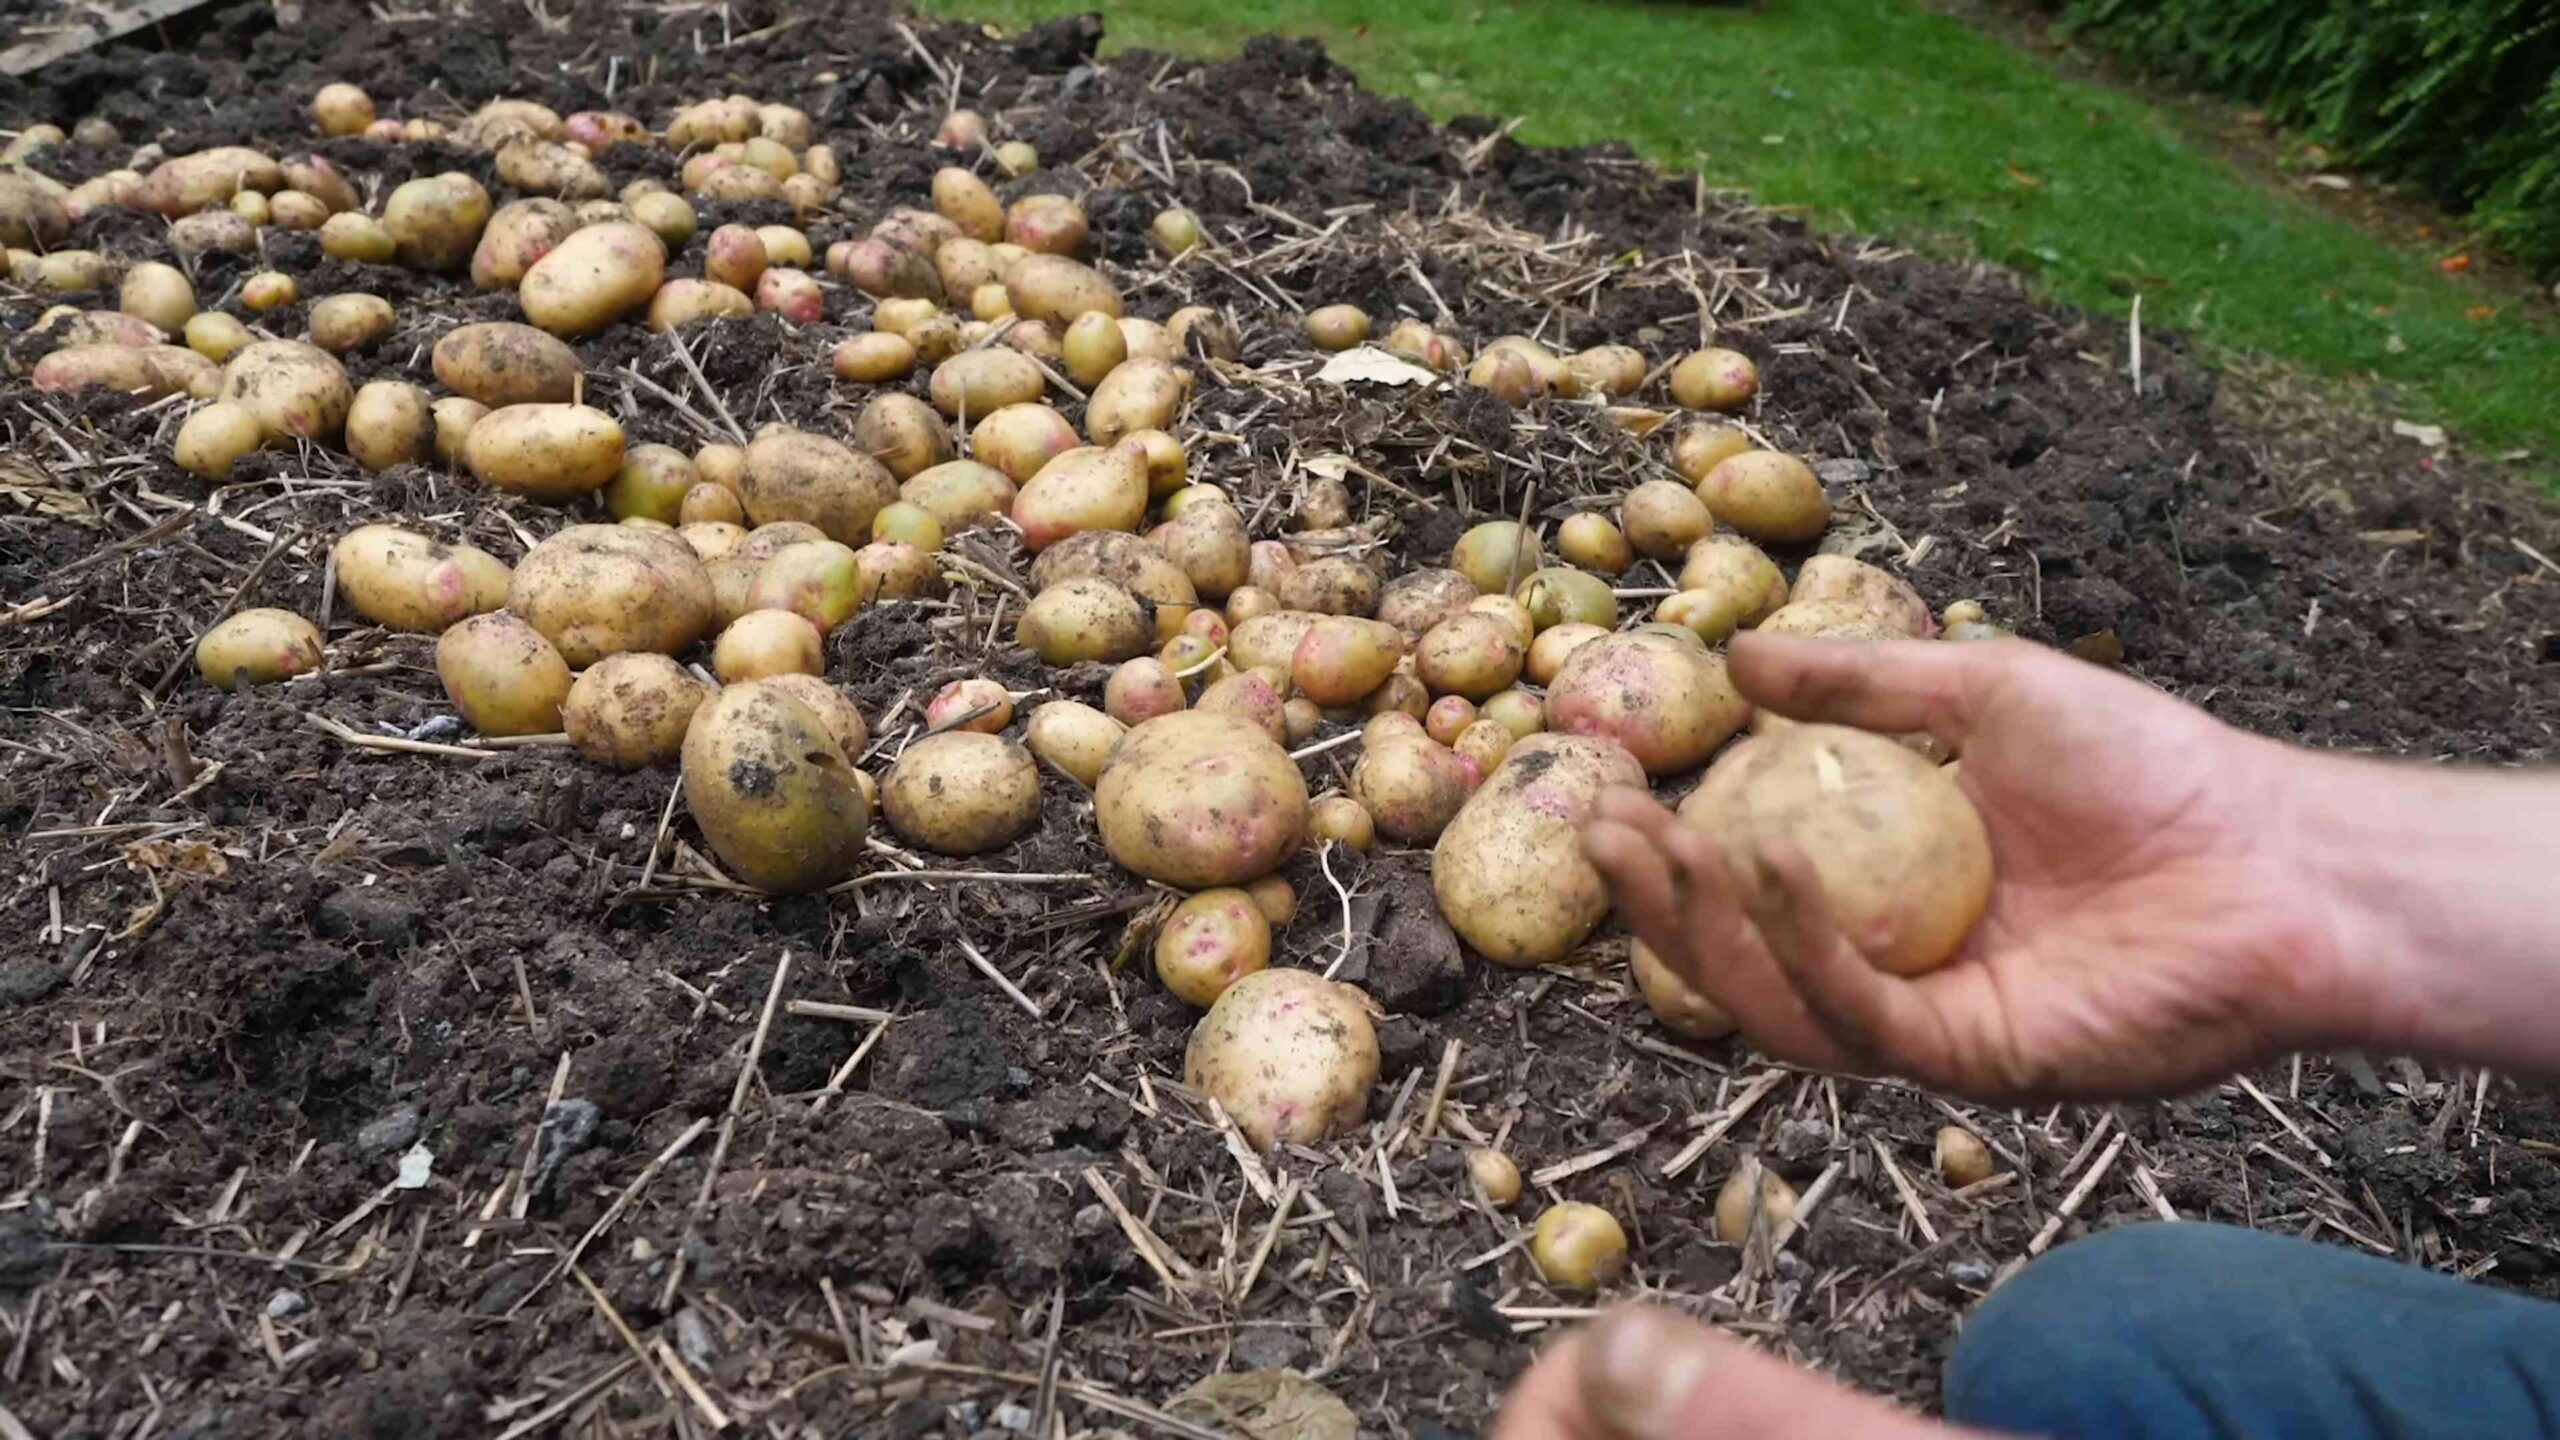
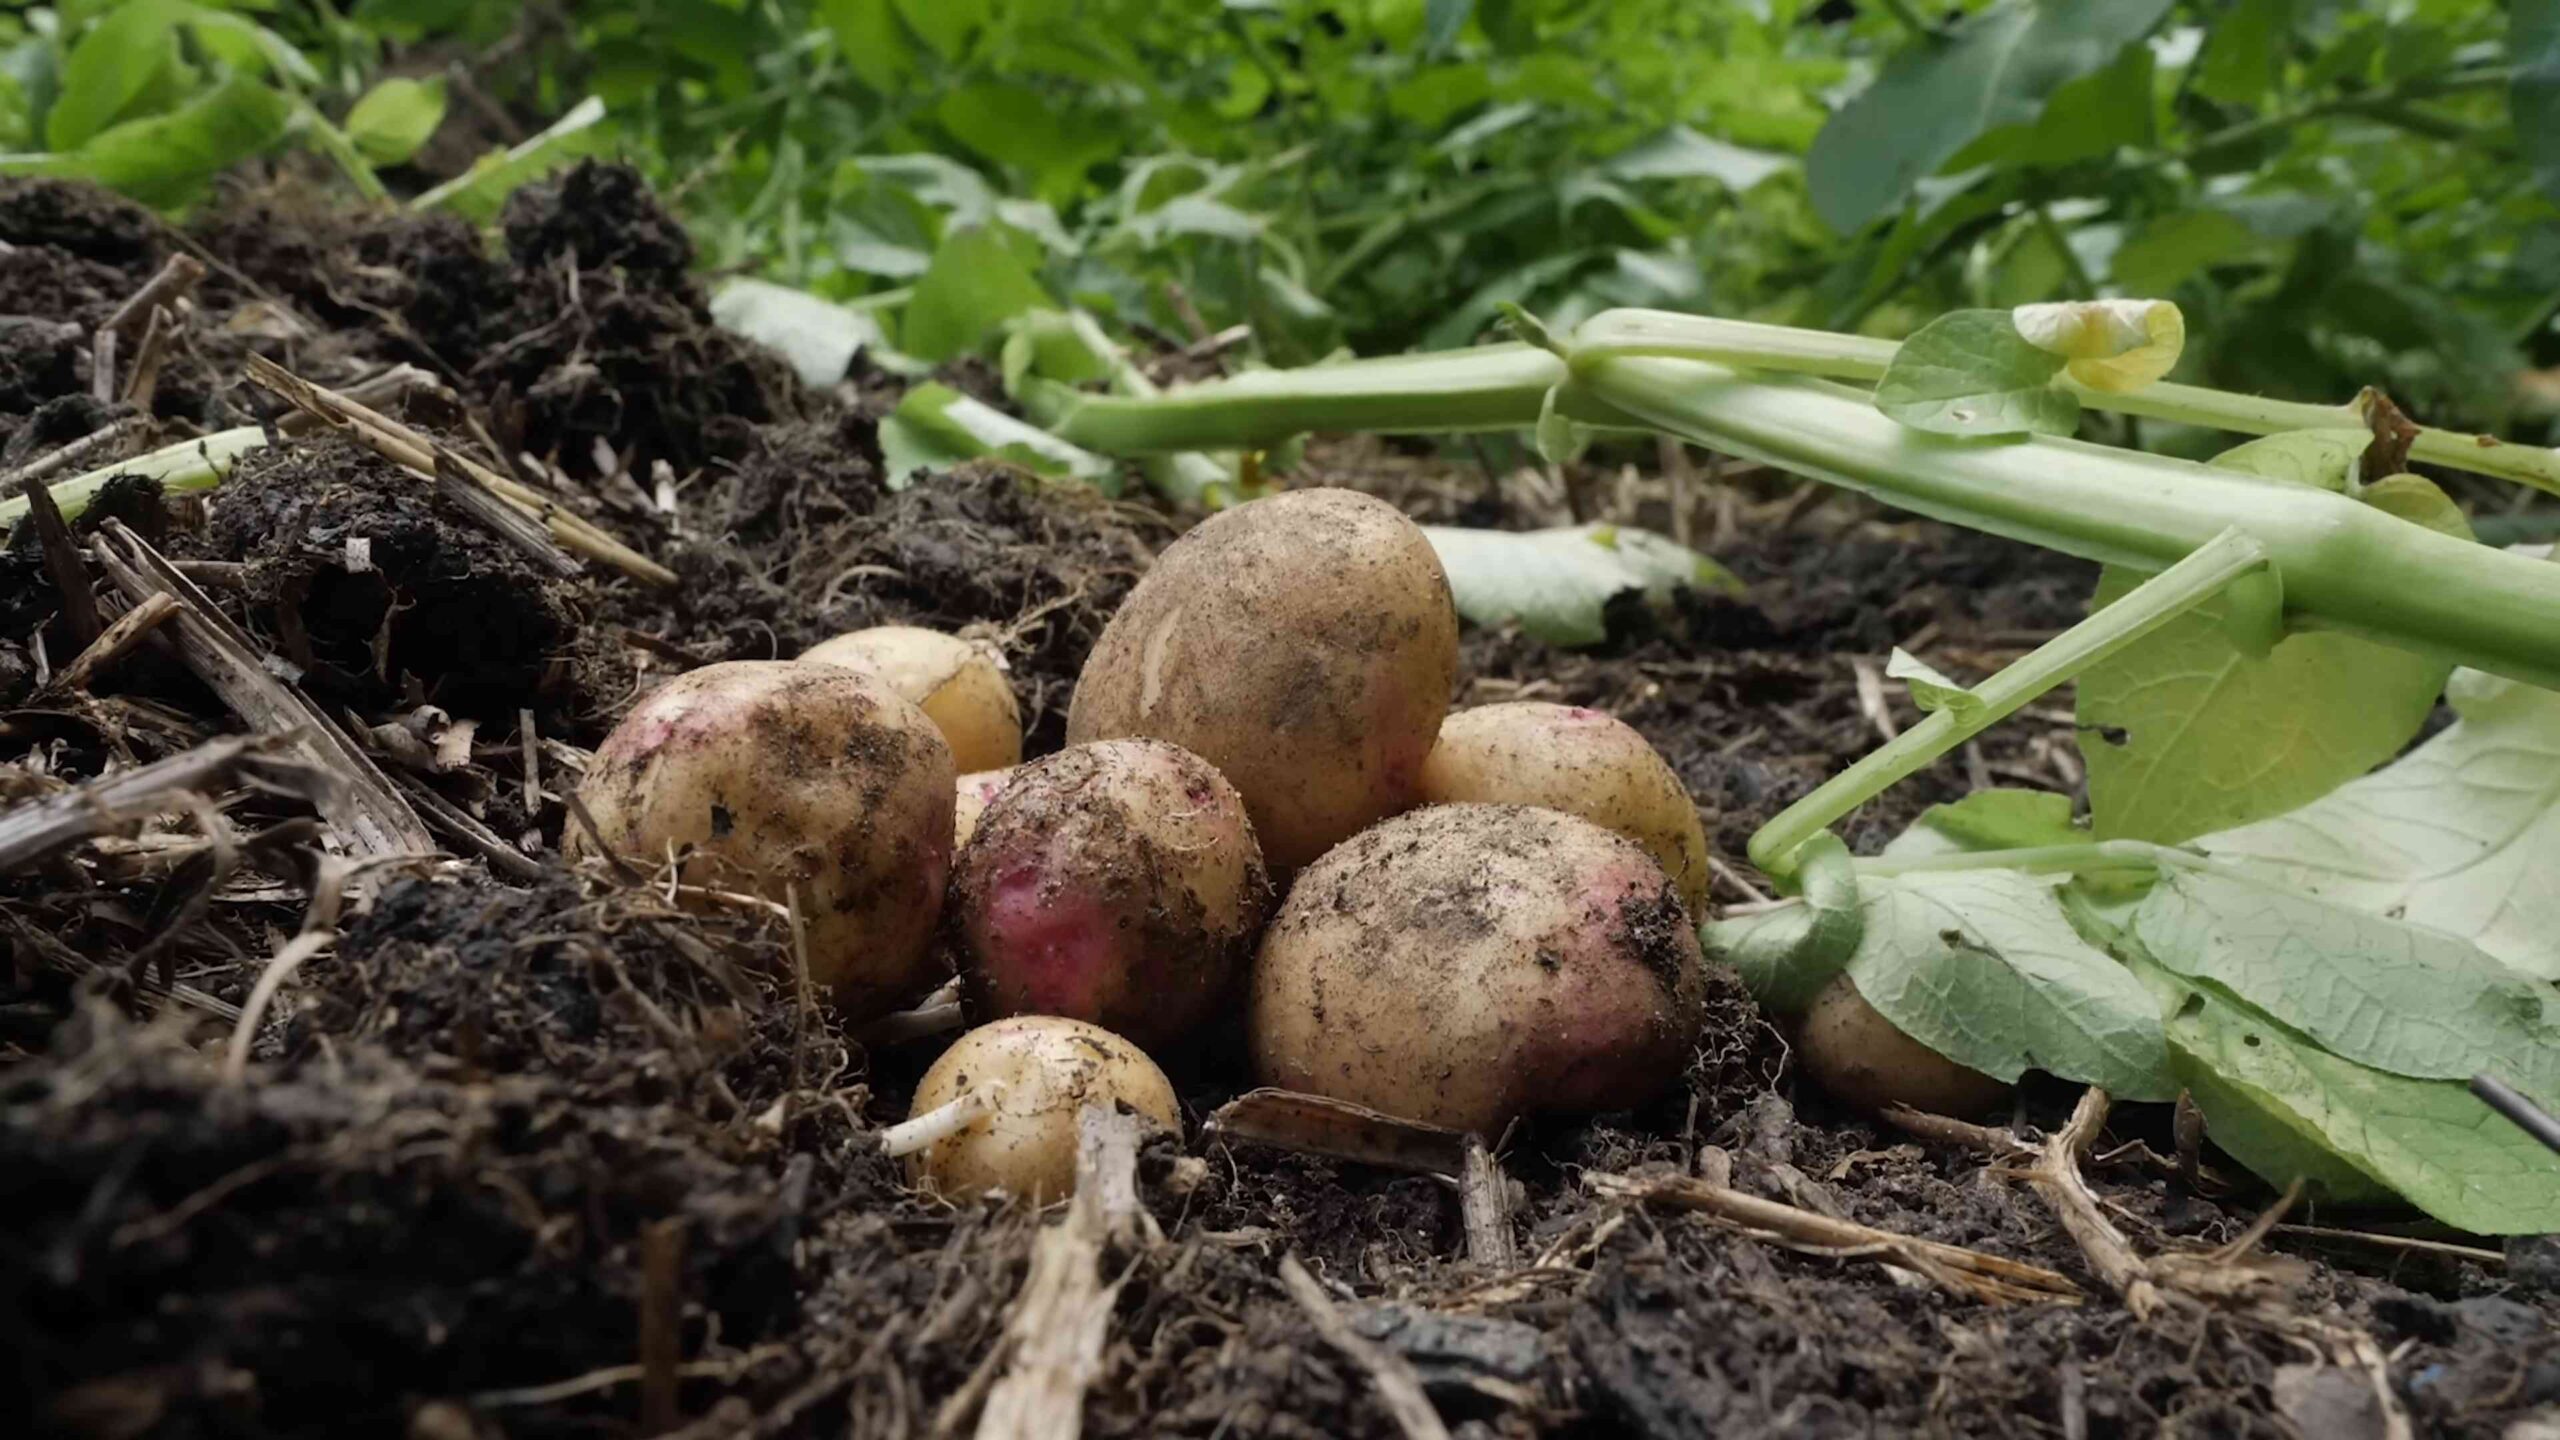
Harvesting Your Potatoes
The moment you’ve been waiting for!
* When to Harvest: You can harvest “new potatoes” (small, tender potatoes) about 2-3 weeks after the plants flower. For mature potatoes, wait until the plants have died back and the foliage has turned yellow or brown. This usually takes about 80-100 days.
* How to Harvest:
1. Gently dig around the base of the plant with a garden fork or shovel.
2. Carefully lift the plant and the surrounding soil, being careful not to damage the potatoes.
3. Remove the potatoes from the soil and brush off any excess dirt.
* Curing Your Potatoes: Curing helps to toughen the skin of the potatoes and prevent rot during storage.
1. Spread the potatoes out in a single layer in a cool, dry, dark place for about 1-2 weeks.
2. Avoid direct sunlight, which can cause them to turn green.
* Storing Your Potatoes: Store your cured potatoes in a cool, dark, and well-ventilated place, such as a root cellar or basement. The ideal temperature is between 40-50°F (4-10°C). Avoid storing potatoes near apples or onions, as they can cause them to sprout prematurely.
Troubleshooting
* Green Potatoes: As mentioned earlier, green potatoes contain solanine, a toxic compound. This happens when potatoes are exposed to sunlight. Discard any green potatoes.
* Potato Scab: Potato scab is a common disease that causes rough, scabby patches on the surface of the potatoes. It’s usually not a serious problem, but it can make the potatoes look unappetizing. To prevent potato scab, avoid planting potatoes in alkaline soil and rotate your crops.
* Pests: Potato beetles can be a major problem. Handpicking them off the plants is effective, or you can use an insecticide.
Enjoying Your Homegrown Potatoes
Congratulations! You’ve successfully grown your own potatoes. Now it’s time to enjoy the fruits (or rather, vegetables) of your labor. There are endless ways to cook and enjoy potatoes. Here are a few ideas:
* Roasted Potatoes: Toss potatoes with olive oil, herbs, and spices, and roast them in the oven until golden brown and crispy.
* Mashed Potatoes: Boil potatoes until tender, then mash them with butter, milk, and salt.
* Potato Salad: Boil potatoes, then mix them with mayonnaise, mustard, celery, onion, and other ingredients.
* French Fries: Cut potatoes into strips, then fry them in oil until golden brown and crispy.
* Potato Soup: Make a creamy and comforting potato soup with potatoes, broth, milk, and other vegetables.
Growing potatoes is a fun and rewarding experience. With a little bit of effort, you can enjoy fresh, delicious potatoes from your own backyard. Happy gardening!
Conclusion
So, there you have it! Growing potatoes in your backyard isn’t just a fun gardening project; it’s a rewarding experience that connects you to your food source and provides you with incredibly fresh, flavorful potatoes. Forget the bland, store-bought spuds – imagine the taste of freshly dug, earthy potatoes gracing your dinner table. This DIY trick, while seemingly simple, unlocks a world of possibilities, from controlling the variety you grow to ensuring they are free from unwanted chemicals.
Why is this a must-try? Because it empowers you. You’re no longer reliant on the grocery store for this staple vegetable. You’re in control of the entire process, from selecting the seed potatoes to harvesting your bounty. Plus, it’s incredibly satisfying to watch those little sprouts emerge and transform into a thriving potato plant. The sense of accomplishment you’ll feel when you dig up your first harvest is unparalleled.
But the beauty of this method lies in its adaptability. Feel free to experiment with different potato varieties. Russets are fantastic for baking and frying, while Yukon Golds offer a creamy texture perfect for mashed potatoes. Red potatoes hold their shape well in salads and stews. Don’t be afraid to try a mix of varieties to discover your favorites.
Consider also experimenting with different growing containers. While potato bags are popular, you can also use large buckets, trash cans (with drainage holes, of course!), or even raised garden beds. The key is to provide ample space for the potatoes to develop.
Another variation involves companion planting. Marigolds can help deter pests, while basil can improve the flavor of your potatoes. Research companion plants that thrive alongside potatoes and incorporate them into your garden for added benefits.
And if you’re short on space, consider growing potatoes in a vertical tower. This method allows you to maximize your yield in a small area, making it perfect for apartment dwellers or those with limited garden space.
Ultimately, the success of your potato-growing venture hinges on your willingness to experiment and adapt. Don’t be afraid to try new things and learn from your mistakes. Gardening is a journey, not a destination.
We wholeheartedly encourage you to try this DIY trick for growing potatoes in your backyard. It’s a simple, effective, and incredibly rewarding way to enjoy fresh, homegrown potatoes. And most importantly, we want to hear about your experience! Share your photos, tips, and challenges in the comments below. Let’s create a community of potato-growing enthusiasts and learn from each other. What varieties did you try? What challenges did you face? What tips do you have for fellow gardeners? Your insights can help others succeed in their potato-growing endeavors. So, get your hands dirty, embrace the process, and prepare to be amazed by the abundance of potatoes you can grow right in your own backyard. Let’s get growing!
Frequently Asked Questions (FAQ)
Q: What kind of potatoes should I use for seed potatoes?
A: You should use certified seed potatoes, which are potatoes specifically grown for planting. These are disease-free and will give you the best chance of a successful harvest. You can purchase them from garden centers or online retailers. Avoid using potatoes from the grocery store, as they may have been treated to prevent sprouting or may carry diseases. If you do use grocery store potatoes, make sure they are organic to avoid any sprout inhibitors. Look for potatoes that have “eyes” (small buds) on them.
Q: How do I prepare my seed potatoes for planting?
A: About a week or two before planting, you can “chit” your seed potatoes. This involves placing them in a cool, bright location to encourage them to sprout. This gives them a head start when you plant them. You can also cut larger potatoes into smaller pieces, ensuring that each piece has at least one or two eyes. Allow the cut pieces to dry for a day or two before planting to prevent rotting.
Q: When is the best time to plant potatoes?
A: The best time to plant potatoes is in early spring, about two to four weeks before the last expected frost. The soil temperature should be at least 45 degrees Fahrenheit. Check your local weather forecast and planting guides for specific recommendations for your region.
Q: What kind of soil do potatoes need?
A: Potatoes prefer well-drained, slightly acidic soil with a pH between 6.0 and 6.8. Amend your soil with compost or other organic matter to improve drainage and fertility. Avoid heavy clay soils, as they can become waterlogged and cause the potatoes to rot.
Q: How deep should I plant my seed potatoes?
A: Plant your seed potatoes about 4-6 inches deep, with the eyes facing up. Space them about 12 inches apart in rows that are 30-36 inches apart.
Q: What does “hilling” potatoes mean, and why is it important?
A: Hilling potatoes involves gradually mounding soil around the stems of the plants as they grow. This encourages the plants to produce more potatoes along the buried stems. It also helps to protect the developing potatoes from sunlight, which can cause them to turn green and produce solanine, a toxic compound. Hill your potatoes every few weeks as the plants grow, until the mounds are about 12 inches high.
Q: How often should I water my potato plants?
A: Water your potato plants regularly, especially during dry periods. Aim to keep the soil consistently moist but not waterlogged. Water deeply and less frequently, rather than shallowly and often.
Q: What are some common potato pests and diseases, and how can I prevent them?
A: Common potato pests include potato beetles, aphids, and flea beetles. Diseases include blight, scab, and rot. To prevent these problems, choose disease-resistant varieties, practice crop rotation, and keep your garden clean and free of debris. You can also use organic pest control methods, such as insecticidal soap or neem oil.
Q: How do I know when my potatoes are ready to harvest?
A: Potatoes are typically ready to harvest about 70-100 days after planting, depending on the variety. You can harvest “new potatoes” (small, immature potatoes) a few weeks earlier. To harvest, gently dig around the plants with a garden fork or shovel, being careful not to damage the potatoes.
Q: How should I store my harvested potatoes?
A: Store your harvested potatoes in a cool, dark, and dry place, such as a root cellar or basement. Avoid storing them in the refrigerator, as this can cause them to turn sweet. Properly stored potatoes can last for several months.
Q: Can I grow potatoes in containers if I don’t have a backyard?
A: Yes, you can definitely grow potatoes in containers! Use large containers (at least 10 gallons) with drainage holes. Follow the same planting and hilling instructions as you would for growing potatoes in the ground. Container-grown potatoes may require more frequent watering and fertilization.
Q: What are some good companion plants for potatoes?
A: Good companion plants for potatoes include beans, cabbage, corn, garlic, horseradish, marigolds, peas, and thyme. Avoid planting potatoes near tomatoes, cucumbers, pumpkins, raspberries, sunflowers, or turnips.
Q: Can I grow potatoes from potatoes that have sprouted in my kitchen?
A: While you *can* technically grow potatoes from sprouted potatoes in your kitchen, it’s generally not recommended. These potatoes may be treated with sprout inhibitors or may carry diseases. It’s always best to use certified seed potatoes for the best results. However, if you’re feeling adventurous, you can try it! Just make sure the potatoes are organic and haven’t been treated with any chemicals.
Q: Is growing potatoes in your backyard a good way to practice sustainable gardening?
A: Absolutely! Growing your own potatoes reduces your reliance on commercially grown produce, which often involves long-distance transportation and the use of pesticides and herbicides. By growing your own potatoes, you can control the entire process and ensure that they are grown sustainably and organically. Plus, you can compost the potato plant remains after harvest, further enriching your soil and reducing waste. This DIY trick is a step towards a more sustainable lifestyle.
Leave a Comment