

Growing angled luffa at home can seem like a tropical dream, especially if you’re not living in a balmy climate. But guess what? It’s totally achievable, and I’m here to spill all the secrets! Forget those expensive loofah sponges from the store; imagine harvesting your own, knowing exactly where they came from and how they were grown.
The angled luffa, also known as Chinese okra or ridge gourd, has a rich history, deeply rooted in Asian cuisine and traditional medicine. For centuries, it’s been a staple in gardens and kitchens across Asia, prized for its delicious flavor and versatile uses. But beyond its culinary appeal, the dried fruit transforms into the perfect natural exfoliating sponge.
Why should you try this DIY project? Well, for starters, it’s incredibly rewarding to nurture a plant from seed to harvest. Plus, with growing concerns about sustainability and the environmental impact of mass-produced goods, cultivating your own loofah is a fantastic way to reduce waste and embrace a more eco-friendly lifestyle. And let’s be honest, who wouldn’t want to impress their friends with a homegrown loofah sponge? So, let’s dive into these simple yet effective tricks and hacks that will have you growing angled luffa at home like a pro, no matter your gardening experience!
Growing Angled Luffa at Home: A Comprehensive DIY Guide
Hey there, fellow gardening enthusiasts! Ever dreamt of growing your own natural sponges? Well, you’re in the right place! Today, I’m going to walk you through the process of growing angled luffa (also known as Chinese okra or ridged gourd) right in your backyard. It’s a rewarding experience, and trust me, nothing beats using a sponge you’ve nurtured from seed to scrub!
Understanding Angled Luffa
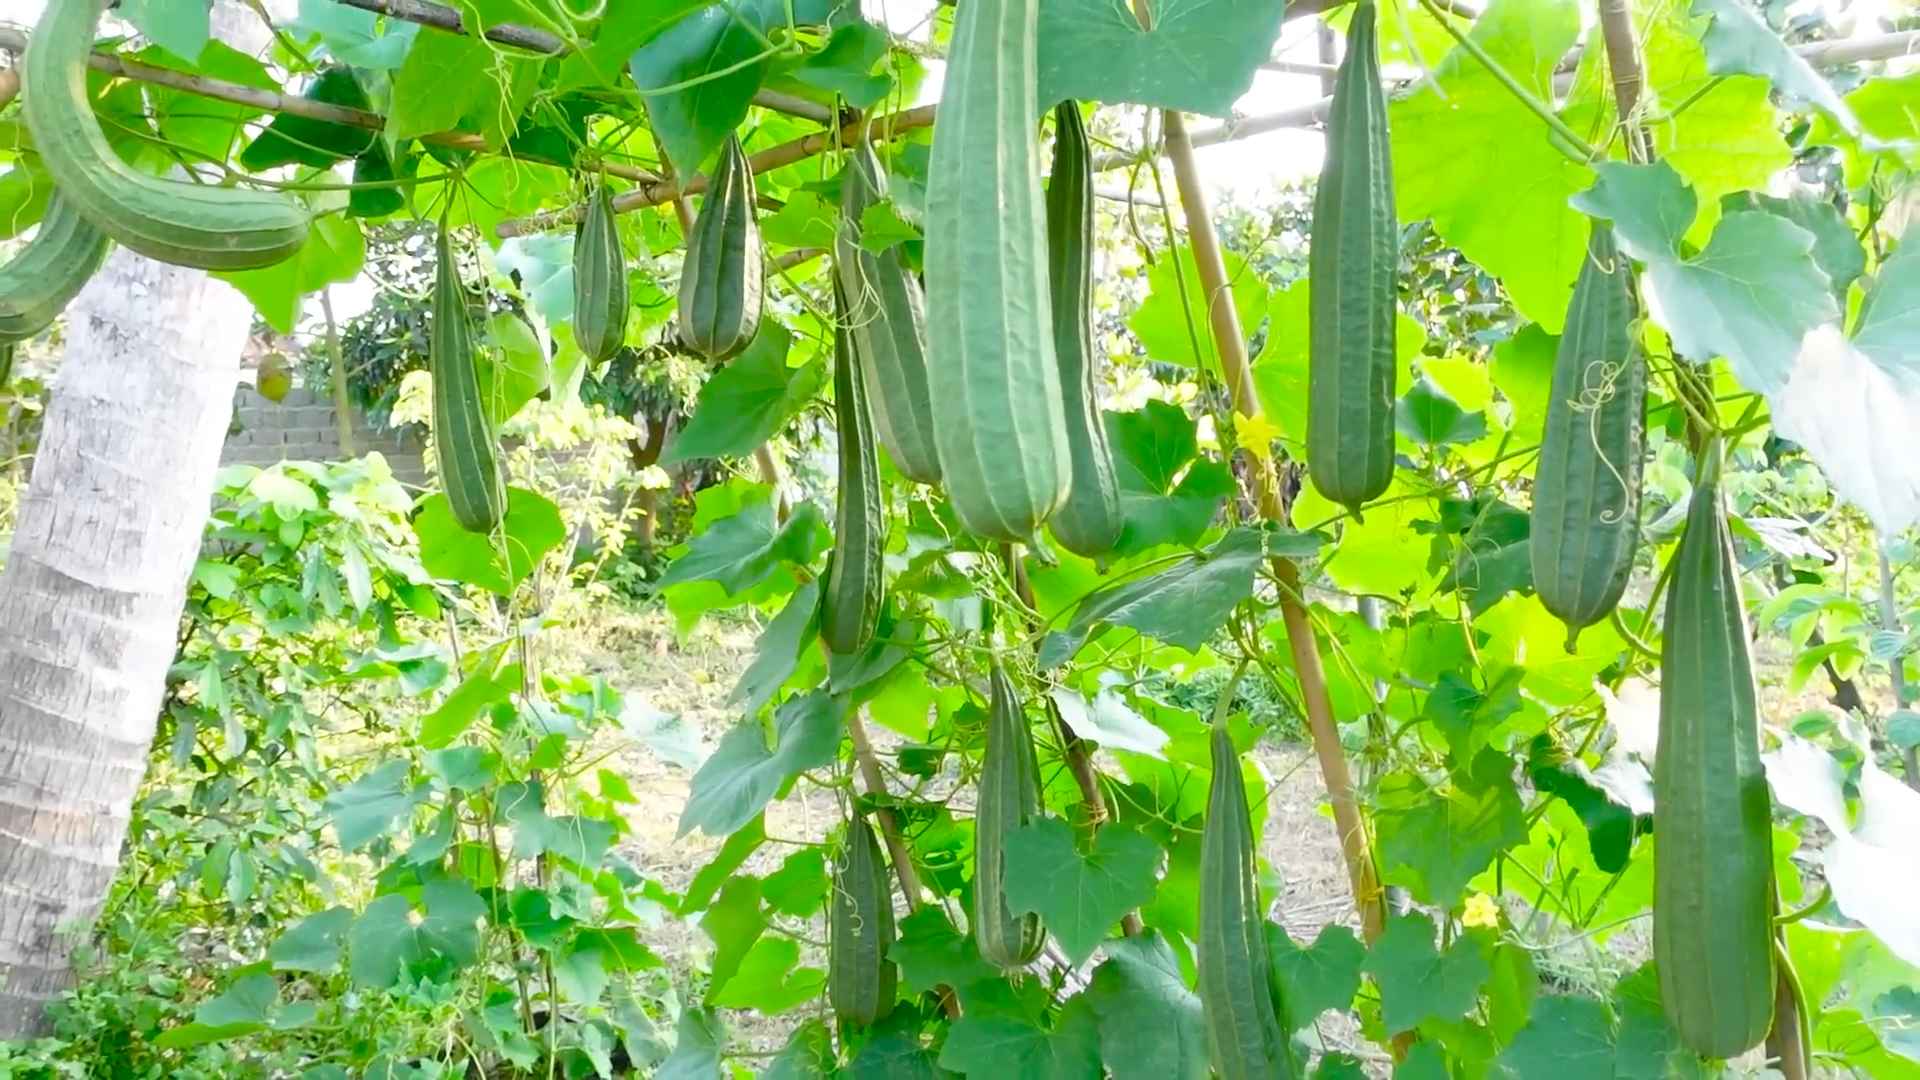
Before we dive in, let’s get acquainted with our star plant. Angled luffa (Luffa acutangula) is a vigorous vine that produces edible fruits when young and fibrous sponges when mature. It thrives in warm climates and requires a long growing season. So, patience is key!
Materials You’ll Need
* Luffa seeds (available online or at your local garden center)
* Seed starting trays or small pots
* Seed starting mix
* Well-draining garden soil
* Compost or aged manure
* A sunny location with at least 6-8 hours of direct sunlight
* A sturdy trellis or support structure (at least 6-8 feet tall)
* Gardening gloves
* Watering can or hose
* Pruning shears
* Fertilizer (optional, but recommended)
* Mulch (optional)
Phase 1: Starting Your Luffa Seeds
Luffa seeds have a tough outer shell, so we need to give them a little head start. Here’s how:
Scarification and Soaking
1. Scarify the Seeds: Gently rub the seeds with sandpaper or nick them with a knife. Be careful not to damage the inner part of the seed! This helps water penetrate the seed coat.
2. Soak the Seeds: Place the scarified seeds in a bowl of warm water for 24-48 hours. This will further soften the seed coat and encourage germination. You’ll likely see them swell up – that’s a good sign!
Sowing the Seeds
1. Prepare Your Seed Starting Trays: Fill your seed starting trays or small pots with a seed starting mix. Moisten the mix thoroughly.
2. Plant the Seeds: Make a small hole (about 1 inch deep) in the center of each pot. Place one seed in each hole and cover it gently with the seed starting mix.
3. Water Gently: Water the seeds gently to avoid disturbing them.
4. Provide Warmth: Luffa seeds need warmth to germinate. The ideal temperature is between 70-85°F (21-29°C). You can use a heat mat or place the trays in a warm location.
5. Maintain Moisture: Keep the soil consistently moist, but not waterlogged. Cover the trays with a plastic dome or plastic wrap to retain moisture.
6. Wait Patiently: Germination usually takes 7-14 days. Once the seedlings emerge, remove the plastic cover and provide them with plenty of light.
Phase 2: Transplanting Your Luffa Seedlings
Once your seedlings have developed a few sets of true leaves (usually after 3-4 weeks), they’re ready to be transplanted into the garden.
Preparing the Garden Bed
1. Choose a Sunny Location: Select a spot in your garden that receives at least 6-8 hours of direct sunlight per day.
2. Prepare the Soil: Luffa plants prefer well-draining soil that is rich in organic matter. Amend the soil with compost or aged manure to improve its fertility and drainage.
3. Install a Trellis: Luffa vines are vigorous climbers, so they need a sturdy trellis or support structure to grow on. Make sure the trellis is at least 6-8 feet tall. You can use a wooden trellis, a metal fence, or even a sturdy pergola.
4. Space the Plants: Space the luffa plants about 2-3 feet apart to allow them plenty of room to grow.
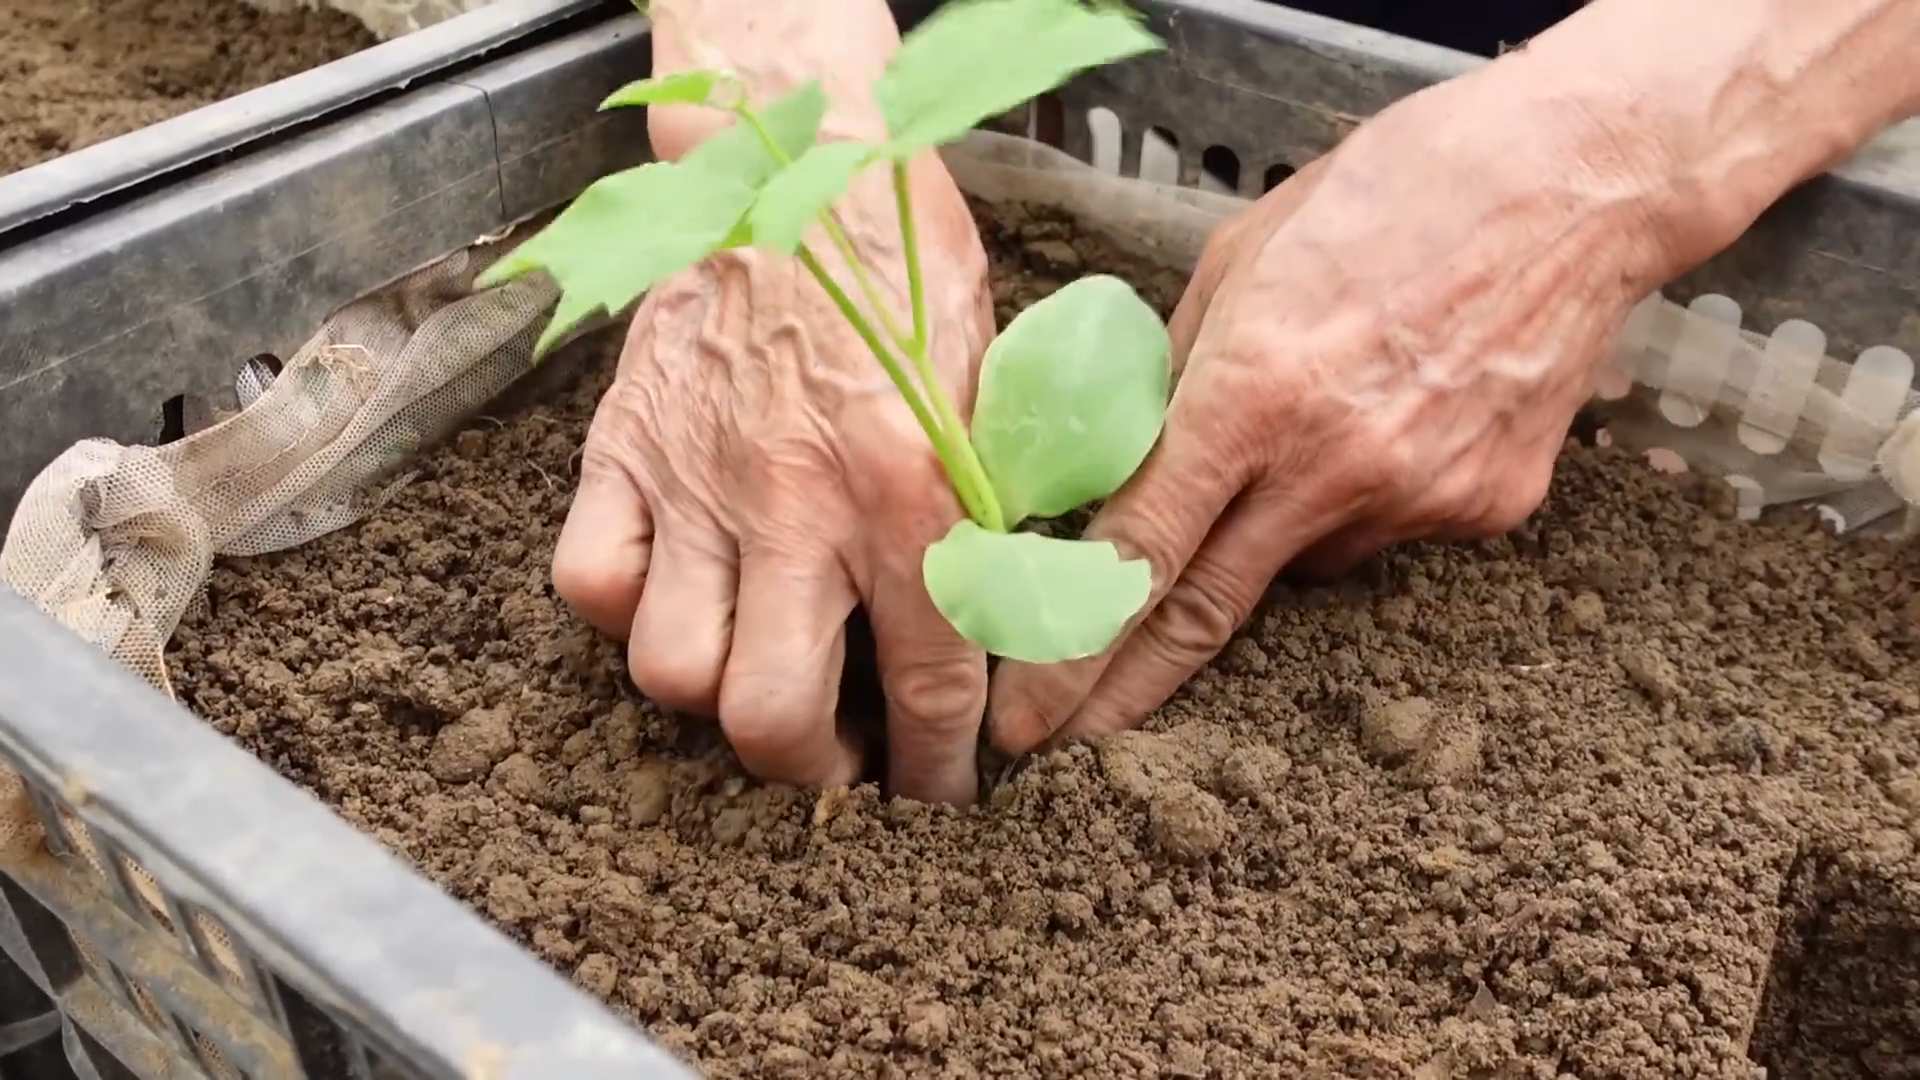
Transplanting the Seedlings
1. Harden Off the Seedlings: Before transplanting, gradually acclimate the seedlings to outdoor conditions by exposing them to increasing amounts of sunlight and wind over a period of 7-10 days. This process is called “hardening off.”
2. Dig Holes: Dig holes that are slightly larger than the root balls of the seedlings.
3. Carefully Remove the Seedlings: Gently remove the seedlings from their pots, being careful not to damage the roots.
4. Place the Seedlings in the Holes: Place the seedlings in the holes and backfill with soil.
5. Water Thoroughly: Water the seedlings thoroughly after transplanting.
6. Mulch (Optional): Apply a layer of mulch around the base of the plants to help retain moisture and suppress weeds.
Phase 3: Caring for Your Luffa Plants
Now that your luffa plants are in the ground, it’s time to provide them with the care they need to thrive.
Watering
* Water Regularly: Luffa plants need consistent moisture, especially during hot, dry weather. Water deeply whenever the top inch of soil feels dry to the touch.
* Avoid Overwatering: Be careful not to overwater, as this can lead to root rot.
Fertilizing
* Fertilize Regularly: Luffa plants are heavy feeders, so they benefit from regular fertilization. Use a balanced fertilizer (e.g., 10-10-10) every 2-3 weeks. You can also use organic fertilizers like compost tea or fish emulsion.
* Follow Package Instructions: Always follow the instructions on the fertilizer package.
Pruning
* Prune Regularly: Pruning helps to improve air circulation and sunlight penetration, which can reduce the risk of disease.
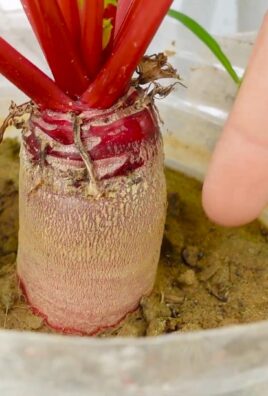
* Remove Suckers: Remove any suckers (shoots that grow from the base of the plant) to encourage the plant to focus its energy on producing fruits.
* Trim Excess Foliage: Trim any excess foliage that is blocking sunlight from reaching the fruits.
Pest and Disease Control
* Monitor for Pests and Diseases: Keep an eye out for common pests like aphids, squash bugs, and cucumber beetles. Also, watch for signs of diseases like powdery mildew and downy mildew.
* Take Action Promptly: If you spot any pests or diseases, take action promptly to prevent them from spreading. You can use organic pest control methods like insecticidal soap or neem oil. For diseases, you can use copper-based fungicides.
Training the Vines
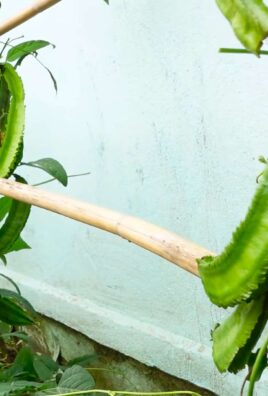
* Guide the Vines: As the luffa vines grow, guide them up the trellis or support structure. You can use twine or plant ties to secure the vines to the trellis.
* Encourage Vertical Growth: Encourage the vines to grow vertically to maximize sunlight exposure and air circulation.
Phase 4: Harvesting Your Luffa Sponges
The moment you’ve been waiting for! Harvesting your own luffa sponges is incredibly satisfying.
When to Harvest
* Wait for Maturity: Luffa fruits are ready to be harvested when they turn yellow or brown and the skin becomes dry and brittle. The fruit should also feel lightweight.
* Test for Readiness: You can test for readiness by pressing on the fruit. If it feels hollow and the skin cracks easily, it’s ready to harvest.
Harvesting Process
1. Cut the Fruit: Use pruning shears to cut the luffa fruit from the vine. Leave a few inches of stem attached.
2. Dry the Fruit: Allow the fruit to dry completely in a well-ventilated area. This may take several weeks. You can hang the fruit upside down to speed up the drying process.
3. Peel the Skin: Once the fruit is completely dry, the skin should be easy to peel off. You may need to soak the fruit in water for a few minutes to loosen the skin.
4. Remove the Seeds: Shake out the seeds from the inside of the luffa. You can save these seeds for planting next year.
5. Rinse and Clean: Rinse the luffa sponge thoroughly with water to remove any remaining pulp or debris.
6. Bleach (Optional): If you want to whiten the luffa sponge, you can soak it in a diluted bleach solution (1 part bleach to 10 parts water) for a few minutes. Rinse thoroughly after bleaching.
7. Dry Completely: Allow the luffa sponge to dry completely before using it.
Tips for Success
* Start Early: Start your luffa seeds indoors 8-10 weeks before the last expected frost.
* Provide Plenty of Sunlight: Luffa plants need at least 6-8 hours
Conclusion
So, there you have it! Growing angled luffa at home is not only achievable but also incredibly rewarding. Imagine the satisfaction of harvesting your own natural sponges, knowing exactly where they came from and how they were grown. Forget those mass-produced, chemically treated sponges from the store. With a little patience and effort, you can have a sustainable supply of exfoliating goodness right from your backyard.
This DIY project is a must-try for several reasons. First, it’s environmentally friendly. You’re reducing your reliance on plastic sponges and supporting a more sustainable lifestyle. Second, it’s cost-effective. Once you have the seeds and a basic setup, the ongoing costs are minimal. Third, it’s a fun and educational experience. You’ll learn about plant growth, pest control, and the wonders of nature. And finally, the quality of a homegrown angled luffa is simply unmatched. They are more durable, more effective at exfoliating, and free from harmful chemicals.
But the benefits don’t stop there. You can experiment with different growing techniques to optimize your harvest. Try companion planting with herbs like basil or marigolds to deter pests. Consider using different types of soil or fertilizers to see which yields the best results. You can even train your luffa vines to grow on different structures, creating a beautiful and functional garden feature.
And speaking of variations, don’t be afraid to get creative with your luffa sponges. Once harvested and dried, you can cut them into different shapes and sizes to suit your needs. Use smaller pieces for facial exfoliation, larger pieces for body scrubbing, or even create custom-shaped sponges for specific areas like your back or feet. You can also add essential oils to your luffa sponges for an aromatherapy boost during your shower. Imagine a lavender-infused luffa for relaxation or a peppermint-infused luffa for an invigorating start to your day.
We strongly encourage you to give this DIY trick a try. It’s a project that’s both practical and fulfilling, and it’s a great way to connect with nature and reduce your environmental impact. Plus, the feeling of using a sponge that you grew yourself is simply unparalleled.
Once you’ve harvested your first angled luffa, we’d love to hear about your experience. Share your tips, tricks, and photos with us in the comments below. Let’s build a community of luffa growers and inspire others to embrace this sustainable and rewarding hobby. What challenges did you face? What successes did you celebrate? What unique variations did you try? Your insights could be invaluable to other aspiring luffa farmers.
Don’t wait any longer. Start planning your angled luffa garden today and get ready to enjoy the benefits of homegrown, natural sponges. You won’t regret it!
Frequently Asked Questions (FAQ)
What is the best time of year to plant angled luffa seeds?
Angled luffa requires a long growing season, typically 150-200 days of warm weather. Therefore, it’s best to start your seeds indoors 6-8 weeks before the last expected frost. This will give them a head start and ensure they have enough time to mature before the weather turns cold. If you live in a region with a very short growing season, you may need to start your seeds even earlier. Once the danger of frost has passed and the soil has warmed up, you can transplant the seedlings outdoors.
How much space does an angled luffa vine need?
Angled luffa vines are vigorous growers and require plenty of space to spread out. Each vine can easily grow 10-15 feet long, so you’ll need to provide them with a sturdy trellis or other support structure. A good rule of thumb is to space the plants 2-3 feet apart along the trellis. Make sure the trellis is strong enough to support the weight of the mature vines and the heavy luffa gourds. Insufficient space can lead to overcrowding, reduced yields, and increased susceptibility to pests and diseases.
What kind of soil is best for growing angled luffa?
Angled luffa prefers well-drained, fertile soil that is rich in organic matter. Before planting, amend the soil with compost, aged manure, or other organic amendments to improve its fertility and drainage. A slightly acidic to neutral soil pH (6.0-7.0) is ideal. Avoid planting in heavy clay soil, as this can lead to root rot. If your soil is heavy, consider growing your luffa in raised beds or containers.
How often should I water my angled luffa plants?
Angled luffa plants need consistent moisture, especially during hot, dry weather. Water deeply and regularly, aiming to keep the soil consistently moist but not waterlogged. A good rule of thumb is to water when the top inch of soil feels dry to the touch. Mulching around the plants can help to retain moisture and suppress weeds. Avoid overhead watering, as this can increase the risk of fungal diseases.
What are some common pests and diseases that affect angled luffa?
Angled luffa can be susceptible to various pests and diseases, including squash bugs, squash vine borers, aphids, powdery mildew, and downy mildew. Regularly inspect your plants for signs of infestation or disease. Handpick pests whenever possible. For more serious infestations, consider using organic insecticides or fungicides. Good air circulation and proper watering practices can help to prevent fungal diseases.
How do I know when my angled luffa is ready to harvest?
The timing of harvest depends on your intended use. For sponges, you’ll want to harvest the luffa gourds when they are fully mature and the skin has turned brown and dry. The gourd should feel lightweight and the seeds should rattle inside. If you’re planning to eat the young luffa as a vegetable, harvest them when they are still green and tender, typically when they are about 6-8 inches long.
How do I process my angled luffa into a sponge?
Processing your angled luffa into a sponge is a relatively simple process. First, soak the dried gourd in water for several days to soften the skin. Once the skin is soft, you can peel it off easily. Remove the seeds and rinse the luffa thoroughly. Allow the luffa to dry completely in the sun before using it. You can also bleach the luffa to lighten its color, but this is not necessary.
Can I eat angled luffa?
Yes, young angled luffa gourds can be eaten as a vegetable. They have a mild, slightly sweet flavor and can be used in stir-fries, soups, and other dishes. Harvest the gourds when they are still green and tender, typically when they are about 6-8 inches long. Peel the skin and remove the seeds before cooking.
How can I save seeds from my angled luffa for next year?
Saving seeds from your angled luffa is easy. Simply allow a few gourds to fully mature on the vine. Once the gourds are dry and brown, harvest them and remove the seeds. Spread the seeds out on a paper towel to dry completely. Store the dried seeds in an airtight container in a cool, dark, and dry place. They should remain viable for several years.
Is growing angled luffa at home worth the effort?
Absolutely! Growing angled luffa at home is a rewarding and sustainable way to produce your own natural sponges. It’s a fun and educational project that can connect you with nature and reduce your reliance on plastic products. Plus, the quality of a homegrown angled luffa is simply unmatched. So, give it a try and experience the satisfaction of harvesting your own natural sponges!
Leave a Comment