

Growing Blueberries from Seeds might seem like a daunting task, but trust me, the reward of harvesting your own juicy, homegrown blueberries is absolutely worth the effort! Have you ever imagined plucking plump, sun-ripened blueberries straight from your backyard, knowing you nurtured them from tiny seeds? This isn’t just about gardening; it’s about connecting with nature and experiencing the satisfaction of creating something beautiful and delicious from scratch.
Blueberries have a rich history, deeply rooted in North American indigenous cultures, where they were not only a vital food source but also held medicinal and spiritual significance. Today, they’re celebrated globally for their incredible health benefits and delightful flavor. But let’s be honest, buying blueberries can get expensive! That’s where the magic of DIY comes in.
This article is your ultimate guide to successfully growing blueberries from seeds. We’ll break down the process into easy-to-follow steps, sharing insider tips and tricks to ensure your blueberry seedlings thrive. Whether you’re a seasoned gardener or a complete beginner, I’m here to help you unlock the secrets to cultivating your own blueberry patch. Get ready to roll up your sleeves and embark on this exciting gardening adventure – your future blueberry pies will thank you!
Growing Blueberries from Seeds: A Comprehensive DIY Guide
Hey there, fellow gardening enthusiasts! Ever dreamt of having a blueberry patch bursting with juicy, homegrown goodness? While most people propagate blueberries from cuttings or purchased plants, growing them from seeds is a rewarding, albeit patient, journey. It’s a longer process, but the satisfaction of nurturing a plant from its very beginning is unmatched. So, grab your gardening gloves, and let’s dive into the wonderful world of blueberry seed propagation!
Understanding the Challenge
Before we get started, let’s be real: growing blueberries from seed isn’t a walk in the park. Blueberries have a low germination rate, and the seedlings are slow growers. It can take several years (3-5) to get a decent harvest. But don’t let that discourage you! With patience, persistence, and the right techniques, you can absolutely succeed. Think of it as a long-term investment in delicious, healthy fruit.
Phase 1: Seed Extraction and Preparation
This is where the magic begins! We need to get those tiny seeds out of the berries and prepare them for germination.
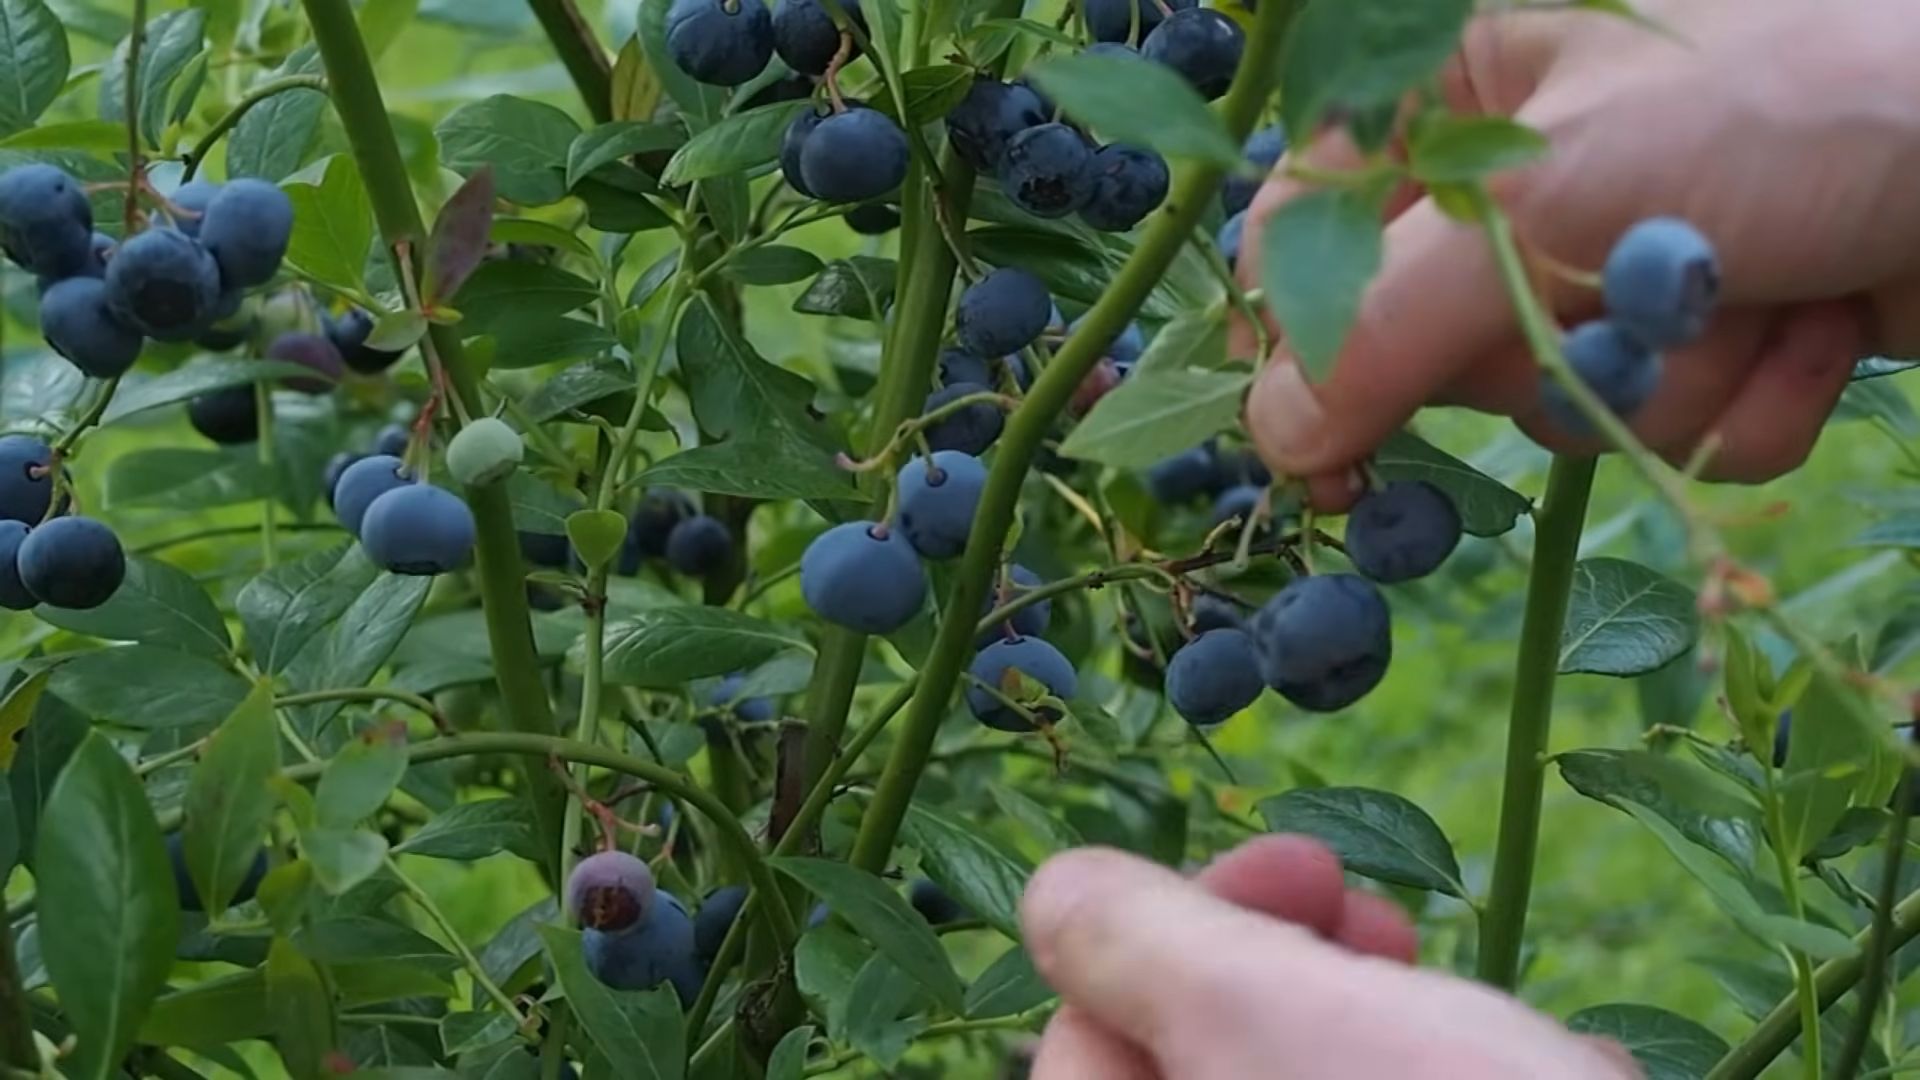
1. Gather Your Ripe Blueberries: Choose fully ripe, plump blueberries from a healthy plant. You can use store-bought organic blueberries, but keep in mind that the resulting plants might not be exactly like the parent plant due to hybridization. If you have access to wild blueberries, even better!
2. Mash the Berries: Gently mash the blueberries in a small bowl. You can use a fork or your fingers (wear gloves if you don’t want stained hands!). The goal is to break open the berries and release the seeds.
3. Separate the Seeds: Add water to the mashed berries and stir well. The pulp will float to the top, while the heavier seeds will sink to the bottom. Carefully pour off the pulp and water, repeating this process several times until you have relatively clean seeds at the bottom of the bowl.
4. Clean the Seeds Thoroughly: Place the seeds in a fine-mesh sieve and rinse them under running water. Rub the seeds gently to remove any remaining pulp. This is crucial to prevent mold growth during stratification.
5. Dry the Seeds: Spread the cleaned seeds on a paper towel in a single layer. Allow them to air dry completely for several days. Make sure they are in a well-ventilated area and out of direct sunlight.
6. Prepare for Stratification: Once the seeds are dry, place them in a small, airtight container or a zip-lock bag. Mix the seeds with a slightly moistened (not soaking wet!) medium like peat moss or vermiculite. The medium should be just damp enough to clump together when squeezed.
7. Stratify the Seeds: This is the crucial step that mimics winter conditions and breaks seed dormancy. Place the container with the seeds in the refrigerator for 90-120 days. The ideal temperature is between 33°F and 41°F (0.5°C and 5°C). This cold period is essential for successful germination. Don’t skip this step!
8. Check Regularly: During stratification, check the seeds every few weeks to ensure the medium is still slightly moist. If it’s drying out, lightly mist it with water. Also, check for any signs of mold. If you see mold, discard the affected seeds and replace the medium.
Phase 2: Sowing the Seeds and Germination
After the cold stratification period, it’s time to sow the seeds and encourage them to sprout.
1. Prepare Your Seed Starting Mix: Blueberries require acidic soil. Use a seed starting mix specifically formulated for acid-loving plants, or create your own by mixing equal parts peat moss, perlite, and vermiculite. You can also add a small amount of sulfur to further lower the pH. Aim for a pH between 4.5 and 5.5.
2. Choose Your Containers: Use seed trays, small pots, or even recycled containers with drainage holes. Make sure the containers are clean to prevent fungal diseases.
3. Sow the Seeds: Fill the containers with the seed starting mix and gently firm the surface. Sprinkle the blueberry seeds thinly over the surface of the soil. Don’t bury the seeds too deep; they need light to germinate. A light dusting of the seed starting mix is sufficient.
4. Water Gently: Water the seeds gently using a spray bottle or a watering can with a fine rose. Avoid overwatering, as this can lead to damping-off, a fungal disease that can kill seedlings.
5. Create a Humid Environment: Cover the containers with a clear plastic dome or plastic wrap to create a humid environment. This will help keep the soil moist and promote germination.
6. Provide Light: Place the containers in a warm location with bright, indirect light. A south-facing window is ideal, but avoid direct sunlight, which can scorch the seedlings. You can also use grow lights to provide consistent light.
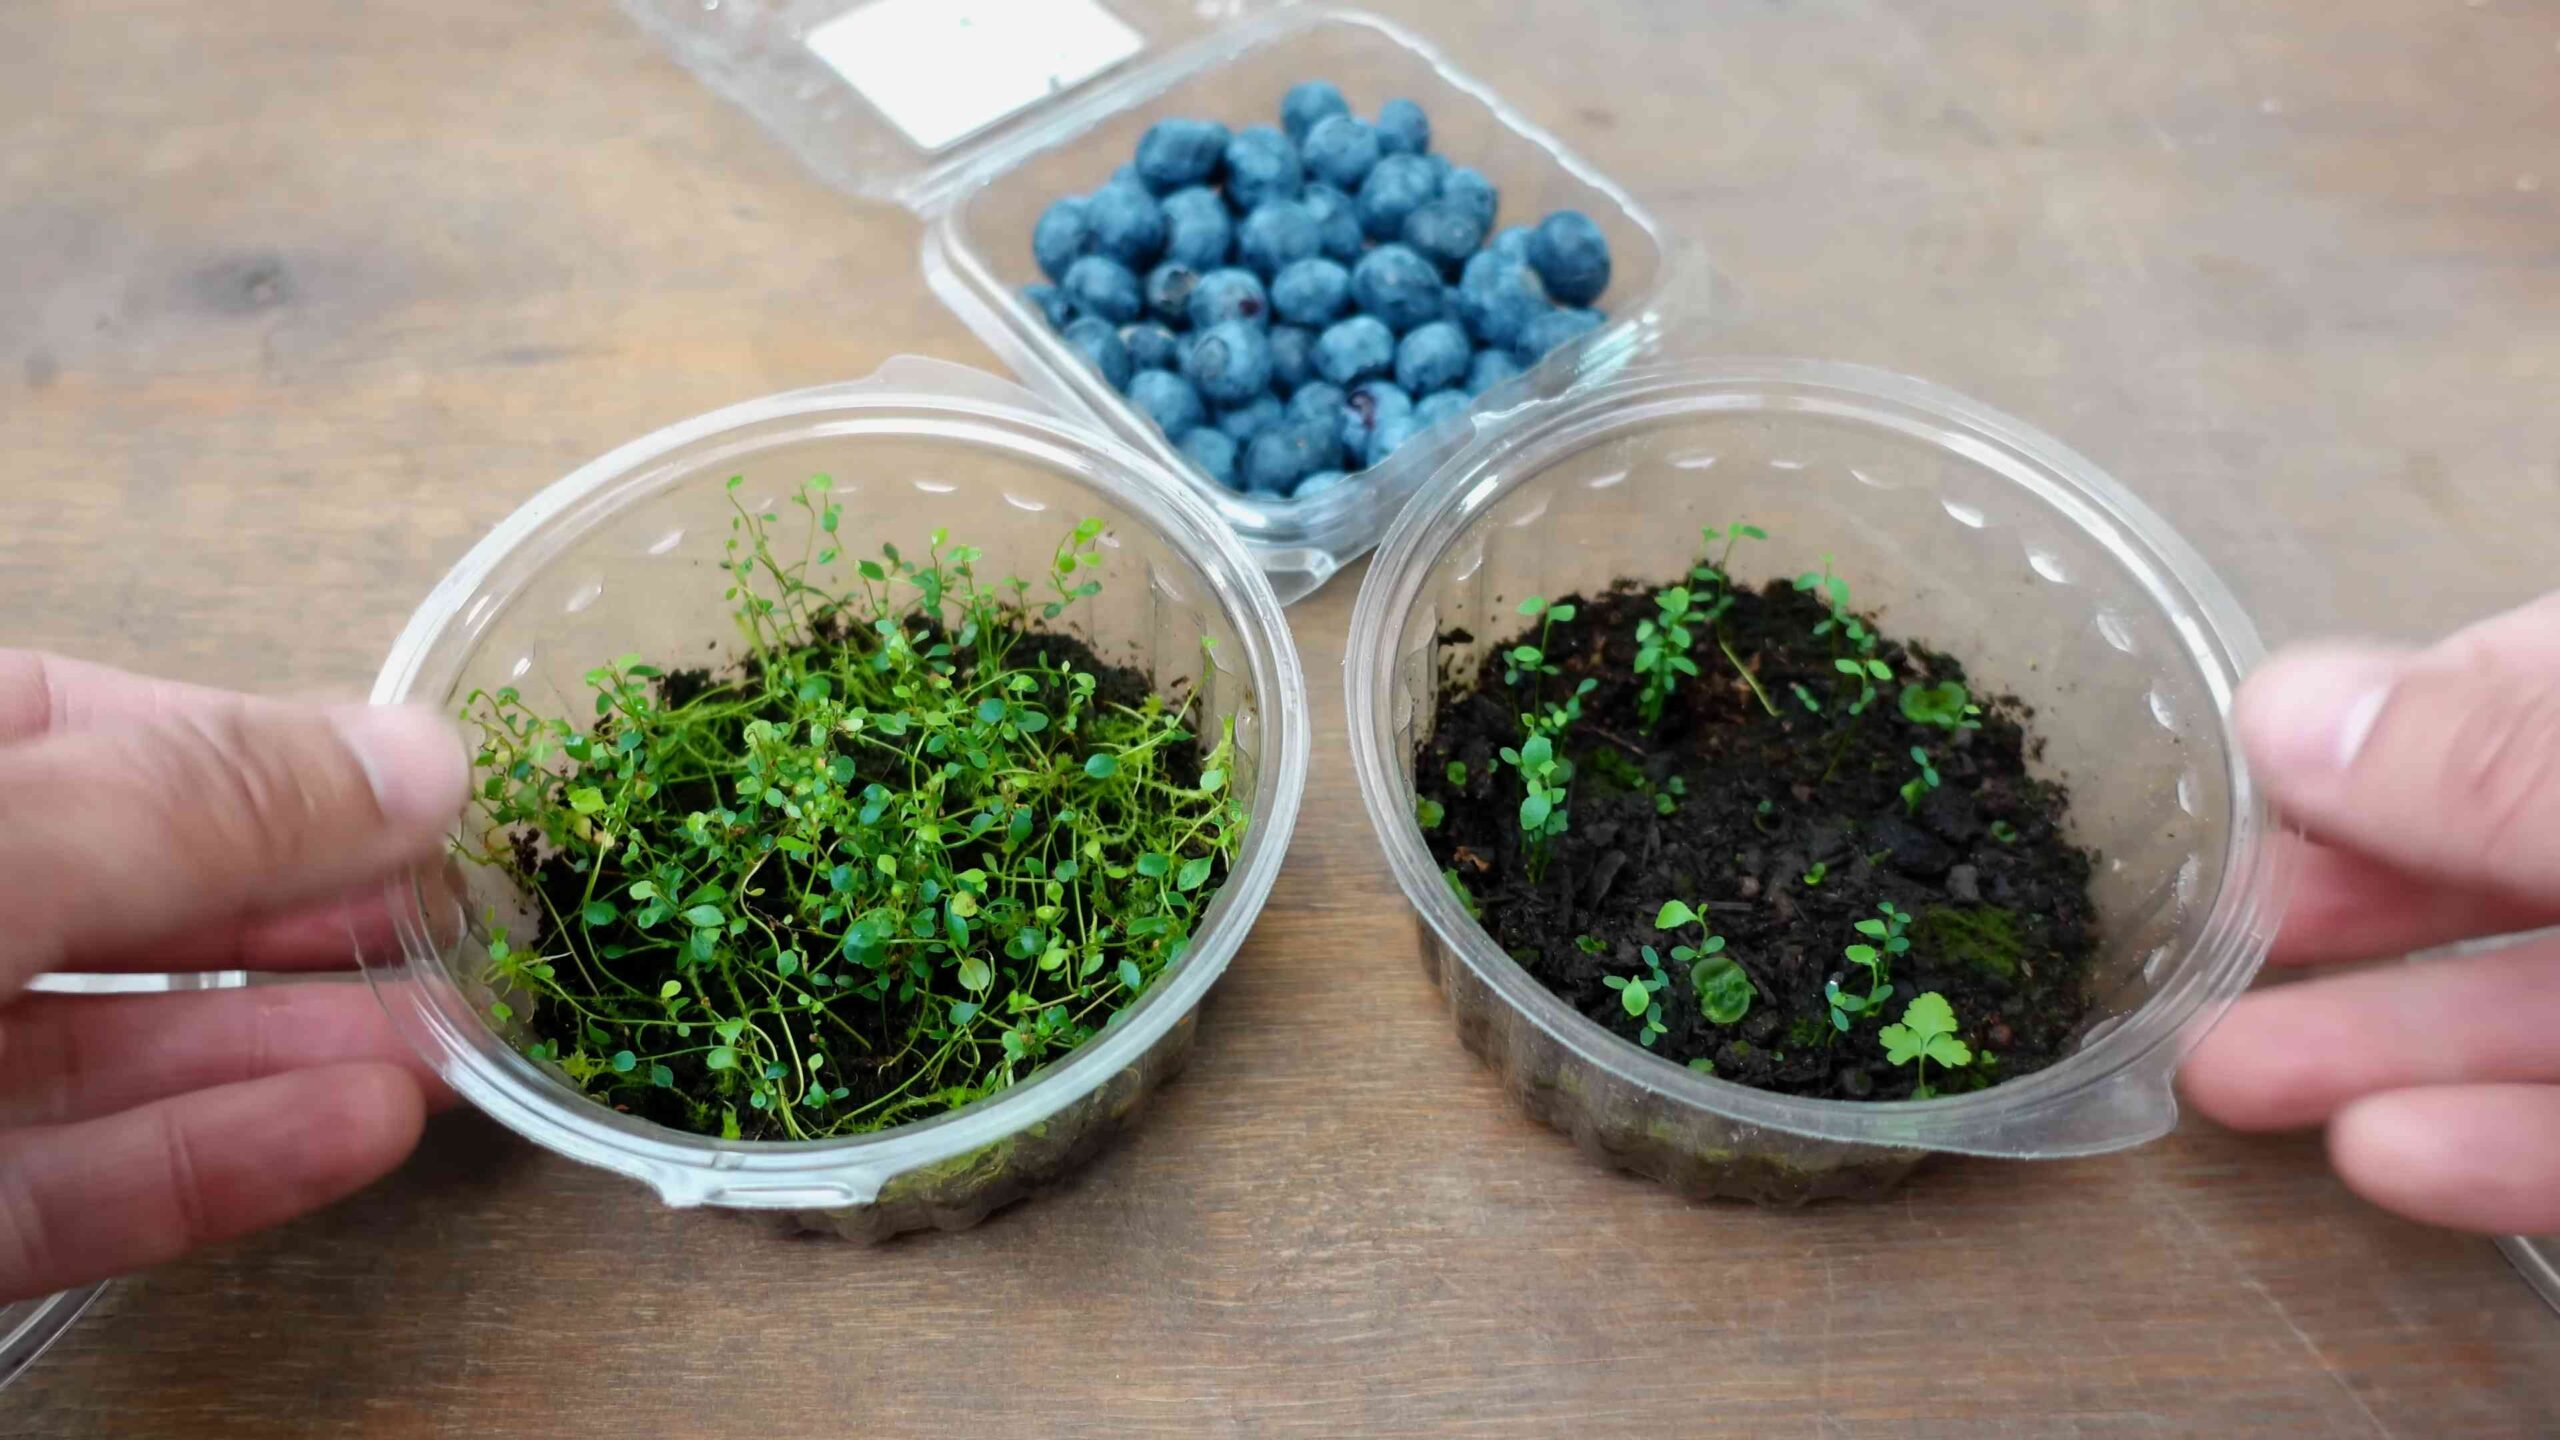
7. Monitor Germination: Germination can take anywhere from a few weeks to a few months. Be patient! Keep the soil consistently moist but not waterlogged. Remove the plastic dome or wrap once the seedlings start to emerge.
8. Ventilate Regularly: Once the seedlings emerge, ventilate the containers regularly to prevent fungal diseases. You can do this by removing the plastic dome or wrap for a few hours each day.
Phase 3: Caring for the Seedlings
Now that you have tiny blueberry seedlings, it’s crucial to provide them with the right care to help them thrive.
1. Watering: Water the seedlings regularly, keeping the soil consistently moist but not waterlogged. Use a spray bottle or a watering can with a fine rose to avoid disturbing the delicate roots.
2. Fertilizing: Feed the seedlings with a diluted acid-loving fertilizer every two weeks. Start with a very weak solution (half the recommended strength) and gradually increase the concentration as the seedlings grow.
3. Lighting: Provide the seedlings with plenty of bright, indirect light. If you’re using grow lights, keep them about 6-12 inches above the seedlings.
4. Thinning: If you have multiple seedlings growing in the same container, thin them out to give them enough space to grow. Choose the strongest seedlings and carefully remove the weaker ones.
5. Repotting: Once the seedlings have developed a few sets of true leaves, it’s time to repot them into larger containers. Use a potting mix specifically formulated for acid-loving plants.
6. Hardening Off: Before transplanting the seedlings outdoors, you need to harden them off. This process gradually acclimates the seedlings to outdoor conditions. Start by placing the seedlings outdoors in a sheltered location for a few hours each day. Gradually increase the amount of time they spend outdoors over a period of one to two weeks.
7. Protect from Pests and Diseases: Keep an eye out for pests and diseases. Common blueberry pests include aphids, spider mites, and blueberry maggots. Common diseases include powdery mildew and root rot. Treat any infestations or infections promptly with appropriate organic or chemical controls.
Phase 4: Transplanting and Long-Term Care
After a year or two of nurturing your seedlings indoors or in a protected area, they’ll be ready to be transplanted into their permanent home in the garden.
1. Choose the Right Location: Blueberries need full sun (at least six hours of direct sunlight per day) and well-drained, acidic soil. Avoid planting them in areas where water tends to pool.
2. Prepare the Soil: Amend the soil with peat moss, sulfur, or other acidifying amendments to lower the pH to between 4.5 and 5.5. You can also add compost or other organic matter to improve drainage and fertility.
3. Planting: Dig a hole that is twice as wide and as deep as the root ball of the seedling. Gently remove the seedling from its container and loosen the roots. Place the seedling in the hole and backfill with soil. Water thoroughly.
4. Mulching: Apply a layer of mulch around the base of the plant to help retain moisture, suppress weeds, and regulate soil temperature. Pine needles, wood chips, or shredded bark are good choices for blueberry mulch.
5. Watering: Water the newly transplanted blueberries regularly, especially during dry periods. Blueberries need consistent moisture to thrive.
6. Fertilizing: Fertilize the blueberries in the spring with an acid-loving fertilizer. Follow the instructions on the fertilizer label.
7. Pruning: Prune the blueberries annually to remove dead, damaged, or crossing branches. Pruning helps to improve air circulation and sunlight penetration, which can increase fruit production.
8. Pest and Disease Control: Continue to monitor the blueberries for pests and diseases and treat them promptly as needed.
9. Patience is Key: Remember that it can take several years for blueberries grown from seed to start producing fruit. Be patient and continue to provide them with the right care, and you’ll eventually be rewarded with a bountiful harvest of
Conclusion
Embarking on the journey of growing blueberries from seeds might seem daunting, but the rewards are immeasurable. From witnessing the miracle of germination to nurturing your own blueberry bushes from their very inception, this DIY project offers a unique connection to nature and a profound sense of accomplishment. Forget the instant gratification of purchasing established plants; this is about patience, dedication, and the satisfaction of creating something truly special.
Why is this DIY trick a must-try? Because it empowers you to cultivate rare or heirloom varieties that might be unavailable at your local nurseries. It allows you to tailor the growing conditions from the very beginning, ensuring your blueberry bushes are perfectly adapted to your specific climate and soil. And, perhaps most importantly, it’s a cost-effective way to expand your blueberry patch without breaking the bank.
Consider these variations to personalize your blueberry-growing experience. Experiment with different blueberry varieties, each offering unique flavor profiles and ripening times. Try using different seed starting mediums, such as peat moss, coconut coir, or a blend of both, to determine which works best for your growing conditions. You can also explore different stratification methods, such as cold stratification in the refrigerator or outdoor stratification in a protected area.
Don’t be afraid to get creative with your container choices. While traditional nursery pots are perfectly acceptable, you can also repurpose recycled containers, such as plastic tubs or buckets, as long as they have adequate drainage. Just remember that blueberries require acidic soil, so be sure to use a potting mix specifically formulated for acid-loving plants.
We encourage you to take the plunge and try this DIY trick for growing blueberries from seeds. It’s a rewarding experience that will connect you with nature and provide you with a bountiful harvest of delicious, homegrown blueberries for years to come. The process of growing blueberries from seeds is a testament to the power of patience and the magic of nature.
Once you’ve embarked on this exciting adventure, we’d love to hear about your experiences! Share your tips, tricks, and challenges in the comments below. Let’s create a community of blueberry enthusiasts who are passionate about growing their own food from seed. Your insights could inspire others to take on this rewarding project and enjoy the fruits (literally!) of their labor. So, grab your seeds, prepare your soil, and get ready to witness the miracle of life unfold before your eyes. Happy growing!
Frequently Asked Questions (FAQ)
Q: How long does it take for blueberry seeds to germinate?
A: Germination time for blueberry seeds can vary widely, typically ranging from 4 to 8 weeks, but sometimes longer. Patience is key! Factors like seed viability, stratification effectiveness, and environmental conditions (temperature, moisture) all play a role. Ensure consistent moisture and warmth during the germination period. Don’t give up if you don’t see sprouts immediately; some seeds may take longer than others.
Q: What kind of soil is best for growing blueberries from seeds?
A: Blueberries are acid-loving plants, so they require a soil pH between 4.5 and 5.5. Use a potting mix specifically formulated for acid-loving plants, such as azaleas, rhododendrons, or camellias. You can also amend regular potting mix with peat moss or sulfur to lower the pH. Regularly test the soil pH and adjust as needed to maintain the optimal range.
Q: How often should I water blueberry seedlings?
A: Blueberry seedlings need consistent moisture but should not be waterlogged. Water them when the top inch of soil feels dry to the touch. Avoid overwatering, as this can lead to root rot. Ensure the containers have adequate drainage to prevent water from pooling at the bottom. As the seedlings grow, you may need to adjust the watering frequency depending on the weather and environmental conditions.
Q: What is stratification, and why is it necessary for blueberry seeds?
A: Stratification is the process of subjecting seeds to a period of cold, moist conditions to break dormancy and promote germination. Blueberry seeds typically require a cold stratification period of 60 to 90 days. This can be achieved by placing the seeds in a moist medium (such as peat moss or vermiculite) in a sealed bag or container and refrigerating them at around 40°F (4°C). Alternatively, you can stratify the seeds outdoors in a protected area during the winter months.
Q: How much sunlight do blueberry seedlings need?
A: Blueberry seedlings need plenty of sunlight to thrive. Aim for at least 6 hours of direct sunlight per day. If you’re growing them indoors, place them near a sunny window or use grow lights to supplement natural light. As the seedlings mature, they can tolerate more direct sunlight.
Q: When should I transplant my blueberry seedlings?
A: Transplant your blueberry seedlings when they have developed several sets of true leaves and are large enough to handle easily, typically after a few months. Choose a permanent location with well-drained, acidic soil and plenty of sunlight. Space the plants appropriately, depending on the variety, to allow for adequate growth.
Q: Can I grow blueberries in containers?
A: Yes, blueberries can be successfully grown in containers, especially if you have limited space or poor soil conditions. Choose a large container (at least 15-20 gallons) with good drainage. Use a potting mix specifically formulated for acid-loving plants and fertilize regularly with an acid-forming fertilizer. Container-grown blueberries may require more frequent watering than those grown in the ground.
Q: What kind of fertilizer should I use for blueberry plants?
A: Use an acid-forming fertilizer specifically formulated for blueberries, azaleas, or rhododendrons. These fertilizers typically contain ammonium sulfate or sulfur-coated urea, which help to lower the soil pH. Fertilize in the spring, before new growth begins, and again in early summer. Follow the instructions on the fertilizer package carefully to avoid over-fertilizing.
Q: How do I protect my blueberry plants from pests and diseases?
A: Monitor your blueberry plants regularly for signs of pests or diseases. Common pests include aphids, spider mites, and blueberry maggots. Diseases include fungal infections like powdery mildew and botrytis blight. Use appropriate pest control methods, such as insecticidal soap or horticultural oil, to control pests. Prune your plants regularly to improve air circulation and prevent fungal diseases.
Q: How long does it take for blueberry plants to produce fruit?
A: Blueberry plants typically take 2 to 3 years to begin producing fruit, although some varieties may produce sooner. The first few years are focused on establishing a strong root system and vegetative growth. Be patient, and you’ll be rewarded with a bountiful harvest of delicious blueberries in the years to come.

Leave a Comment