

Growing Blueberries from Seeds might seem like a daunting task, but trust me, the reward of harvesting your own juicy, homegrown blueberries is absolutely worth the effort! Have you ever imagined plucking plump, sun-ripened blueberries straight from your own backyard, knowing you nurtured them from tiny seeds? This isn’t just a gardening project; it’s a journey into the heart of nature’s bounty.
Blueberries have a rich history, deeply rooted in North American culture. Native American tribes revered them for their nutritional value and medicinal properties, using them in everything from food to dyes. Today, we celebrate blueberries for their delicious flavor and powerful antioxidants. But what if you could skip the store-bought berries and cultivate your own thriving blueberry patch?
That’s where this DIY guide comes in! Many gardeners shy away from growing blueberries from seeds, believing it’s too complicated or time-consuming. But with the right knowledge and a little patience, you can successfully propagate these delightful berries yourself. This article is your comprehensive roadmap, breaking down the process into easy-to-follow steps. We’ll cover everything from seed selection and stratification to planting and ongoing care. So, ditch the intimidation and get ready to embark on a rewarding gardening adventure. Let’s unlock the secrets to growing your own delicious blueberries from scratch!
Growing Blueberries from Seeds: A Comprehensive DIY Guide
Hey there, fellow gardening enthusiasts! So, you’re thinking about growing blueberries from seeds? Awesome! It’s a bit of a challenge, I won’t lie, but the reward of nurturing a blueberry bush from a tiny seed is incredibly satisfying. Plus, you can potentially discover unique varieties! This guide will walk you through every step, from seed extraction to transplanting. Let’s get started!
Understanding the Challenge
Before we dive in, let’s be realistic. Growing blueberries from seed isn’t as straightforward as popping a tomato seed in the ground. Blueberries have a low germination rate, and the seedlings are slow growers. It can take several years (3-5) to get your first harvest. But don’t let that discourage you! With patience and the right techniques, you can absolutely do it.
Phase 1: Seed Extraction and Preparation
This is where the magic begins! We need to get those tiny seeds out of the berries.
* Choosing Your Berries: Opt for fully ripe, organic blueberries. Organic is crucial to avoid any seed-inhibiting chemicals. You can use fresh or frozen berries (thawed, of course). I personally prefer fresh, as I feel they yield better results.
* Gather Your Supplies: You’ll need:
* Ripe blueberries
* A blender or food processor (optional, but helpful)
* A fine-mesh sieve or cheesecloth
* A bowl or container
* Distilled water
* Paper towels
* A small container with a lid for stratification (more on that later)
* Sphagnum peat moss (for stratification)
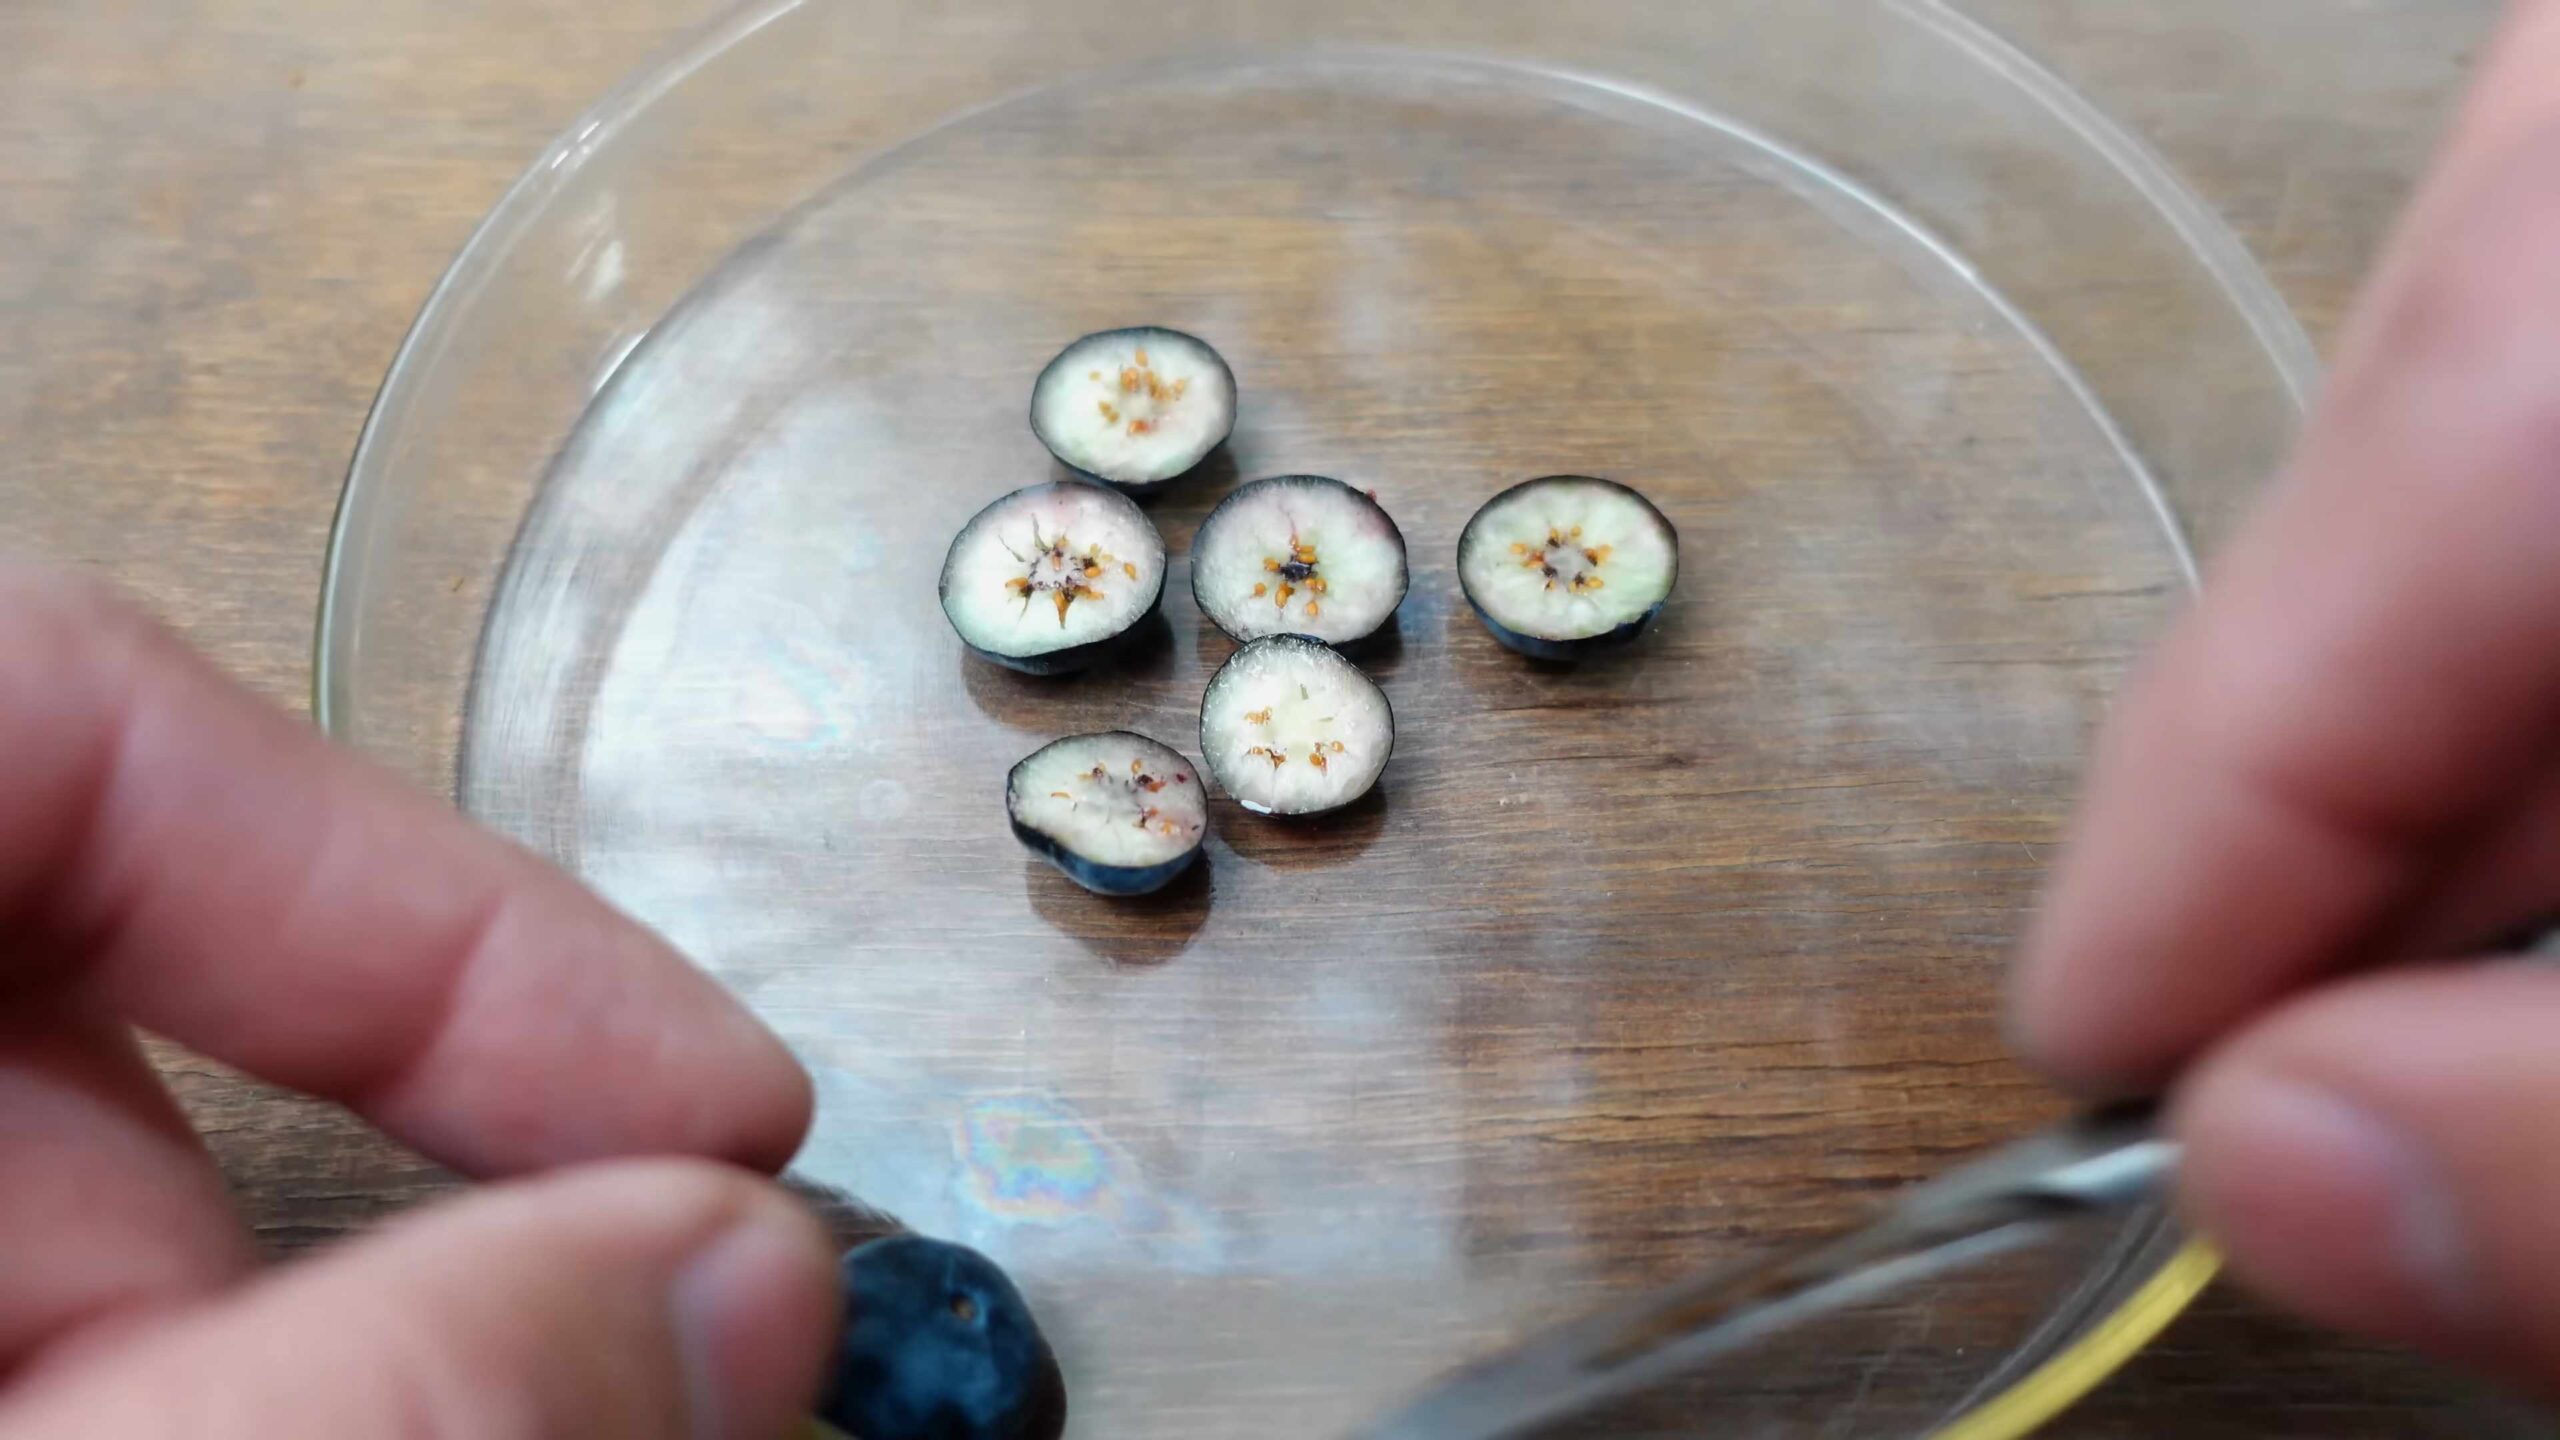
Step-by-Step Extraction:
1. Macerate the Berries: Gently crush the blueberries in a bowl. You can use your fingers, a fork, or, for a quicker process, pulse them briefly in a blender or food processor. Be careful not to over-blend; you just want to break the berries open.
2. Separate the Seeds: Add distilled water to the crushed berries. The goal is to separate the seeds from the pulp. Stir the mixture vigorously. The pulp will float to the top, while the seeds will sink to the bottom.
3. Rinse and Repeat: Pour the mixture through a fine-mesh sieve or cheesecloth. Rinse the seeds thoroughly with distilled water, removing as much pulp as possible. Repeat this process several times until you have relatively clean seeds. This is important because any remaining pulp can promote mold growth.
4. Final Cleaning: Spread the seeds on a paper towel and gently rub them to remove any remaining pulp. This can be a bit tedious, but it’s worth the effort.
5. Drying the Seeds: Allow the seeds to air dry completely on a clean paper towel. This usually takes a few days. Make sure they are in a well-ventilated area and out of direct sunlight.
6. Seed Stratification: This is a crucial step for blueberry seeds. Stratification mimics the natural winter conditions that the seeds need to break dormancy.
* Prepare the Stratification Medium: Moisten sphagnum peat moss with distilled water. It should be damp but not soggy. Squeeze out any excess water.
* Mix Seeds and Peat Moss: Gently mix the dried blueberry seeds with the moistened peat moss.
* Store in the Refrigerator: Place the mixture in a sealed container (like a small plastic container with a lid) and store it in the refrigerator for 90-120 days. The ideal temperature is between 33°F and 41°F (0.5°C and 5°C).
* Check Periodically: During stratification, check the peat moss periodically to ensure it remains moist. If it dries out, lightly mist it with distilled water.
Phase 2: Sowing and Germination
After the stratification period, it’s time to sow the seeds and hopefully witness the miracle of germination!
* Gather Your Supplies:
* Seed starting trays or small pots
* Seed starting mix (a fine, sterile mix is essential)
* Distilled water
* Spray bottle
* Humidity dome or plastic wrap (to maintain humidity)
* Grow lights (optional, but highly recommended)
Step-by-Step Sowing:
1. Prepare the Seed Starting Trays: Fill the seed starting trays or small pots with the seed starting mix. Gently firm the soil, but don’t compact it.
2. Sow the Seeds: Sprinkle the stratified seeds evenly over the surface of the soil. Blueberry seeds are tiny, so don’t bury them too deep. A light dusting of seed starting mix is sufficient.
3. Water Gently: Mist the soil surface with distilled water using a spray bottle. Avoid overwatering, as this can lead to damping-off (a fungal disease that kills seedlings).
4. Maintain Humidity: Cover the seed starting trays with a humidity dome or plastic wrap to maintain high humidity levels. This is crucial for germination.
5. Provide Light: Place the seed starting trays under grow lights or in a bright, indirect sunlight location. Grow lights are highly recommended, as they provide consistent and controlled light.
6. Monitor Germination: Germination can take anywhere from a few weeks to a few months. Be patient! Keep the soil consistently moist but not soggy. Remove the humidity dome or plastic wrap for a few hours each day to allow for air circulation and prevent fungal growth.
7. Ventilation is Key: Once you see seedlings emerging, gradually increase the ventilation by removing the humidity dome for longer periods each day. This will help the seedlings acclimate to lower humidity levels.
Phase 3: Seedling Care
Congratulations! You have blueberry seedlings! Now, the real work begins. These little guys are delicate and require careful attention.
* Watering: Water the seedlings regularly, but avoid overwatering. The soil should be consistently moist but not soggy. Allow the surface of the soil to dry slightly between waterings. Use distilled water or rainwater, as tap water can contain minerals that are harmful to blueberry seedlings.
* Lighting: Provide the seedlings with plenty of light. If you’re using grow lights, keep them on for 14-16 hours per day. If you’re using natural light, place the seedlings in a bright, indirect sunlight location.
* Fertilizing: Blueberry seedlings are sensitive to fertilizer. Start fertilizing them with a very dilute solution of a fertilizer specifically formulated for acid-loving plants (like azaleas or rhododendrons) after they have developed their first true leaves (the leaves that appear after the initial seed leaves). Follow the instructions on the fertilizer label carefully, and use only a fraction of the recommended dose.
* Transplanting: Once the seedlings have developed several sets of true leaves and are large enough to handle (usually a few inches tall), it’s time to transplant them into individual pots.
* Prepare the Pots: Fill small pots (2-3 inches in diameter) with a well-draining potting mix specifically formulated for acid-loving plants.
* Gently Remove the Seedlings: Carefully remove the seedlings from the seed starting trays, being careful not to damage the roots. Use a small tool, like a spoon or fork, to help loosen the soil around the roots.
* Transplant into Pots: Plant each seedling in its own pot, making sure the top of the root ball is level with the soil surface.
* Water Thoroughly: Water the transplanted seedlings thoroughly with distilled water.
* Provide Shade: Keep the newly transplanted seedlings in a shaded location for a few days to help them recover from the transplant shock.
Phase 4: Growing On and Hardening Off
Now that your seedlings are in individual pots, you need to continue to care for them and gradually acclimate them to outdoor conditions.
* Continued Care: Continue to water, fertilize, and provide light to the seedlings as described above. Monitor them regularly for any signs of pests or diseases.
* Repotting: As the seedlings grow, you will need to repot them into larger pots. Choose pots that are 1-2 inches larger in diameter than the previous pot.
* Hardening Off: Before transplanting the seedlings into the ground, you need to harden them off. This process gradually acclimates them to outdoor conditions, such as sunlight, wind, and temperature fluctuations.
* Start Slowly: Begin by placing the seedlings outdoors in a sheltered location for a few hours each day. Gradually increase the amount of time they spend outdoors each day.
* Protect from Harsh Conditions: Protect the seedlings from direct sunlight, strong winds, and frost.
* Monitor for Stress: Watch the seedlings closely for any signs of stress, such as wilting or leaf burn. If you see any signs of stress, bring the seedlings back indoors and gradually reintroduce them to outdoor
Conclusion
So, you’ve journeyed with us through the somewhat unconventional, yet incredibly rewarding, process of growing blueberries from seeds. It’s a path less traveled, certainly, compared to purchasing established bushes, but the satisfaction of nurturing a blueberry plant from its very beginning is unparalleled. Why is this DIY trick a must-try? Because it offers a unique connection to your food, a deeper understanding of plant life cycles, and the sheer thrill of witnessing a tiny seed transform into a fruit-bearing shrub. Plus, it’s a fantastic way to propagate rare or heirloom varieties that might be difficult to find as established plants.
This method allows you to cultivate a larger number of plants at a fraction of the cost of buying mature bushes. Imagine rows of thriving blueberry plants, all started from a simple packet of seeds! The possibilities are endless.
But the benefits extend beyond mere economics. Growing blueberries from seeds allows for greater genetic diversity in your blueberry patch. Seed-grown plants often exhibit unique characteristics, leading to variations in fruit size, flavor, and disease resistance. You might even discover a new and improved blueberry variety!
Don’t be intimidated by the time commitment. While it requires patience, the process itself is relatively straightforward. Think of it as a long-term project, a slow and steady journey towards a bountiful harvest. And remember, the journey is just as important as the destination.
Variations and Suggestions:
* Experiment with different blueberry varieties: Try growing different types of blueberries from seed, such as highbush, lowbush, or rabbiteye, to see which ones thrive best in your local climate and soil conditions.
* Use different stratification methods: While we’ve outlined a specific cold stratification process, you can experiment with other methods, such as using a refrigerator or burying the seeds outdoors in a protected area.
* Amend your soil: Blueberries thrive in acidic soil. Test your soil pH and amend it with peat moss or sulfur to achieve a pH of 4.5 to 5.5.
* Consider companion planting: Plant blueberries alongside other acid-loving plants, such as azaleas, rhododendrons, or cranberries, to create a mutually beneficial ecosystem.
* Grafting: Once your seed-grown blueberries are established, you can graft them onto more vigorous rootstock to improve their growth and fruit production. This is an advanced technique, but it can be a rewarding way to enhance your blueberry patch.
We encourage you to embark on this rewarding adventure of growing blueberries from seeds. It’s a testament to patience, dedication, and the magic of nature. The taste of a blueberry you’ve nurtured from its very beginning is simply unmatched.
So, grab a packet of blueberry seeds, prepare your soil, and get ready to witness the miracle of life unfold before your eyes. Don’t forget to document your journey and share your experiences with us! We’d love to hear about your successes, challenges, and any unique variations you discover along the way. Share your photos and stories on social media using #DIYBlueberries and let’s build a community of seed-starting blueberry enthusiasts!
Remember, the key to success with this DIY trick is patience and attention to detail. But the rewards – a thriving blueberry patch filled with delicious, homegrown fruit – are well worth the effort. Happy growing!
Frequently Asked Questions (FAQ)
Q: How long does it take to grow blueberries from seeds?
A: Growing blueberries from seeds is a long-term project. It typically takes 2-3 years for a seed-grown blueberry plant to mature and produce fruit. The first year is primarily focused on germination and seedling development. The second year involves transplanting and continued growth. By the third year, you may start to see a small harvest, which will increase as the plant matures. Patience is key!
Q: What kind of soil is best for growing blueberries from seeds?
A: Blueberries require acidic soil with a pH between 4.5 and 5.5. The soil should also be well-draining and rich in organic matter. Amend your soil with peat moss, sulfur, or other acidifying agents to achieve the desired pH. You can also use a soil testing kit to determine your soil’s pH level. A mix of peat moss, sand, and composted pine bark works well.
Q: How often should I water blueberry seedlings?
A: Blueberry seedlings need consistent moisture, especially during the first few months. Water them regularly to keep the soil consistently moist but not waterlogged. Check the soil moisture daily and water when the top inch feels dry. Avoid overwatering, as this can lead to root rot. As the plants mature, you can reduce the watering frequency, but ensure they still receive adequate moisture, especially during dry periods.
Q: Do I need to fertilize blueberry seedlings?
A: Yes, blueberry seedlings benefit from regular fertilization. Use a fertilizer specifically formulated for acid-loving plants, such as azalea or rhododendron fertilizer. Apply the fertilizer according to the package instructions, typically in the spring and early summer. Avoid over-fertilizing, as this can damage the delicate roots of the seedlings. Organic fertilizers, such as compost tea or fish emulsion, are also excellent options.
Q: How do I protect blueberry seedlings from pests and diseases?
A: Blueberry seedlings are susceptible to various pests and diseases. Monitor your plants regularly for signs of infestation or disease. Common pests include aphids, spider mites, and blueberry maggots. Diseases include fungal infections like powdery mildew and root rot. Use organic pest control methods, such as insecticidal soap or neem oil, to control pests. Ensure good air circulation and proper drainage to prevent fungal diseases. Consider using row covers to protect young plants from pests.
Q: Can I grow blueberries from seeds indoors?
A: Yes, you can start growing blueberries from seeds indoors, especially during the cold stratification period. This allows you to control the temperature and moisture levels more effectively. Use a seed starting tray or small pots filled with acidic potting mix. Provide adequate light, either natural or artificial, and maintain a consistent temperature. Once the seedlings are large enough, you can transplant them into larger pots or directly into the garden.
Q: What is cold stratification, and why is it necessary for growing blueberries from seeds?
A: Cold stratification is the process of exposing seeds to cold, moist conditions for a specific period to break dormancy and promote germination. Blueberry seeds require cold stratification because they have a natural dormancy mechanism that prevents them from germinating until they have experienced a period of cold. This ensures that the seeds germinate in the spring when conditions are favorable for growth. Without cold stratification, the seeds may not germinate at all.
Q: What are some common mistakes to avoid when growing blueberries from seeds?
A: Some common mistakes to avoid include:
* Using non-acidic soil: Blueberries require acidic soil to thrive.
* Overwatering or underwatering: Maintain consistent moisture without waterlogging.
* Over-fertilizing: Use a fertilizer specifically formulated for acid-loving plants and follow the package instructions carefully.
* Neglecting pest and disease control: Monitor your plants regularly and take action promptly if you notice any problems.
* Lack of patience: Growing blueberries from seeds takes time and patience. Don’t get discouraged if you don’t see results immediately.
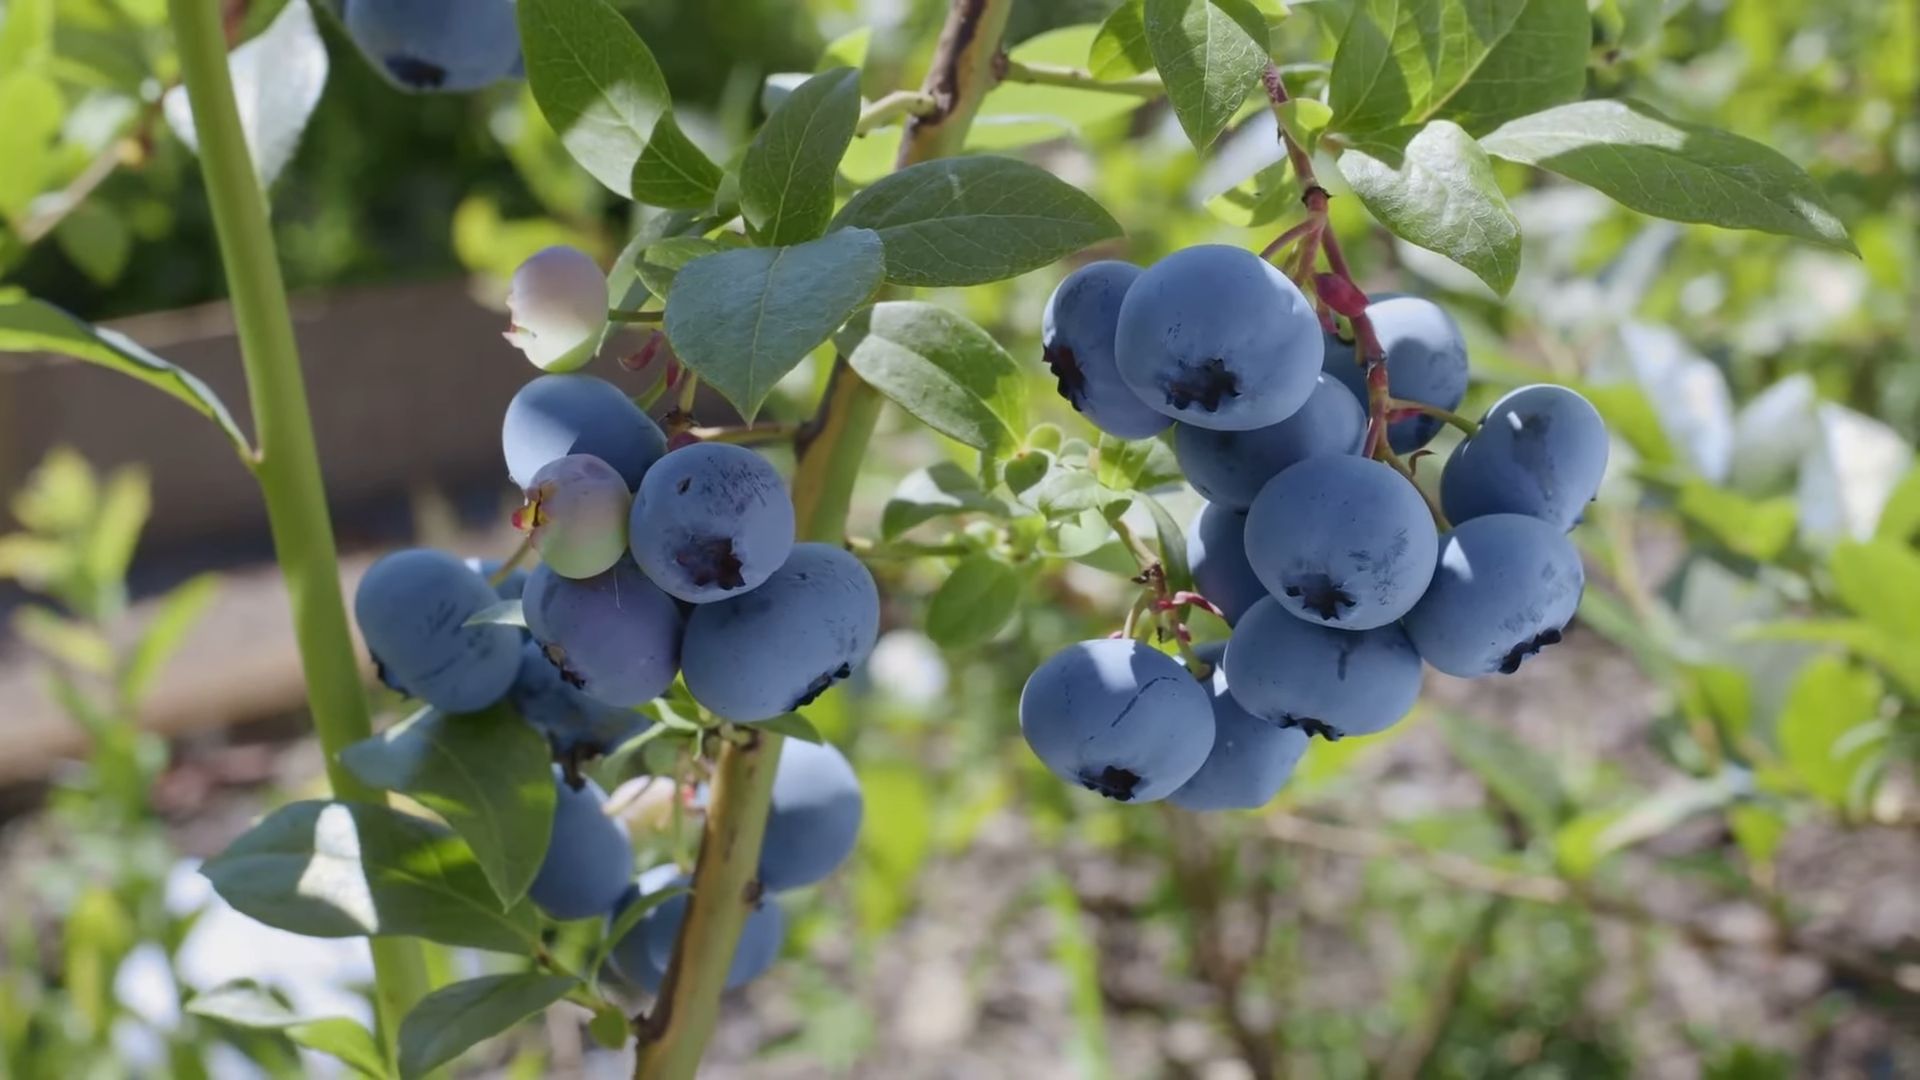
Q: How do I know when my blueberries are ripe?
A: Blueberries are typically ripe when they are a deep blue color and easily detach from the stem. They should also be plump and slightly soft to the touch. Taste a few berries to ensure they are sweet and flavorful. The ripening time varies depending on the variety and climate, but it typically occurs in the summer.
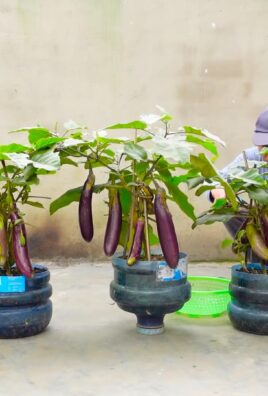
Q: Can I grow blueberries from seeds in containers?
A: Yes, you can grow blueberries from seeds in containers. Choose a large container with good drainage and fill it with acidic potting mix. Ensure the container receives adequate sunlight and water regularly. Container-grown blueberries may require more frequent fertilization than those grown in the ground. Select a compact or dwarf variety that is well-suited for container growing.
Q: What are the benefits of growing blueberries from seeds compared to buying established plants?
A: While growing blueberries from seeds requires more time and effort, it offers several benefits:
* Cost savings: Seeds are much cheaper than established plants.
* Genetic diversity: Seed-grown plants often exhibit unique characteristics.
* Satisfaction: The feeling of nurturing a plant from seed to fruit is incredibly rewarding.
* Propagation of rare varieties: You can grow rare or heirloom varieties that may be difficult to find as established plants.
* Control over growing conditions: You have complete control over the soil, water, and fertilizer used.
Q: What is the best time of year to start growing blueberries from seeds?
A: The best time to start growing blueberries from seeds is in the late fall or early winter. This allows you to cold stratify the seeds over the winter months and start them indoors in the early spring. You can also start them directly outdoors in the spring, but the germination rate may be lower.
Leave a Comment