

Growing Okra for Continuous Harvest: Imagine stepping into your backyard and plucking fresh, vibrant okra pods, ready to be transformed into a delicious gumbo or a crispy, fried side dish. Sounds dreamy, right? Well, it doesn’t have to be just a dream! I’m here to share some simple yet effective DIY tricks that will help you achieve a bountiful and continuous okra harvest, right from your own home garden.
Okra, also known as “lady’s fingers,” has a rich history, tracing back to ancient Ethiopia. From there, it spread across North Africa, the Middle East, and eventually made its way to the Americas with the transatlantic slave trade. It’s a resilient and nutritious vegetable that has sustained communities for centuries. But let’s be honest, sometimes getting a consistent yield can be a bit tricky. That’s where these DIY hacks come in!
Let’s face it, nobody wants a garden that gives you a few okra pods and then calls it quits. We want an abundance! This article is packed with practical tips and tricks to ensure you’re growing okra for continuous harvest. I’ll walk you through everything from proper planting techniques and soil preparation to strategic pruning and pest control. With these simple DIY methods, you’ll be enjoying fresh okra all season long, impressing your friends and family with your green thumb. So, grab your gardening gloves, and let’s get started!
Growing Okra for Continuous Harvest: My Foolproof Guide
Okra, also known as lady’s fingers, is a warm-season vegetable that’s surprisingly easy to grow, and with a few simple tricks, you can enjoy a continuous harvest throughout the summer and into the fall. I’ve been growing okra for years, and I’m excited to share my secrets to maximizing your yield. This guide will walk you through everything from seed starting to harvesting, ensuring you have a steady supply of delicious okra for your favorite recipes.
Choosing the Right Okra Variety
Before you even think about planting, selecting the right okra variety is crucial. Different varieties have different growth habits, pod sizes, and disease resistance. Here are a few of my favorites:
* Clemson Spineless: This is a classic, reliable variety that produces dark green, spineless pods. It’s a great choice for beginners because it’s relatively easy to grow and widely available.
* Burgundy: If you’re looking for something a little different, Burgundy okra has beautiful red pods that add a pop of color to your garden. The flavor is similar to Clemson Spineless.
* Emerald: This variety is known for its smooth, dark green pods and high yields. It’s also relatively early-maturing, which is a bonus if you live in a cooler climate.
* Annie Oakley II: A dwarf variety, perfect for container gardening or smaller spaces. It produces tender, spineless pods.
Consider your local climate and growing conditions when making your selection. Check with your local nursery or extension office for recommendations on varieties that thrive in your area.
Starting Okra Seeds
Okra thrives in warm weather, so it’s best to start seeds indoors about 4-6 weeks before the last expected frost. You can also direct sow seeds once the soil has warmed up to at least 65°F (18°C). I prefer starting indoors because it gives the plants a head start.
Materials You’ll Need:
* Okra seeds
* Seed starting trays or small pots
* Seed starting mix
* Heat mat (optional, but recommended)
* Grow lights (optional, but recommended)
* Watering can or spray bottle
Step-by-Step Instructions:
1. Soak the Seeds: Okra seeds have a hard outer coating, so soaking them in warm water for 12-24 hours before planting can significantly improve germination rates. I usually put them in a small bowl of water and let them sit overnight.
2. Prepare the Seed Starting Trays: Fill your seed starting trays or pots with seed starting mix. Gently press down on the soil to remove any air pockets.
3. Plant the Seeds: Make a small hole (about 1/2 inch deep) in the center of each cell or pot. Place one or two okra seeds in each hole and cover with soil. Gently pat the soil down.
4. Water Thoroughly: Water the seeds gently using a watering can or spray bottle. Make sure the soil is moist but not waterlogged.
5. Provide Warmth and Light: Place the seed starting trays on a heat mat to maintain a soil temperature of around 75-85°F (24-29°C). If you’re using grow lights, position them a few inches above the trays.
6. Maintain Moisture: Keep the soil consistently moist by watering as needed. Check the soil daily and water when the top inch feels dry.
7. Thin Seedlings (If Necessary): Once the seedlings emerge (usually within 7-14 days), thin them to one plant per cell or pot. Choose the strongest, healthiest seedling and snip off the others at the soil line.
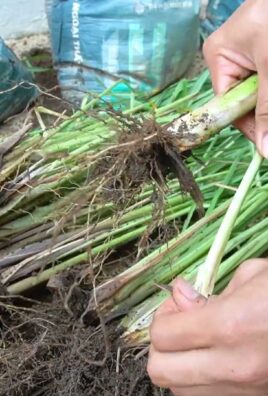
Transplanting Okra Seedlings
Once the danger of frost has passed and the soil has warmed up, it’s time to transplant your okra seedlings into the garden.
Preparing the Garden Bed:
* Choose a Sunny Location: Okra needs at least 6-8 hours of sunlight per day.
* Amend the Soil: Okra prefers well-drained soil that is rich in organic matter. Amend the soil with compost or well-rotted manure before planting.
* Check the Soil pH: Okra grows best in soil with a pH between 6.0 and 7.0. You can test your soil pH using a soil testing kit. If the pH is too low, add lime to raise it. If it’s too high, add sulfur to lower it.
Transplanting Instructions:
1. Harden Off the Seedlings: Before transplanting, you need to harden off the seedlings to acclimate them to outdoor conditions. Gradually expose them to longer periods of sunlight and cooler temperatures over a period of 7-10 days. Start by placing them outside for an hour or two each day, and gradually increase the time.
2. Dig the Holes: Dig holes that are slightly larger than the root balls of the seedlings. Space the holes 12-18 inches apart in rows that are 3-4 feet apart.
3. Carefully Remove the Seedlings: Gently remove the seedlings from their trays or pots, being careful not to damage the roots.
4. Plant the Seedlings: Place the seedlings in the holes and backfill with soil. Gently pat the soil down around the base of the plants.
5. Water Thoroughly: Water the seedlings thoroughly after transplanting.
6. Mulch: Apply a layer of mulch around the plants to help retain moisture, suppress weeds, and regulate soil temperature. I like to use straw or wood chips.
Caring for Okra Plants
Once your okra plants are in the ground, it’s important to provide them with proper care to ensure a healthy and productive harvest.
Watering:
Okra needs consistent moisture, especially during hot, dry weather. Water deeply and regularly, aiming for about 1 inch of water per week. Avoid overhead watering, as this can promote fungal diseases. Drip irrigation is an excellent option for okra.
Fertilizing:
Okra is a heavy feeder, so it benefits from regular fertilization. Apply a balanced fertilizer (such as 10-10-10) every 4-6 weeks. You can also side-dress the plants with compost or well-rotted manure.
Weeding:
Keep the garden bed free of weeds, as they can compete with okra plants for nutrients and water. Hand-pull weeds regularly or use a hoe to cultivate the soil.
Pest and Disease Control:
Okra is generally resistant to pests and diseases, but it can be susceptible to certain problems, such as aphids, flea beetles, and fungal diseases. Inspect your plants regularly for signs of infestation or disease.
* Aphids: These small, sap-sucking insects can cause stunted growth and distorted leaves. Control aphids by spraying them with insecticidal soap or neem oil.
* Flea Beetles: These tiny beetles can chew small holes in the leaves of okra plants. Control flea beetles by using row covers or spraying with pyrethrin.
* Fungal Diseases: Okra can be susceptible to fungal diseases such as powdery mildew and verticillium wilt. Prevent fungal diseases by providing good air circulation, avoiding overhead watering, and using disease-resistant varieties. If you notice signs of fungal disease, treat the plants with a fungicide.
Harvesting Okra for Continuous Production
This is where the magic happens! Proper harvesting is key to encouraging continuous okra production.
When to Harvest:
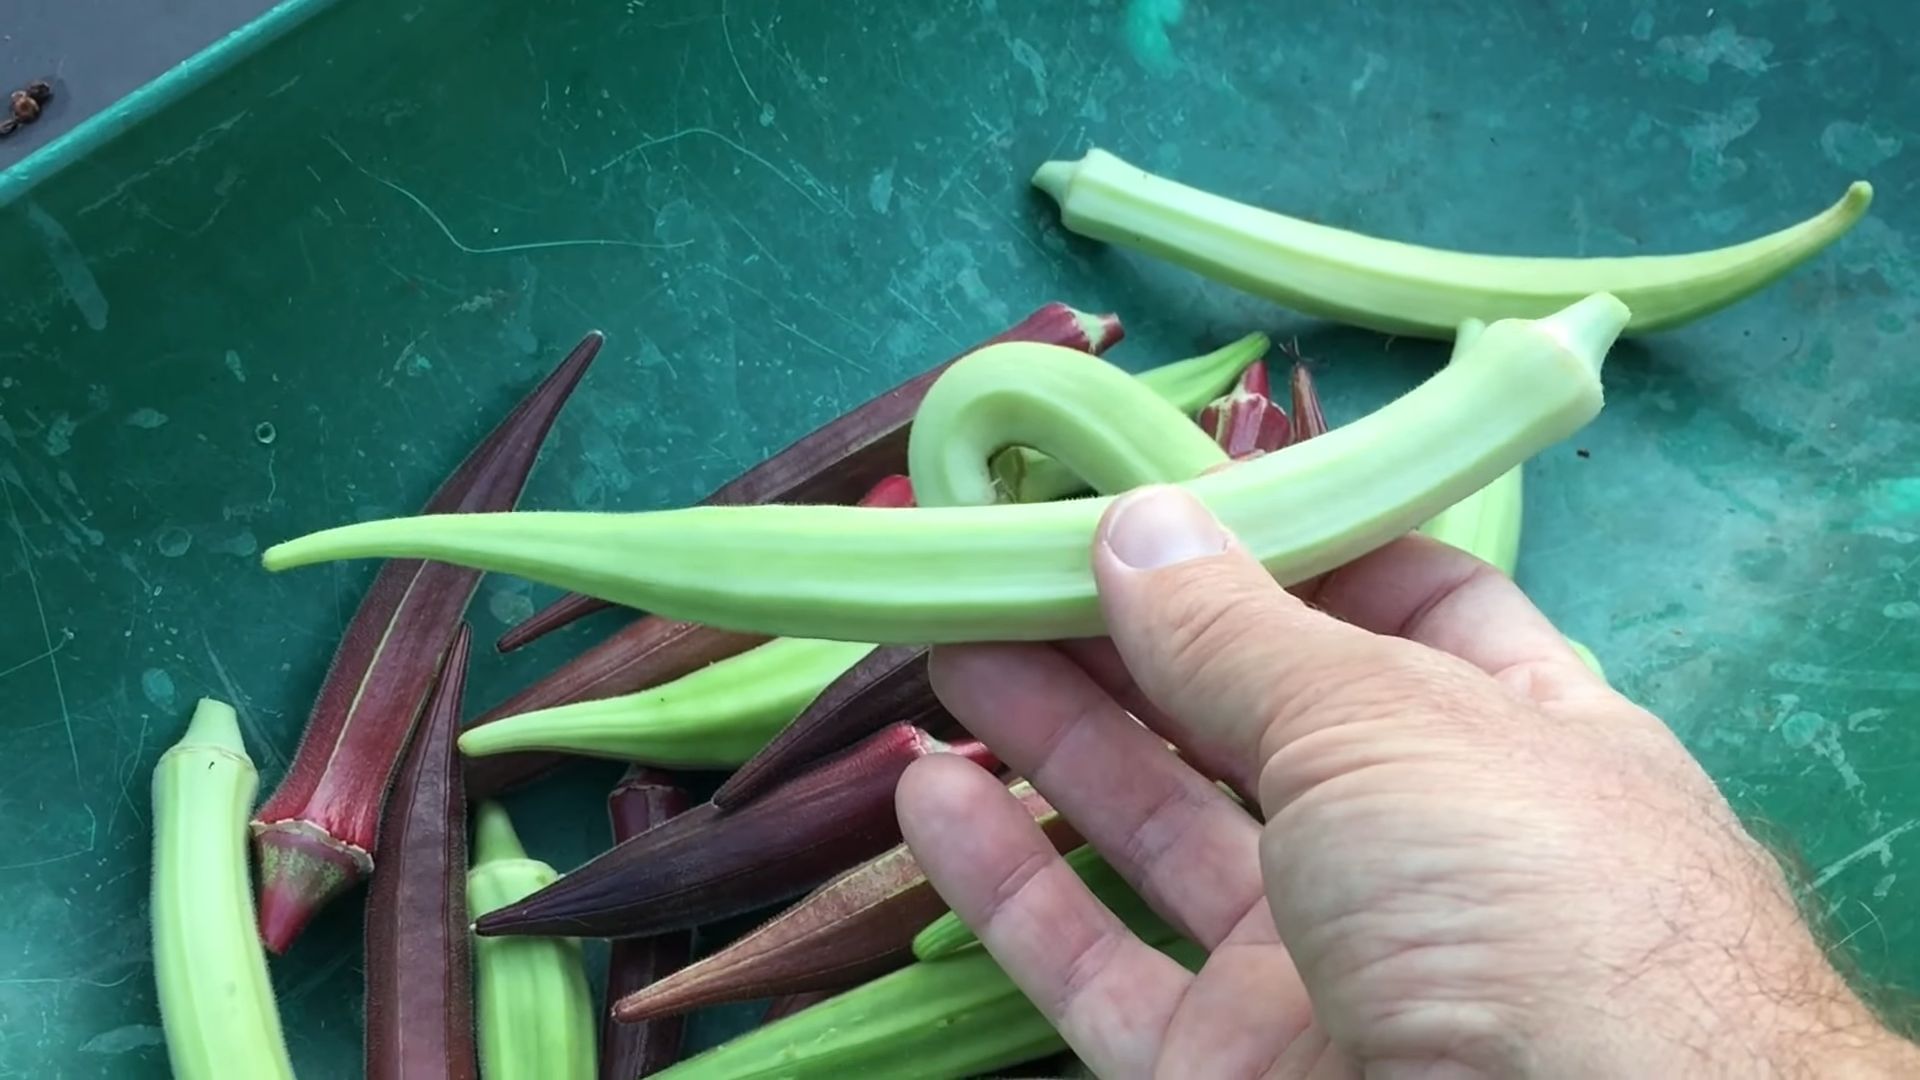
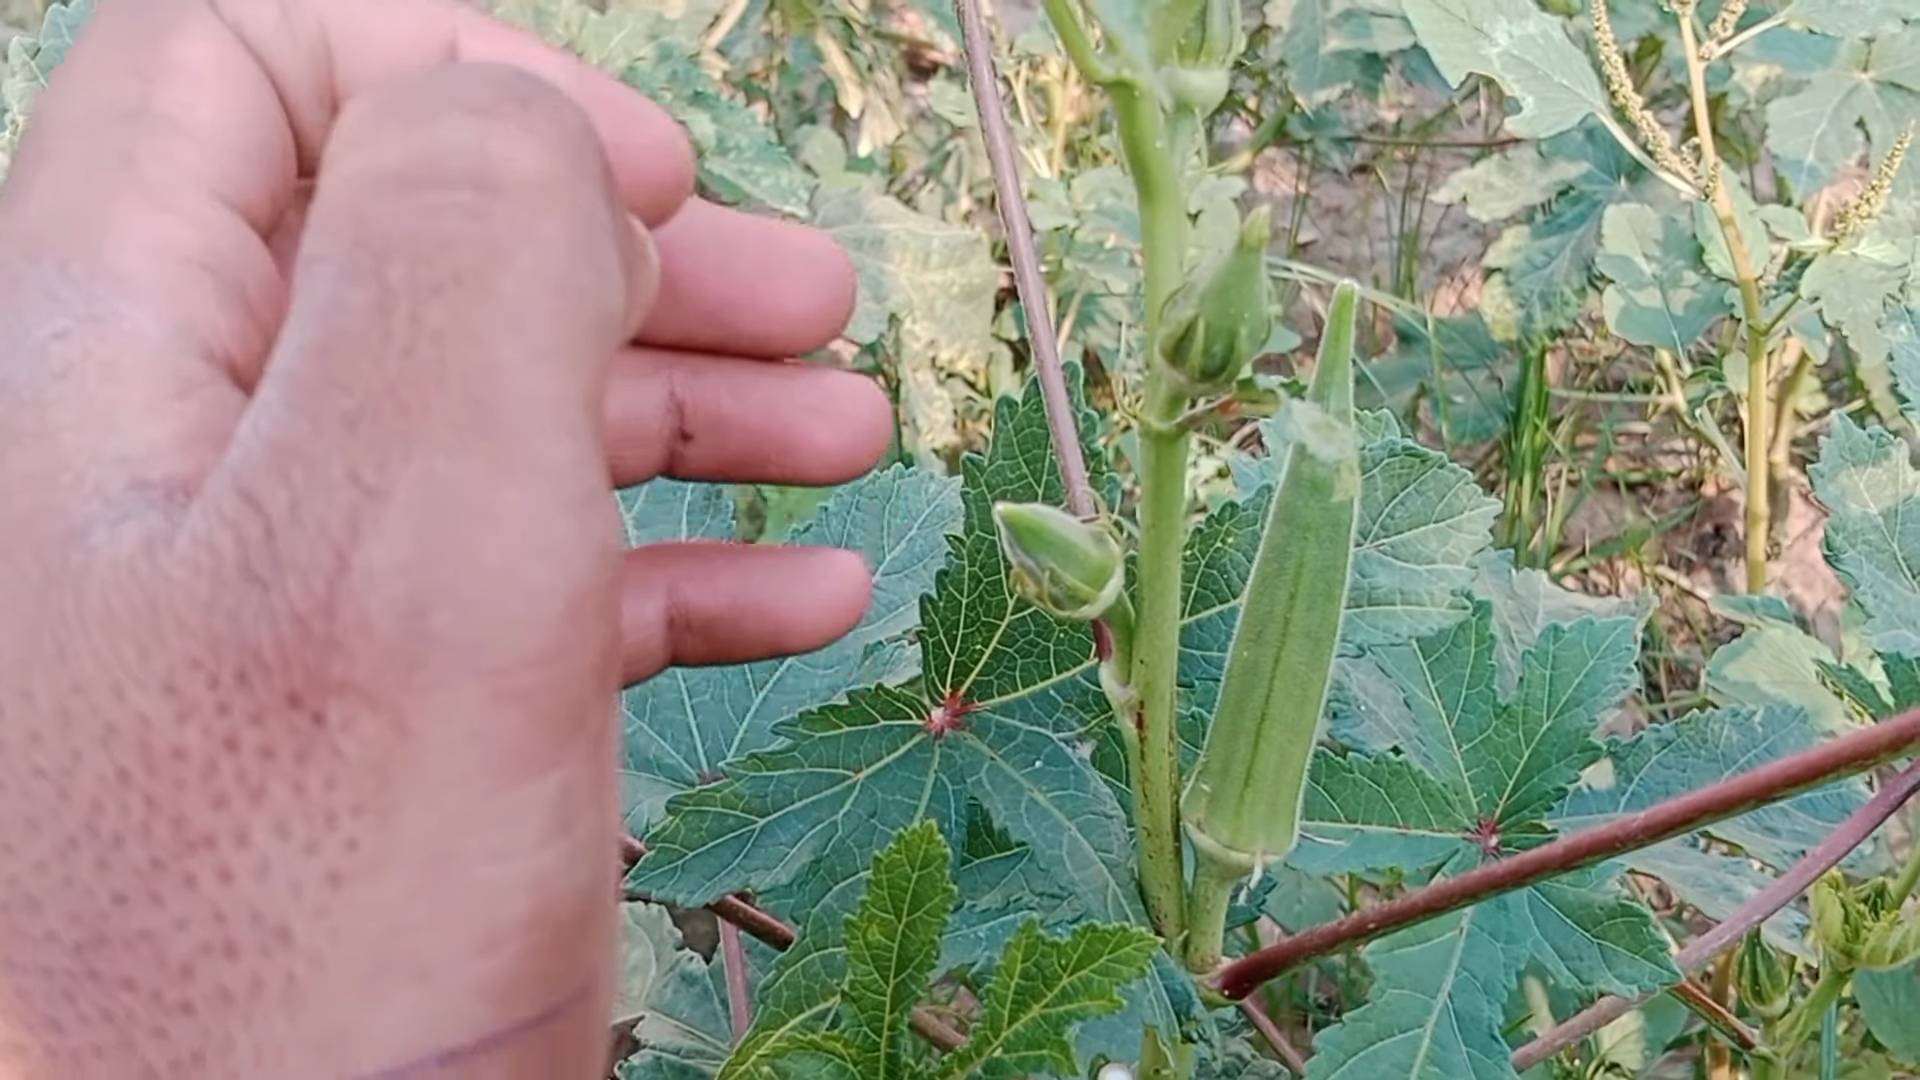
Okra pods are best harvested when they are young and tender, typically 3-4 inches long. Overripe pods become tough and fibrous. Check your plants every day or two during the peak growing season.
How to Harvest:
Use a sharp knife or pruning shears to cut the pods from the plant. Be careful not to damage the plant. Wear gloves when harvesting okra, as some varieties have spines that can irritate the skin.
The Secret to Continuous Harvest:
The key to continuous okra production is to harvest the pods frequently. When you harvest a pod, the plant will produce more. If you let the pods mature on the plant, it will stop producing new pods. So, keep harvesting those young, tender pods!
Pruning for Increased Yield:
As the okra plant grows taller, you can prune the lower leaves to improve air circulation and encourage more pod production. Simply remove the yellowing or damaged leaves near the base of the plant. I usually do this every few weeks.
Extending the Harvest Season
Even as the weather starts to cool down, you can take steps to extend your okra harvest season.
* Row Covers: Use row covers to protect your plants from frost.
* Mulch: Apply a thick layer of mulch around the plants to insulate the soil.
* Watering: Continue to water the plants regularly, even as the weather cools down.
* Fertilizing: Apply a final dose of fertilizer to give the plants a boost.
By following these tips, you can
Conclusion
So, there you have it! Mastering the art of continuous okra harvesting isn’t just about planting seeds; it’s about understanding the plant’s needs and implementing a few simple, yet crucial, techniques. By following these guidelines, you’re not just growing okra; you’re cultivating a sustainable source of fresh, delicious pods throughout the growing season.
Why is this DIY trick a must-try? Because it transforms your okra patch from a sporadic producer to a veritable okra factory! Imagine stepping into your garden and consistently finding perfectly sized, tender okra pods ready for picking. No more waiting anxiously for weeks between harvests, no more dealing with overgrown, woody okra that’s only fit for the compost bin. This method ensures a steady supply of high-quality okra for all your culinary adventures.
Beyond the basic principles outlined, there’s plenty of room for experimentation. Consider companion planting to further enhance your okra’s growth. Marigolds can deter nematodes, while basil can repel aphids. You could also try different varieties of okra to see which performs best in your specific climate and soil conditions. Clemson Spineless is a classic choice, but Burgundy okra adds a beautiful splash of color to your garden and your plate. For those with limited space, dwarf varieties like Baby Bubba are excellent options for container gardening.
Another variation to consider is succession planting. Even with continuous harvesting techniques, production may slow down during the hottest part of the summer. By planting a second round of okra seeds a few weeks after the first, you can ensure a continuous supply throughout the entire growing season.
The key to success lies in consistent monitoring and timely action. Regularly inspect your plants for pests and diseases, and address any issues promptly. Don’t be afraid to experiment with different fertilizers and watering schedules to find what works best for your okra. Remember, every garden is unique, and what works for one gardener may not work for another.
Ultimately, the goal is to create a thriving okra patch that provides you with a bountiful harvest. This DIY approach to growing okra for continuous harvest is not just a gardening technique; it’s an investment in fresh, healthy food and a deeper connection with nature.
We wholeheartedly encourage you to try this method in your own garden. The rewards are well worth the effort. And most importantly, we want to hear about your experiences! Share your successes, your challenges, and any tips you’ve discovered along the way. Let’s build a community of okra enthusiasts who are passionate about growing their own food and sharing their knowledge with others. Post your photos and stories on social media using #ContinuousOkraHarvest and let us know how it goes! Happy gardening!
Frequently Asked Questions (FAQ)
What is the best time to plant okra for continuous harvesting?
The ideal time to plant okra is after the last frost when the soil has warmed to at least 65 degrees Fahrenheit (18 degrees Celsius). Okra thrives in warm weather and requires plenty of sunshine. Planting too early can stunt its growth and reduce your overall yield. In warmer climates with longer growing seasons, you can even plant a second crop of okra in mid-summer for a fall harvest.
How often should I harvest okra to encourage continuous production?
Harvest okra pods every one to two days, depending on the variety and growing conditions. The key is to pick the pods when they are young and tender, typically 2-4 inches long. Overgrown pods become tough and fibrous, signaling the plant to stop producing new pods. Regular harvesting encourages the plant to continue flowering and setting fruit.
What type of fertilizer is best for okra?
Okra benefits from a balanced fertilizer with a slightly higher phosphorus content to promote flowering and fruiting. A 5-10-5 or 10-20-10 fertilizer is a good option. You can also amend the soil with compost or well-rotted manure before planting to provide a slow-release source of nutrients. Avoid over-fertilizing with nitrogen, as this can lead to excessive foliage growth at the expense of pod production. Side-dress your okra plants with fertilizer every 4-6 weeks during the growing season.
How much water does okra need?
Okra requires consistent moisture, especially during flowering and pod development. Water deeply and regularly, aiming for about 1 inch of water per week. Avoid overhead watering, as this can promote fungal diseases. Drip irrigation or soaker hoses are excellent options for delivering water directly to the roots. Mulching around the plants can help retain moisture and suppress weeds.
What are some common pests and diseases that affect okra, and how can I control them?
Common pests that attack okra include aphids, flea beetles, corn earworms, and nematodes. Aphids can be controlled with insecticidal soap or neem oil. Flea beetles can be deterred with row covers or diatomaceous earth. Corn earworms can be handpicked or treated with Bacillus thuringiensis (Bt). Nematodes can be managed by planting resistant varieties or using soil amendments like compost and cover crops.
Common diseases that affect okra include powdery mildew, Fusarium wilt, and leaf spot. Powdery mildew can be treated with fungicides or by improving air circulation around the plants. Fusarium wilt is a soilborne disease that can be prevented by planting in well-drained soil and avoiding overwatering. Leaf spot can be controlled with fungicides or by removing infected leaves.
Can I grow okra in containers?
Yes, okra can be successfully grown in containers, especially dwarf varieties. Choose a large container (at least 10 gallons) with good drainage. Use a high-quality potting mix and provide regular watering and fertilization. Place the container in a sunny location that receives at least 6-8 hours of direct sunlight per day. Container-grown okra may require more frequent watering and fertilization than okra grown in the ground.
How do I know when okra pods are ready to harvest?
Okra pods are ready to harvest when they are young, tender, and easily snapped off the plant. The ideal size varies depending on the variety, but generally, pods should be harvested when they are 2-4 inches long. Overgrown pods become tough and fibrous. Use a sharp knife or pruning shears to cut the pods from the plant, leaving a small stub.
What can I do with an overabundance of okra?
If you find yourself with an overabundance of okra, there are many ways to preserve it for later use. Okra can be frozen, pickled, canned, or dried. Freezing is a simple option: blanch the okra pods for a few minutes, then freeze them in freezer bags or containers. Pickling and canning are great ways to preserve okra in a flavorful brine. Drying okra can be done in a dehydrator or oven, and the dried pods can be used in soups and stews. You can also share your excess okra with friends, neighbors, or local food banks.
How can I improve the soil for growing okra?
Okra prefers well-drained soil that is rich in organic matter. Before planting, amend the soil with compost, well-rotted manure, or other organic materials. This will improve soil drainage, fertility, and water retention. You can also add a slow-release fertilizer to the soil to provide a steady supply of nutrients. Conduct a soil test to determine the pH level and nutrient content of your soil, and amend accordingly. Okra prefers a slightly acidic to neutral soil pH of 6.0-7.0.
Leave a Comment