

Growing Sweet Potato Tops is easier than you might think, and I’m here to show you how! Have you ever looked at a sweet potato and wondered if you could turn it into something beautiful, not just delicious? Well, you absolutely can! For generations, resourceful gardeners have been coaxing vibrant, leafy vines from humble sweet potatoes, transforming them into stunning ornamental plants.
Beyond their aesthetic appeal, sweet potato vines, or “slips,” as they’re often called, have a rich history. In some cultures, they’re even considered symbols of prosperity and abundance. But let’s be honest, most of us are drawn to them because they’re simply gorgeous and incredibly low-maintenance.
Why should you learn this DIY trick? Because growing sweet potato tops is a fantastic way to add a touch of green to your home, whether you have a sprawling garden or just a sunny windowsill. Plus, it’s a budget-friendly way to propagate new plants and impress your friends with your green thumb. In this article, I’ll guide you through the simple steps to create your own thriving sweet potato vine, adding a touch of natural beauty to your space. Let’s get started!
Regrowing Sweet Potato Tops: A Fun and Easy DIY Project
Hey there, fellow plant enthusiasts! Have you ever looked at a sweet potato and thought, “I bet I could grow something cool from that?” Well, you’re in luck! Regrowing sweet potato tops is a super simple and rewarding DIY project that anyone can do, even if you don’t have a green thumb. Plus, it’s a great way to add a touch of greenery to your home and impress your friends with your plant-growing skills. Let’s dive in!
What You’ll Need
Before we get started, let’s gather our supplies. This project is pretty low-key, so you probably already have most of what you need:
* A sweet potato (organic is best, but any will do!)
* A glass or jar (wide enough to hold the sweet potato)
* Toothpicks
* Water
* A sunny spot
Preparing Your Sweet Potato
Okay, let’s get our sweet potato ready for its transformation!
1. Choose your sweet potato wisely: Look for a sweet potato that’s firm, healthy-looking, and free from any soft spots or blemishes. A larger sweet potato will generally give you more sprouts.
2. Clean your sweet potato: Gently wash the sweet potato under cool water to remove any dirt or debris. You don’t need to scrub it vigorously, just a light rinse will do.
3. Insert the toothpicks: This is where the toothpicks come in handy. Insert 3-4 toothpicks evenly spaced around the middle of the sweet potato. These toothpicks will act as a support system, allowing you to suspend the sweet potato in the glass of water. Make sure the toothpicks are inserted firmly enough to hold the sweet potato securely.
Setting Up Your Water Vessel
Now, let’s get our water vessel ready for the sweet potato to take a dip!
1. Choose your glass or jar: Select a glass or jar that’s wide enough to hold the sweet potato without it falling in. The opening should be wide enough to allow the top half of the sweet potato to be exposed to air.
2. Fill with water: Fill the glass or jar with water, leaving about an inch of space at the top. Tap water is fine, but if your tap water is heavily chlorinated, you might want to let it sit out for a day or two to allow the chlorine to dissipate.
3. Position the sweet potato: Carefully place the sweet potato on top of the glass or jar, using the toothpicks to suspend it. The bottom half of the sweet potato should be submerged in the water, while the top half remains exposed to air.
The Waiting Game (and Maintenance)
This is where the patience comes in! It might take a few weeks for your sweet potato to start sprouting, so don’t get discouraged if you don’t see results right away.
1. Find a sunny spot: Place your sweet potato setup in a warm, sunny location. A windowsill is usually a great option. Sweet potatoes need plenty of sunlight to sprout and grow.
2. Change the water regularly: This is crucial! Change the water every 2-3 days to prevent bacteria from growing and to keep the water fresh. Stagnant water can lead to rot and hinder the sprouting process.
3. Monitor the water level: Make sure the bottom half of the sweet potato remains submerged in water. As the water evaporates, add more to maintain the proper level.
4. Be patient: As I mentioned before, sprouting can take time. You should start to see small roots emerging from the bottom of the sweet potato within a week or two. After that, sprouts will start to appear on the top.
From Sprouts to Slips: Getting Ready to Plant
Once your sweet potato has developed a good amount of sprouts, it’s time to prepare them for planting. These sprouts are called “slips,” and they’re what will eventually grow into new sweet potato plants.
1. Let the sprouts grow: Allow the sprouts to grow to about 6-8 inches long. This will give them a good head start when you plant them.
2. Gently twist off the slips: Once the sprouts are long enough, carefully twist them off the sweet potato. Try to get as much of the base of the sprout as possible, as this is where the roots will develop.
3. Rooting the slips in water: Place the slips in a glass of water, making sure the bottom inch or two is submerged. Place the glass in a sunny location and change the water every 2-3 days. Within a week or two, you should see roots starting to grow.
Planting Your Sweet Potato Slips
Now for the exciting part – planting your sweet potato slips!
1. Choose your planting location: Sweet potatoes need plenty of sunshine and well-drained soil. If you’re planting them in the ground, choose a spot that gets at least 6 hours of sunlight per day. If you’re planting them in containers, make sure the containers are large enough to accommodate the growing plants.
2. Prepare the soil: Sweet potatoes prefer loose, well-drained soil. Amend the soil with compost or other organic matter to improve drainage and fertility.
3. Dig holes for the slips: Dig holes that are deep enough to accommodate the roots of the slips. Space the holes about 12-18 inches apart.
4. Plant the slips: Carefully remove the slips from the water and plant them in the holes. Make sure the roots are covered with soil.
5. Water thoroughly: Water the newly planted slips thoroughly to help them settle in.
Caring for Your Sweet Potato Plants
Now that your sweet potato plants are in the ground, it’s important to provide them with the care they need to thrive.
1. Water regularly: Sweet potatoes need consistent moisture, especially during the first few weeks after planting. Water them regularly, especially during dry spells.
2. Fertilize occasionally: Sweet potatoes are heavy feeders, so fertilize them occasionally with a balanced fertilizer. Follow the instructions on the fertilizer label.
3. Control weeds: Keep the area around your sweet potato plants free of weeds. Weeds can compete with the plants for nutrients and water.
4. Watch for pests and diseases: Keep an eye out for pests and diseases that can affect sweet potato plants. If you notice any problems, take action to control them promptly.
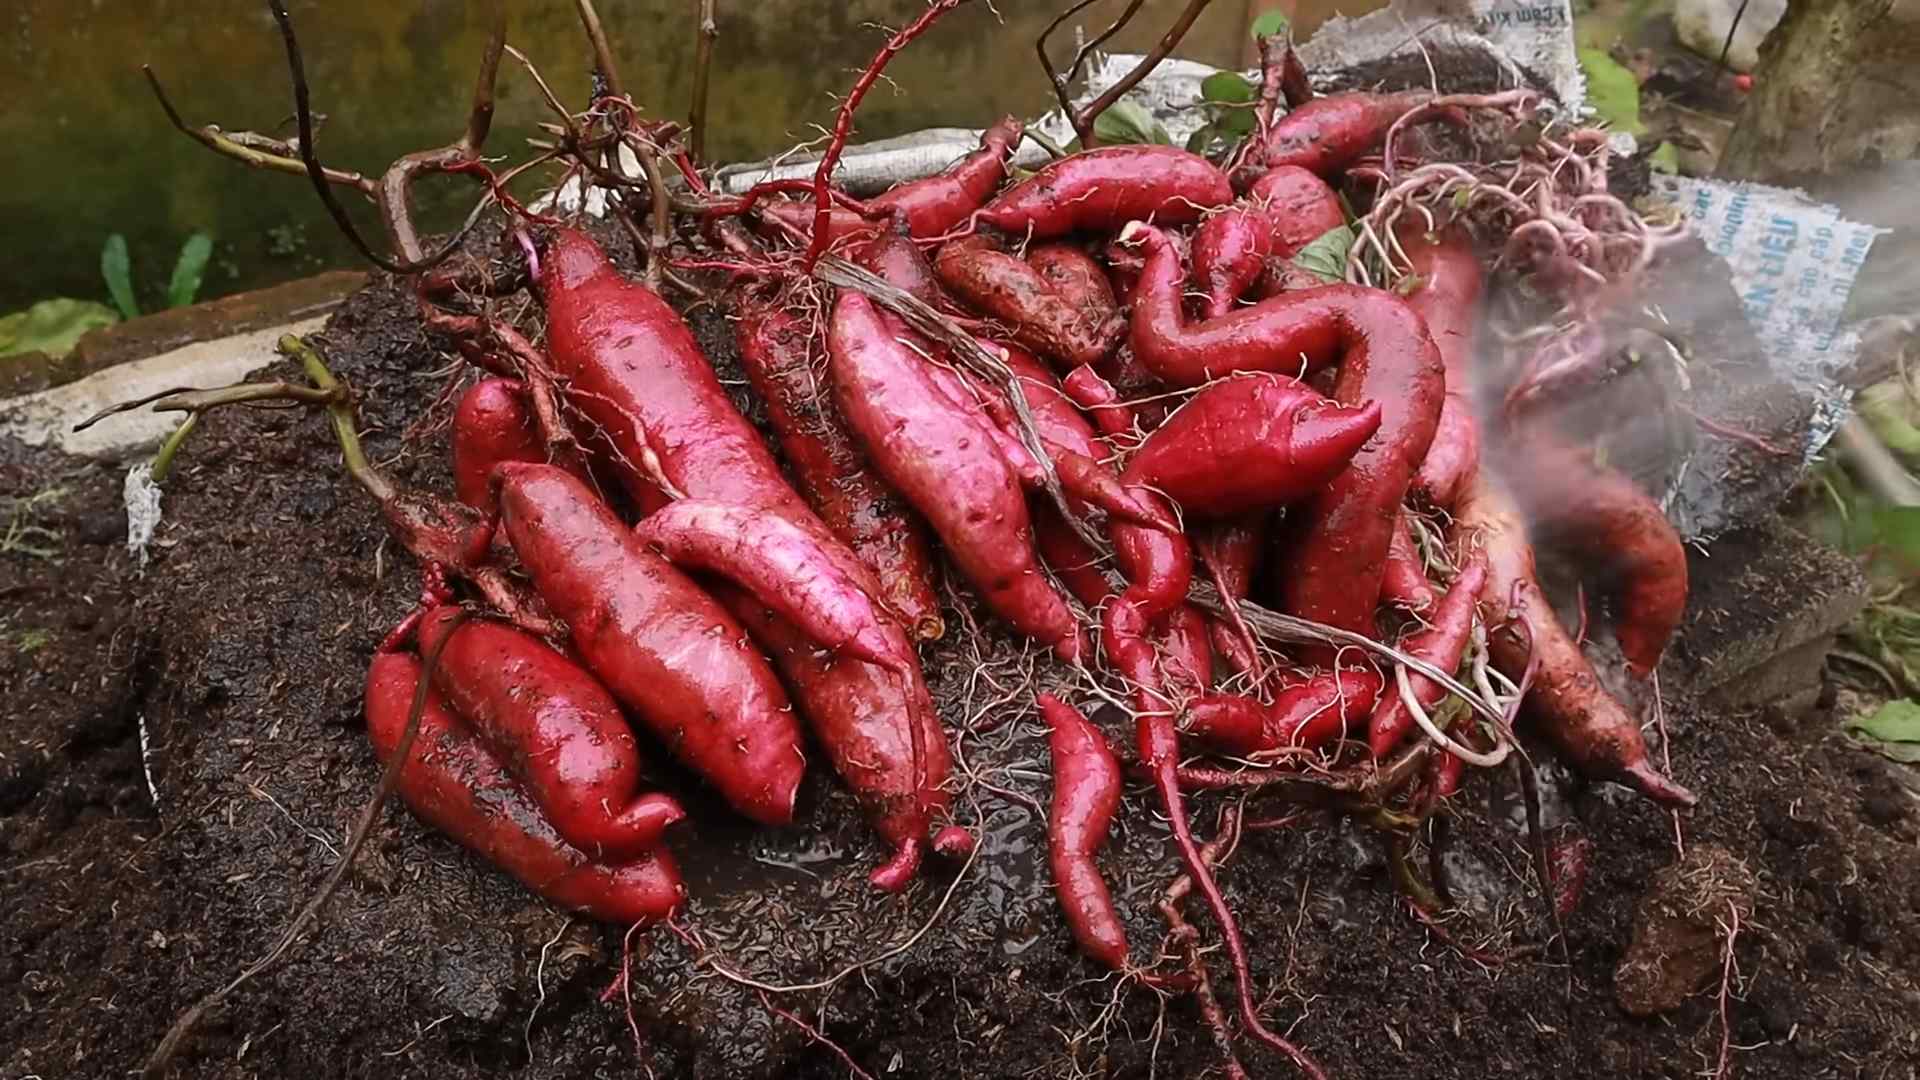
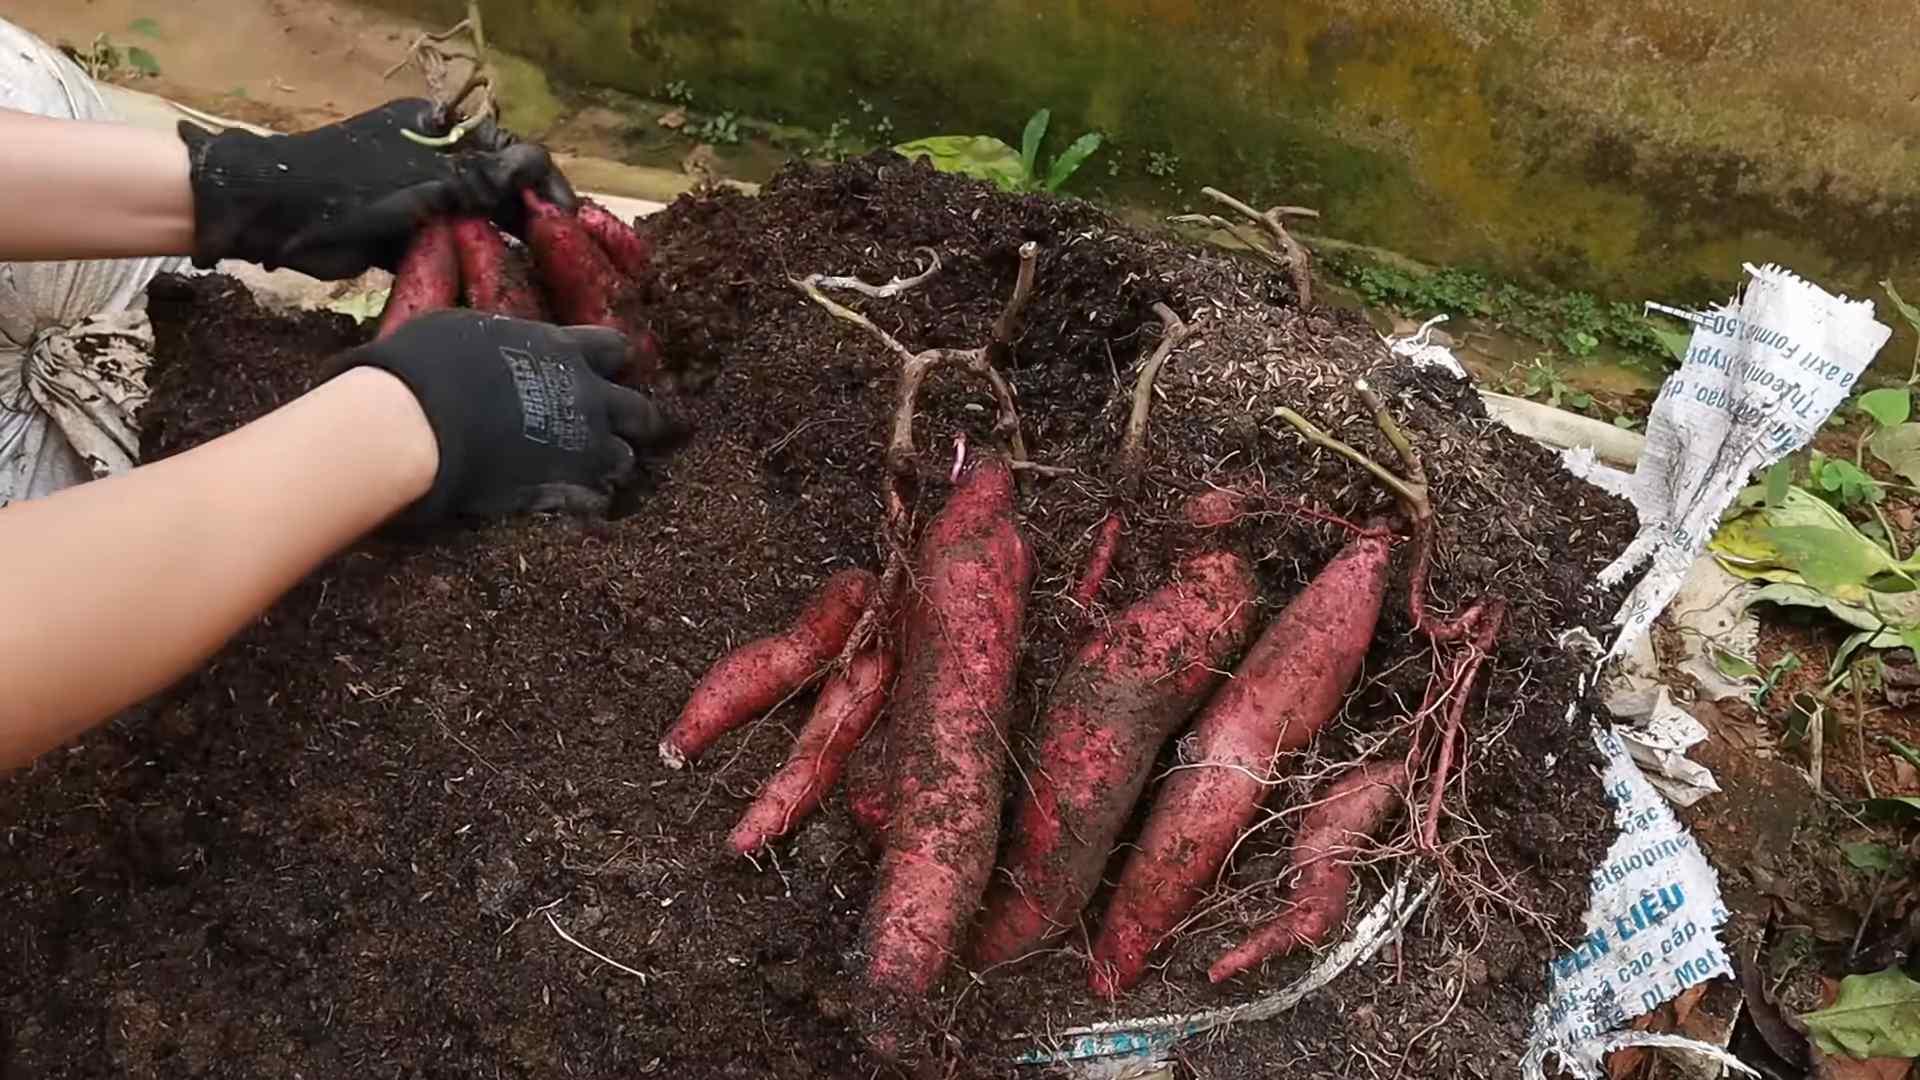
Harvesting Your Sweet Potatoes
The moment you’ve been waiting for! Harvesting your sweet potatoes is the culmination of all your hard work.
1. Know when to harvest: Sweet potatoes are typically ready to harvest in the fall, about 90-120 days after planting. The leaves will start to turn yellow and the vines will begin to die back.
2. Dig carefully: Use a garden fork or shovel to carefully dig around the plants, being careful not to damage the sweet potatoes.
3. Lift the sweet potatoes: Gently lift the sweet potatoes from the ground.
4. Cure the sweet potatoes: Curing is an important step in preserving your sweet potatoes. Place the sweet potatoes in a warm, humid location (around 80-85 degrees Fahrenheit) for about a week. This will allow the skins to harden and the starches to convert to sugars, making them sweeter and more flavorful.
5. Store your sweet potatoes: After curing, store your sweet potatoes in a cool, dry, and dark location. They should keep for several months.
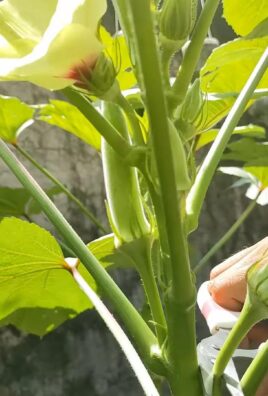
Enjoying Your Sweet Potato Greens
Did you know that sweet potato leaves are edible? They are! And they’re delicious. You can harvest the leaves throughout the growing season. Just make sure not to take too many leaves from any one plant, as this can weaken it. The leaves can be cooked like spinach or other leafy greens. They’re a great source of vitamins and minerals.
Troubleshooting
Sometimes, things don’t go exactly as planned. Here are a few common problems you might encounter and how to fix them:
* No sprouts: If your sweet potato isn’t sprouting, make sure it’s getting enough sunlight and that the water is being changed regularly. You might also try using a different sweet potato.
* Rotting sweet potato: If your sweet potato starts to rot, it’s likely due to bacteria in the water. Make sure you’re changing the water frequently. You might also try adding a small amount of hydrogen peroxide to the water to kill bacteria.
* Yellowing leaves: Yellowing leaves can be a sign of nutrient deficiency. Try fertilizing your plants with a balanced fertilizer.
* Pests: Keep an eye out for pests like aphids and spider mites. If you find any, treat them with an appropriate insecticide.
Final Thoughts
Regrowing sweet potato tops is a fun, easy, and rewarding DIY project that anyone can do. It’s a great way to add a touch of greenery to your home, learn about plant propagation, and even
Conclusion
So, there you have it! Transforming humble sweet potatoes into a vibrant, edible garden of sweet potato tops is not only surprisingly simple, but also incredibly rewarding. We’ve walked you through the process, from selecting the right sweet potato to harvesting your first batch of nutritious greens. But why should you bother with this DIY trick?
Firstly, it’s an incredibly sustainable way to reduce food waste. Instead of tossing those sprouting sweet potatoes, you’re giving them a new lease on life, turning potential waste into a delicious and healthy food source. Secondly, growing your own sweet potato tops provides you with access to fresh, organic greens right at your fingertips. No more last-minute trips to the grocery store when you need a handful of greens for your stir-fry or salad. You’ll know exactly where your food comes from and how it was grown.
Beyond the practical benefits, there’s also the sheer joy of watching something grow. Nurturing your sweet potato vine and witnessing its transformation from a simple tuber to a flourishing plant is a deeply satisfying experience. It’s a connection to nature that can be incredibly grounding and therapeutic.
But the possibilities don’t end with the basic method. Feel free to experiment with different varieties of sweet potatoes to discover which ones produce the most flavorful and abundant greens. Try growing your sweet potato vines in different types of containers, from repurposed buckets to decorative pots, to add a touch of personality to your garden. You can even train your vines to climb a trellis or fence, creating a beautiful and edible living wall.
Consider adding companion plants to your sweet potato setup. Herbs like basil and oregano can help deter pests and enhance the flavor of your sweet potato tops. Marigolds are also a great choice, as they attract beneficial insects and add a splash of color to your garden.
And don’t forget about the sweet potatoes themselves! While the focus here is on the greens, you can also harvest the sweet potatoes that grow beneath the soil. This requires a bit more patience and planning, but it’s a fantastic way to maximize your yield and enjoy the full benefits of your sweet potato plant.
This DIY trick is a game-changer for anyone looking to embrace sustainable living, reduce food waste, and enjoy fresh, homegrown greens. It’s a simple, affordable, and incredibly rewarding project that anyone can undertake, regardless of their gardening experience.
We wholeheartedly encourage you to give this a try. Start with just one sweet potato and see for yourself the magic of transforming a humble tuber into a thriving source of food. Once you’ve experienced the joy of harvesting your own sweet potato tops, we’re confident that you’ll be hooked!
And most importantly, we want to hear about your experiences! Share your photos, tips, and stories with us in the comments below. Let us know what varieties of sweet potatoes you’ve tried, what challenges you’ve faced, and what successes you’ve celebrated. Together, we can create a community of sweet potato top enthusiasts and inspire others to embrace this wonderful DIY project. So go ahead, get your hands dirty, and start growing your own delicious and nutritious sweet potato tops today!
FAQ
Can I use any type of sweet potato to grow sweet potato tops?
Yes, you can generally use any type of sweet potato to grow sweet potato tops. However, some varieties may produce more abundant or flavorful greens than others. Experimenting with different varieties is a great way to discover your personal preference. Look for sweet potatoes that are firm, free from blemishes, and have already started to sprout. Organic sweet potatoes are often a good choice, as they are less likely to have been treated with sprout inhibitors.
How long does it take to grow sweet potato tops?
The time it takes to grow sweet potato tops can vary depending on several factors, including the variety of sweet potato, the growing conditions (temperature, sunlight, humidity), and the size of the tuber. Generally, you can expect to see sprouts emerging within 1-2 weeks of placing the sweet potato in water. Once the sprouts have developed into vines with several leaves, you can start harvesting the tops, typically within 4-6 weeks.
Are sweet potato tops edible?
Yes, sweet potato tops are absolutely edible and are a nutritious addition to your diet. They have a mild, slightly sweet flavor that is similar to spinach or beet greens. They can be eaten raw in salads, or cooked in stir-fries, soups, stews, and other dishes. Sweet potato tops are a good source of vitamins A and C, as well as fiber and antioxidants.
How do I harvest sweet potato tops?
Harvesting sweet potato tops is a simple process. Use a sharp knife or scissors to cut the stems about 4-6 inches from the tip. This will encourage the plant to produce more side shoots, resulting in a bushier and more productive vine. Avoid cutting more than one-third of the plant at a time, as this can stress the plant and reduce its growth. Harvest the tops regularly to encourage continuous production.
How often should I water my sweet potato plant?
The watering frequency for your sweet potato plant will depend on the growing conditions. Generally, you should water the plant when the top inch of soil feels dry to the touch. Avoid overwatering, as this can lead to root rot. If you are growing your sweet potato in water, change the water every few days to prevent the growth of algae and bacteria.
What kind of light do sweet potato plants need?
Sweet potato plants thrive in full sunlight, which means they need at least 6-8 hours of direct sunlight per day. If you are growing your sweet potato indoors, place it near a sunny window or use a grow light to provide adequate light. Insufficient light can result in leggy growth and reduced production of greens.
Can I grow sweet potato tops indoors?
Yes, you can definitely grow sweet potato tops indoors. In fact, it’s a great way to enjoy fresh greens year-round, regardless of the weather outside. Just make sure to provide your sweet potato plant with adequate light, water, and nutrients. A sunny windowsill or a grow light will help ensure healthy growth.
Are there any pests or diseases that affect sweet potato plants?
Sweet potato plants are generally quite resistant to pests and diseases. However, they can occasionally be affected by aphids, spider mites, or whiteflies. These pests can be controlled with insecticidal soap or neem oil. Root rot can also be a problem if the plant is overwatered. To prevent root rot, ensure that the soil is well-draining and avoid overwatering.
Can I grow sweet potatoes from the slips I get from growing sweet potato tops?
Yes, you can absolutely grow sweet potatoes from the slips (the sprouts that grow from the sweet potato). Once the slips have grown to be about 6-8 inches long, you can carefully remove them from the sweet potato and plant them in soil. This is a great way to propagate more sweet potato plants and increase your harvest.
How can I use sweet potato tops in cooking?
Sweet potato tops can be used in a variety of dishes. They can be eaten raw in salads, or cooked in stir-fries, soups, stews, and other dishes. They have a mild, slightly sweet flavor that pairs well with a variety of ingredients. Try adding them to your favorite recipes for a nutritious and delicious boost. You can also blanch them and freeze them for later use.
Is growing sweet potato tops a good way to get more vitamin A?
Yes, growing and consuming sweet potato tops is an excellent way to increase your vitamin A intake. Sweet potato tops are a rich source of beta-carotene, which the body converts into vitamin A. Vitamin A is essential for maintaining healthy vision, skin, and immune function. Incorporating sweet potato tops into your diet can help you meet your daily vitamin A requirements.


Leave a Comment