

Home cleaning simple tricks – who doesn’t want them? Let’s be honest, keeping a house sparkling clean can feel like a never-ending battle. You conquer one mess, and another pops up right behind it! But what if I told you there are easy, almost magical ways to make your cleaning routine faster, more efficient, and even a little bit fun?
For centuries, people have been developing clever hacks to maintain their homes. Think about it – our grandmothers and great-grandmothers didn’t have the fancy gadgets we do today. They relied on ingenuity and simple ingredients to keep their homes tidy and fresh. These time-tested methods, passed down through generations, are the foundation of many of the home cleaning simple tricks we’ll explore today.
In our busy modern lives, time is precious. We’re all juggling work, family, and social commitments, leaving little room for hours of scrubbing and polishing. That’s where these DIY cleaning hacks come in. They’re designed to save you time, money, and effort, allowing you to enjoy a cleaner, more comfortable home without sacrificing your sanity. Plus, many of these tricks utilize natural ingredients, making them a healthier and more eco-friendly alternative to harsh chemical cleaners. So, get ready to discover some game-changing tips that will transform your cleaning routine from a chore into a breeze!

DIY Home Cleaning Hacks That Will Save You Time and Money!
Hey there, fellow cleaning enthusiasts! I’m always on the lookout for ways to make my cleaning routine faster, easier, and, let’s be honest, cheaper. Over the years, I’ve stumbled upon some amazing DIY cleaning hacks that have completely transformed the way I tackle household chores. I’m so excited to share them with you! Get ready to ditch those expensive store-bought cleaners and embrace the power of simple, natural ingredients.
Cleaning Your Microwave Like a Pro (Without Scrubbing!)
Okay, let’s be real, cleaning the microwave is probably nobody’s favorite task. But with this hack, you can say goodbye to scrubbing and hello to a sparkling clean microwave in minutes!
What you’ll need:
* 1 cup of water
* 1 tablespoon of white vinegar or lemon juice
* Microwave-safe bowl
Step-by-step instructions:
1. Combine water and vinegar/lemon juice: In your microwave-safe bowl, mix together the water and either the vinegar or lemon juice. I personally prefer lemon juice because it leaves a fresh, citrusy scent.
2. Microwave the mixture: Place the bowl in the microwave and heat it on high for 5-10 minutes. The goal is to get the mixture boiling and create steam inside the microwave. The steam will loosen all the grime and splatters.
3. Let it sit: Once the timer goes off, don’t open the microwave door immediately! Let it sit for another 5 minutes. This allows the steam to continue working its magic.
4. Wipe it clean: Carefully remove the bowl (it will be hot!). Then, using a clean cloth or sponge, wipe down the inside of the microwave. You’ll be amazed at how easily the grime comes off! For stubborn spots, you might need a little extra elbow grease, but it should be significantly easier than scrubbing from scratch.
5. Clean the turntable: Don’t forget to remove and wash the microwave turntable and the rotating ring underneath. You can usually wash these in the sink with warm, soapy water.
Unclogging Drains Naturally
Clogged drains are a common household problem, and those chemical drain cleaners can be harsh and expensive. Luckily, there’s a natural and effective solution using ingredients you probably already have in your pantry!
What you’ll need:
* 1/2 cup of baking soda
* 1 cup of white vinegar
* Boiling water
Step-by-step instructions:
1. Pour in the baking soda: Carefully pour the baking soda down the clogged drain. Try to get as much of it down the drain as possible.
2. Add the vinegar: Next, pour the vinegar down the drain. You’ll notice a fizzing reaction – that’s the baking soda and vinegar working together to break down the clog.
3. Let it fizz: Let the mixture fizz and bubble for about 30 minutes. This gives it time to dissolve the gunk causing the blockage.
4. Flush with boiling water: After 30 minutes, carefully pour a pot of boiling water down the drain. The hot water will help to flush away the loosened debris.
5. Repeat if necessary: If the drain is still clogged, repeat the process. For particularly stubborn clogs, you might need to repeat it a couple of times.
6. Prevention is key: To prevent future clogs, avoid pouring grease down the drain and use a drain strainer to catch hair and other debris.
Making Your Own All-Purpose Cleaner
Why spend a fortune on multiple cleaning products when you can make your own all-purpose cleaner with just a few simple ingredients? This cleaner is effective, eco-friendly, and smells amazing!
What you’ll need:
* Spray bottle
* 1/4 cup of white vinegar
* 1 tablespoon of baking soda
* Water
* 10-20 drops of your favorite essential oil (optional, but I love using lemon, lavender, or tea tree oil)
Step-by-step instructions:
1. Combine ingredients: In your spray bottle, combine the vinegar and baking soda. Be prepared for a little fizzing!
2. Add water: Slowly add water to the spray bottle, leaving some room at the top.
3. Add essential oils (optional): If you’re using essential oils, add them now. Essential oils not only add a pleasant scent but also have antibacterial and antiseptic properties.
4. Shake well: Secure the spray bottle lid and shake well to combine all the ingredients.
5. Use and enjoy: Your all-purpose cleaner is ready to use! Spray it on surfaces like countertops, sinks, and appliances, and then wipe clean with a cloth or sponge.
Important Note: Avoid using this cleaner on natural stone surfaces like granite or marble, as the vinegar can damage them.
Cleaning Grout Like a Boss
Dirty grout can make your entire bathroom or kitchen look dingy. But don’t worry, I’ve got a simple and effective way to clean grout without harsh chemicals.
What you’ll need:
* Baking soda
* White vinegar
* Old toothbrush or grout brush
* Spray bottle
* Water
Step-by-step instructions:
1. Make a paste: In a small bowl, mix baking soda and a little bit of water to create a thick paste.
2. Apply the paste: Apply the baking soda paste to the grout lines. You can use your fingers or a small spatula to spread it evenly.
3. Spray with vinegar: Fill a spray bottle with white vinegar and spray it onto the baking soda paste. The vinegar will react with the baking soda, creating a fizzing action that helps to lift dirt and grime.
4. Scrub the grout: Use an old toothbrush or a grout brush to scrub the grout lines. Focus on areas that are particularly dirty or stained.
5. Rinse with water: After scrubbing, rinse the grout with clean water. You can use a damp cloth or sponge to wipe away any remaining baking soda residue.
6. Dry the grout: Use a clean towel to dry the grout. This will help to prevent mildew growth.
Shining Stainless Steel Appliances
Stainless steel appliances look sleek and modern, but they can be a magnet for fingerprints and smudges. Here’s how to keep them looking their best:
What you’ll need:
* Microfiber cloth
* White vinegar or olive oil
Step-by-step instructions:
1. Clean with vinegar (optional): For heavily soiled appliances, you can first wipe them down with a cloth dampened with white vinegar. This will help to remove any grease or grime.
2. Apply olive oil: Put a small amount of olive oil on a clean microfiber cloth.
3. Wipe in the direction of the grain: Wipe the stainless steel appliance in the direction of the grain. This will help to prevent streaks.
4. Buff with a clean cloth: Use a clean, dry microfiber cloth to buff the appliance. This will remove any excess oil and leave a beautiful shine.
Important Note: Always test any cleaning product on a small, inconspicuous area of the appliance first to make sure it doesn’t damage the finish.
Freshening Up Your Mattress
We spend a lot of time on our mattresses, so it’s important to keep them clean and fresh. This simple hack will help to eliminate odors and absorb moisture.
What you’ll need:
* Baking soda
* Essential oil (optional)
* Vacuum cleaner
Step-by-step instructions:
1. Sprinkle baking soda: Sprinkle a generous amount of baking soda over the entire surface of your mattress.
2. Add essential oil (optional): If you’re using essential oil, add a few drops to the baking soda before sprinkling it on the mattress. Lavender is a great choice for promoting relaxation.
3. Let it sit: Let the baking soda sit on the mattress for at least 30 minutes, or even longer if possible. This allows the baking soda to absorb odors and moisture.
4. Vacuum thoroughly: Use a vacuum cleaner with an upholstery attachment to thoroughly vacuum the entire surface of the mattress. Make sure to get into all the nooks and crannies.
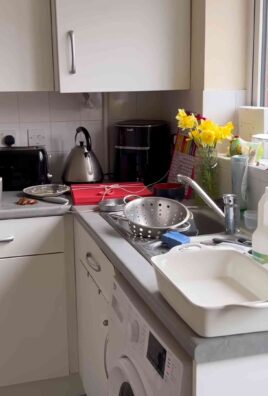
Cleaning Your Dishwasher Like a Pro
Your dishwasher works hard to clean your dishes, but it needs to be cleaned itself! This hack will help to remove food particles, mineral buildup, and odors.
What you’ll need:
* White vinegar
* Baking soda
Step-by-step instructions:
1. Remove debris: Remove any large food particles or debris from the bottom of the dishwasher.
2. Vinegar rinse: Place a dishwasher-safe cup filled with white vinegar on the top rack of the

Conclusion
So, there you have it! Mastering these simple home cleaning tricks isn’t just about achieving a spotless space; it’s about reclaiming your time, saving money, and creating a healthier, happier environment for yourself and your loved ones. We’ve explored how everyday items can become powerful cleaning agents, transforming your approach to household chores. From banishing stubborn stains with baking soda to revitalizing your furniture with vinegar, these methods are not only effective but also surprisingly easy to implement.
The beauty of these DIY solutions lies in their adaptability. Feel free to experiment with different combinations and concentrations to find what works best for your specific needs and surfaces. For instance, if you’re dealing with particularly greasy stovetops, consider adding a few drops of lemon essential oil to your baking soda paste for an extra degreasing boost and a refreshing scent. Or, if you’re looking to disinfect your cutting boards, a simple solution of hydrogen peroxide and vinegar can work wonders. Remember to always test any new cleaning solution on a small, inconspicuous area first to ensure it doesn’t damage the surface.
These home cleaning simple tricks are more than just quick fixes; they’re a sustainable and eco-friendly alternative to harsh chemical cleaners. By embracing these methods, you’re not only reducing your exposure to potentially harmful substances but also minimizing your environmental impact. Plus, you’ll be amazed at how much money you can save by ditching expensive store-bought products and utilizing items you already have in your pantry.
We understand that transitioning to a DIY cleaning routine might seem daunting at first, but we encourage you to take the plunge and experience the difference for yourself. Start with one or two tricks and gradually incorporate more into your cleaning routine as you become more comfortable. You’ll be surprised at how quickly you can transform your home into a sparkling sanctuary without breaking the bank or compromising your health.
Don’t just take our word for it – try these home cleaning simple tricks and see the results for yourself! We’re confident that you’ll be amazed at how effective and easy they are. And most importantly, we want to hear about your experiences! Share your tips, tricks, and success stories in the comments below. Let’s create a community of DIY cleaning enthusiasts who are passionate about creating clean, healthy, and sustainable homes. Your insights could inspire others to embrace these simple yet powerful methods and transform their cleaning routines for the better. So, grab your baking soda, vinegar, and lemon, and get ready to experience the magic of DIY home cleaning!
Frequently Asked Questions (FAQ)
Q: Are these DIY cleaning solutions safe for all surfaces?
A: While most of these DIY cleaning solutions are generally safe for a wide range of surfaces, it’s always best to test them on a small, inconspicuous area first. This is especially important for delicate surfaces like marble, granite, or wood. Avoid using abrasive cleaners like baking soda on easily scratched surfaces. For specific concerns about a particular surface, consult the manufacturer’s recommendations or a professional cleaning service. Always remember to wear gloves when handling cleaning solutions, even natural ones, to protect your skin.
Q: Can I mix different DIY cleaning ingredients together?
A: It’s crucial to exercise caution when mixing DIY cleaning ingredients. Some combinations can create harmful or even dangerous chemical reactions. For example, never mix bleach with vinegar or ammonia, as this can produce toxic fumes. A safe and effective combination is vinegar and baking soda, but be aware that this mixture creates a fizzing reaction that can be messy. Always research the potential reactions before mixing any cleaning ingredients, and when in doubt, use them separately.
Q: How often should I use these DIY cleaning methods?
A: The frequency of using these DIY cleaning methods depends on your individual needs and lifestyle. For high-traffic areas like kitchens and bathrooms, you may want to use them more frequently, perhaps once or twice a week. For less frequently used areas, such as guest rooms or storage spaces, a monthly cleaning may suffice. Pay attention to the level of dirt and grime buildup and adjust your cleaning schedule accordingly. Regular, light cleaning is often more effective than infrequent, heavy-duty cleaning.
Q: What are some alternatives to vinegar for cleaning?
A: While vinegar is a versatile and effective cleaning agent, some people may not like its strong smell. Fortunately, there are several alternatives you can use. Lemon juice is a great option for disinfecting and deodorizing, and it has a pleasant citrus scent. Hydrogen peroxide is another effective disinfectant and can be used to clean surfaces and remove stains. Baking soda can be used as a gentle abrasive cleaner and deodorizer. Essential oils, such as tea tree oil and lavender oil, have antibacterial and antifungal properties and can be added to cleaning solutions for an extra boost.
Q: How can I make my DIY cleaning solutions smell better?
A: One of the biggest advantages of DIY cleaning is the ability to customize the scent. Essential oils are a fantastic way to add fragrance to your cleaning solutions. Lemon, lavender, eucalyptus, and tea tree oil are all popular choices for their pleasant scents and antibacterial properties. You can also infuse vinegar with citrus peels or herbs for a more subtle and natural fragrance. Experiment with different combinations to find your favorite scents. Remember to use essential oils sparingly, as they can be potent.
Q: Are these DIY cleaning tricks effective for deep cleaning?
A: Yes, these home cleaning simple tricks can be very effective for deep cleaning, especially when used consistently and strategically. For example, a baking soda paste can be used to scrub stubborn stains from ovens and stovetops, while a vinegar solution can be used to descale showerheads and faucets. The key to successful deep cleaning with DIY methods is to allow the cleaning solutions to sit on the surface for a longer period of time to penetrate and loosen dirt and grime. You may also need to use a bit more elbow grease to scrub away stubborn stains.
Q: How do I store my DIY cleaning solutions?
A: Proper storage is essential for maintaining the effectiveness and safety of your DIY cleaning solutions. Store them in airtight containers, preferably glass or BPA-free plastic. Label each container clearly with the name of the solution and the date it was made. Keep them out of reach of children and pets. Store them in a cool, dark place to prevent degradation. Some solutions, such as those containing essential oils, may need to be stored in amber-colored bottles to protect them from light.
Q: What if these DIY cleaning tricks don’t work for a particular stain or mess?
A: While these DIY cleaning tricks are effective for many common household messes, some stains or messes may require more specialized treatment. If you’ve tried these methods and they haven’t worked, consider consulting a professional cleaning service or researching specific stain removal techniques online. There are many resources available that can provide guidance on how to tackle even the most stubborn stains. Remember to always test any new cleaning solution on a small, inconspicuous area first to avoid damaging the surface.
Leave a Comment