

Living room organization tips are your secret weapon to transforming a chaotic space into a serene sanctuary! Let’s face it, the living room is the heart of the home – a place for relaxation, entertainment, and quality time with loved ones. But all too often, it becomes a dumping ground for clutter, leaving us feeling stressed and overwhelmed.
Historically, the concept of a dedicated “living room” evolved from more formal parlors, designed to impress guests. Now, it’s a space that should reflect *your* personality and cater to *your* needs. But how can you achieve that when surrounded by piles of books, stray toys, and tangled cords?
That’s where these DIY organization hacks come in! I’m going to share some simple yet effective living room organization tips that will not only declutter your space but also enhance its functionality and aesthetic appeal. Imagine a living room where everything has its place, where you can easily find what you need, and where you can truly relax and unwind. Ready to ditch the chaos and embrace a more organized and inviting living room? Let’s get started!
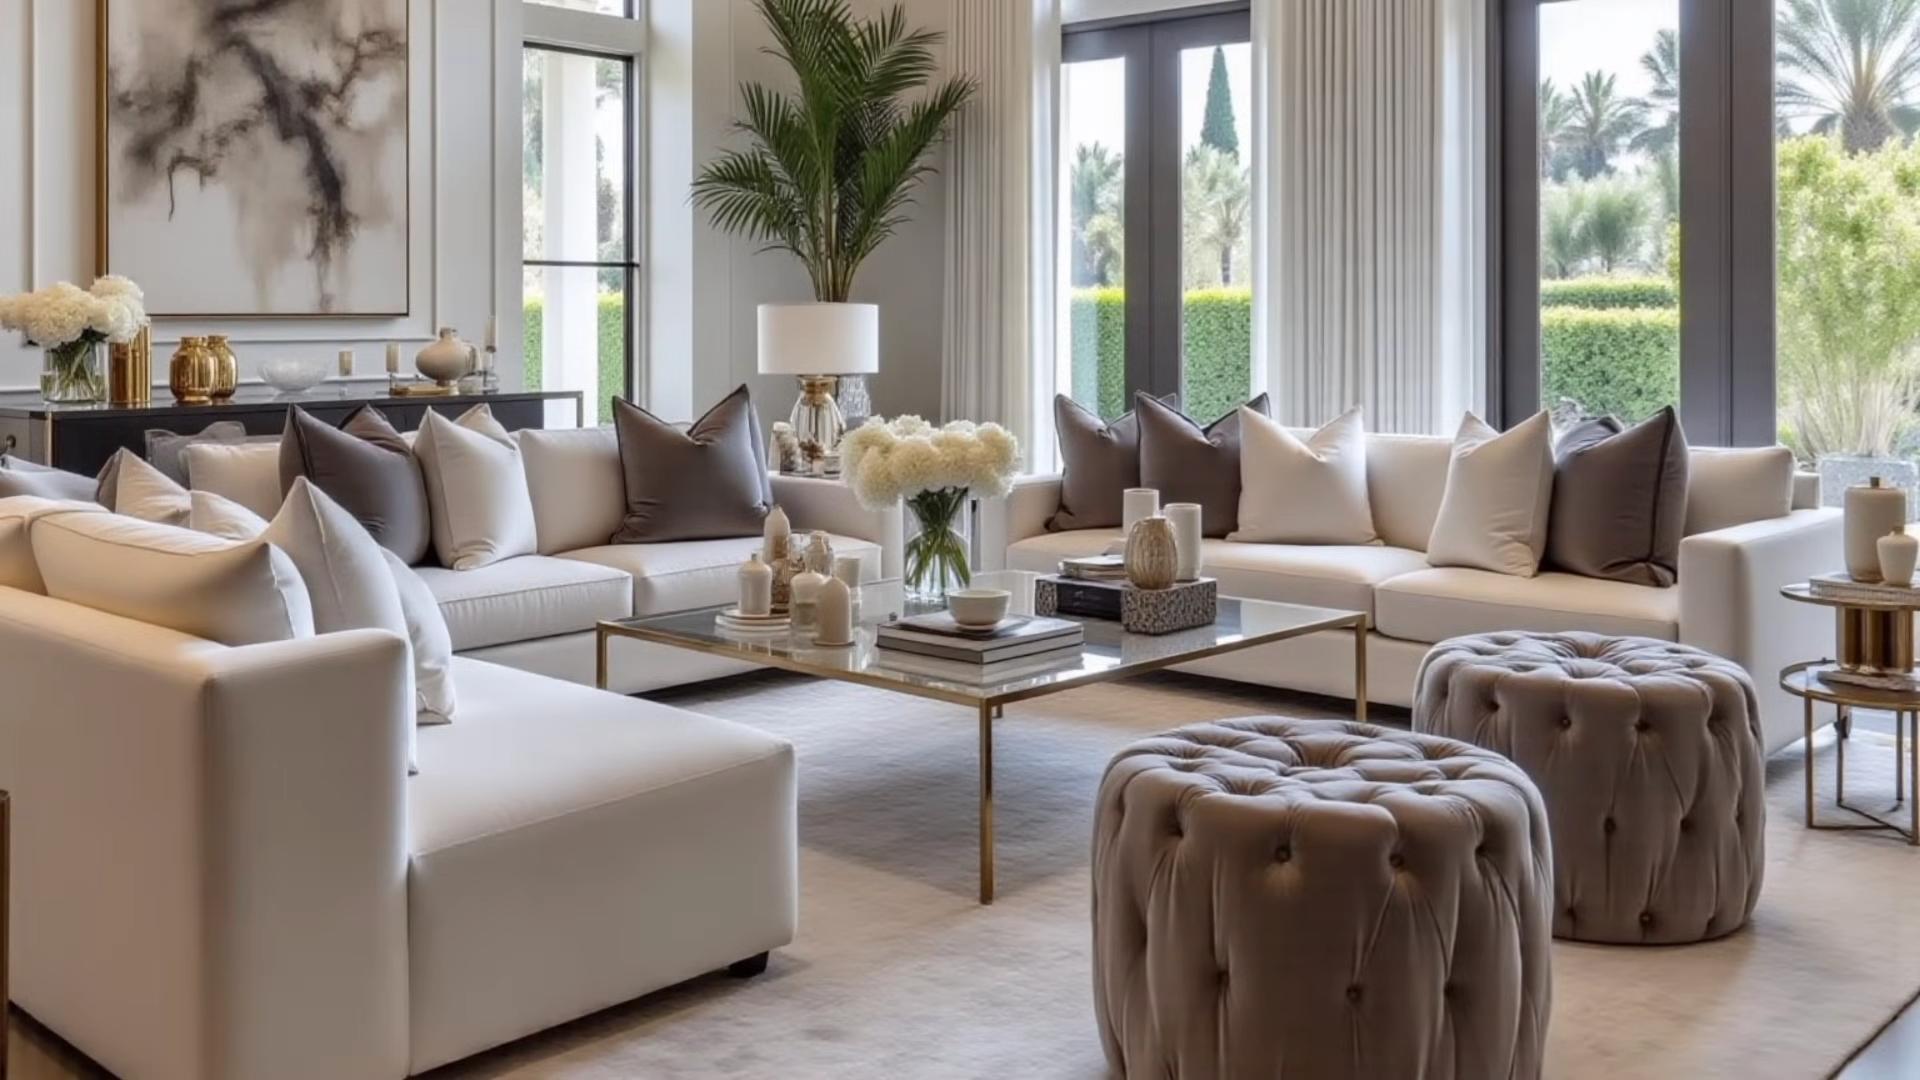
Living Room Organization: From Chaos to Cozy!
Okay, let’s face it, our living rooms often become the dumping ground for, well, everything! Toys, books, blankets, remotes – it all seems to gravitate towards that central space. But don’t despair! I’m going to walk you through some DIY organization hacks that will transform your living room from a cluttered mess into a serene and inviting haven. Get ready to roll up your sleeves and reclaim your space!
Assessing the Damage (and Planning Your Attack!)
Before we dive into the nitty-gritty, let’s take a good, hard look at the situation. This is crucial for figuring out what kind of organization solutions will work best for *your* living room.
* Take Inventory: What are the biggest clutter culprits? Is it overflowing bookshelves? Piles of magazines? Kids’ toys scattered everywhere? Make a list!
* Analyze Your Space: How much storage do you currently have? Are there any underutilized areas, like corners or the space under your coffee table?
* Consider Your Lifestyle: How do you *actually* use your living room? Is it primarily for watching TV, reading, entertaining, or a combination of everything? This will help you prioritize what needs to be easily accessible and what can be tucked away.
* Set Realistic Goals: Don’t try to overhaul everything in one day. Start with a small area and gradually work your way through the room. Rome wasn’t built in a day, and neither is an organized living room!
DIY Storage Solutions: Unleash Your Inner Handyman (or Handywoma!)
Now for the fun part! We’re going to create some clever storage solutions that are both functional and stylish.
1. Repurposed Ladder Bookshelf
This is one of my favorite projects because it’s so simple and adds a rustic touch to any living room.
Materials You’ll Need:
* An old wooden ladder (check flea markets, garage sales, or even your own garage!)
* Sandpaper
* Paint or stain (optional)
* Wooden planks (the width of your ladder rungs)
* Screws or nails
* Drill (if using screws)
Step-by-Step Instructions:
1. Prep the Ladder: Give the ladder a good cleaning to remove any dirt or debris. Then, sand it down to smooth out any rough edges.
2. Paint or Stain (Optional): If you want to change the color of the ladder, now’s the time to paint or stain it. Let it dry completely before moving on. I personally love a distressed look!
3. Measure and Cut the Planks: Measure the distance between the ladder rungs to determine the length of the wooden planks you’ll need. Cut the planks to size.
4. Attach the Planks: Place a plank on each set of rungs, creating shelves. Secure them with screws or nails. If using screws, pre-drill pilot holes to prevent the wood from splitting.
5. Style Your New Bookshelf: Lean the ladder bookshelf against a wall and start filling it with books, plants, and decorative items. Voila! A unique and functional storage solution.
2. Ottoman with Hidden Storage
Ottomans are great for kicking up your feet, but they can also be a secret storage weapon!
Materials You’ll Need:
* An old coffee table or sturdy box (the base of your ottoman)
* Plywood (for the lid)
* Foam padding
* Fabric of your choice
* Hinges
* Screws
* Staple gun
* Drill
* Wood glue (optional)
Step-by-Step Instructions:
1. Prepare the Base: If you’re using a coffee table, remove the legs (if desired). If you’re using a box, make sure it’s sturdy enough to support weight.
2. Create the Lid: Cut a piece of plywood to the size of the coffee table or box. This will be the lid of your ottoman.
3. Add Foam Padding: Cut the foam padding to the same size as the plywood lid. Attach it to the lid using spray adhesive or wood glue.
4. Upholster the Lid: Cut the fabric a few inches larger than the lid on all sides. Place the fabric face down on a flat surface. Center the lid (foam side down) on the fabric.
5. Staple the Fabric: Starting on one side, pull the fabric taut and staple it to the underside of the plywood lid. Repeat on the opposite side, pulling the fabric tight to avoid wrinkles. Continue stapling around the entire lid, working your way around the corners. Fold the corners neatly and staple them in place.
6. Attach the Hinges: Attach the hinges to the underside of the lid and the top edge of the coffee table or box. Use screws to secure them in place.
7. Enjoy Your Hidden Storage: Now you have a stylish ottoman with a secret compartment for storing blankets, magazines, or anything else you want to keep out of sight!
3. DIY Floating Shelves
Floating shelves are a fantastic way to add storage without taking up valuable floor space.
Materials You’ll Need:
* Wooden planks (choose the size and type of wood you prefer)
* Floating shelf brackets
* Screws
* Drill
* Level
* Stud finder (optional, but recommended)
* Sandpaper
* Paint or stain (optional)
Step-by-Step Instructions:
1. Prepare the Wood: Sand the wooden planks to smooth out any rough edges. If you want to paint or stain them, do so now and let them dry completely.
2. Locate Wall Studs: Use a stud finder to locate the wall studs where you want to install the shelves. This is important for ensuring that the shelves are strong and secure. If you can’t find studs, you’ll need to use drywall anchors.
3. Mark the Bracket Locations: Hold the floating shelf brackets against the wall and mark the locations of the screw holes. Use a level to ensure that the brackets are straight.
4. Drill Pilot Holes: Drill pilot holes at the marked locations.
5. Attach the Brackets: Attach the brackets to the wall using screws. If you’re using drywall anchors, follow the instructions that come with the anchors.
6. Slide the Shelves onto the Brackets: Slide the wooden planks onto the floating shelf brackets.
7. Secure the Shelves (Optional): Some floating shelf brackets have small screws that you can use to secure the shelves to the brackets. This is optional, but it can help prevent the shelves from sliding off.
Clever Clutter Control: Taming the Chaos
Now that we’ve created some extra storage, let’s focus on managing the clutter that tends to accumulate in the living room.
* Remote Control Organizer: Instead of letting remotes roam free, corral them in a stylish container or caddy. You can even repurpose a small desk organizer.
* Magazine Rack Makeover: Give an old magazine rack a fresh coat of paint or cover it with fabric to match your decor. This will keep your magazines organized and prevent them from piling up on the coffee table.
* Toy Storage Solutions: Invest in some attractive storage bins or baskets for toys. Label them clearly so kids know where to put their toys when they’re finished playing.
* Blanket Ladder or Basket: Keep blankets neatly folded on a decorative ladder or in a large basket. This will keep them within easy reach without cluttering up the sofa.
* Cord Management: Tame those tangled cords with cable ties, cord organizers, or even decorative boxes. This will not only make your living room look neater but also prevent tripping hazards.
The Finishing Touches: Creating a Cozy and Organized Space
Once you’ve tackled the clutter and implemented some storage solutions, it’s time to add the finishing touches that will make your living room feel truly cozy and organized.
* Declutter Regularly: Make it a habit to declutter your living room on a regular basis. This will prevent clutter from building up and keep your space looking its best.
* Add Personal Touches: Decorate your living room with items that you love and that reflect your personality. This will make the space feel more inviting and comfortable.
* Create a Cozy Atmosphere: Add soft lighting, comfortable seating, and plenty of pillows and blankets to create a cozy and inviting atmosphere.
* Don’t Be Afraid to Experiment: Try different organization solutions and see what works best for you. There’s no one-size-fits-all approach to living room organization.
Remember, the goal is to create a living room that is both functional and beautiful. By following these DIY organization hacks, you can transform your space from a cluttered mess into a serene and inviting haven that you’
Conclusion
Transforming your living room into a haven of tranquility and order doesn’t require a complete overhaul or a hefty investment. This simple yet effective DIY organization trick, focusing on maximizing vertical space and decluttering strategically, is a game-changer for any home. We’ve shown you how to create a more functional and aesthetically pleasing living area, regardless of its size or layout.
The beauty of this approach lies in its adaptability. Feel free to personalize it to suit your unique needs and style. For instance, if you’re a book lover, consider installing floating shelves to create a mini-library, showcasing your favorite reads while keeping them neatly organized. If you have a collection of decorative items, use tiered trays or shadow boxes to display them in an eye-catching and clutter-free manner. You can even incorporate elements of biophilic design by adding plants to your vertical storage solutions, bringing a touch of nature indoors.
Don’t be afraid to experiment with different storage containers and organizational tools. Woven baskets, clear plastic bins, and decorative boxes can all be used to conceal clutter and add visual appeal. Labeling everything clearly will also help you maintain order and easily find what you need. Remember, the goal is to create a system that works for you and your lifestyle.
This DIY organization trick is more than just a quick fix; it’s a sustainable solution that can help you maintain a clutter-free living room for the long term. By implementing these strategies, you’ll not only create a more visually appealing space but also improve your overall well-being. A clutter-free environment can reduce stress, improve focus, and promote a sense of calm and relaxation.
We wholeheartedly encourage you to try this DIY organization trick in your own living room. The results may surprise you! It’s a small investment of time and effort that can yield significant rewards in terms of improved functionality, aesthetics, and overall quality of life.
Once you’ve transformed your living room, we’d love to hear about your experience. Share your before-and-after photos, tips, and variations in the comments section below. Your insights could inspire others to embark on their own organization journey and create a living space they truly love. Let’s build a community of organized and happy homeowners!
Ready to reclaim your living room?
Don’t wait any longer to create the organized and inviting living room you’ve always dreamed of. This DIY organization trick is the perfect starting point. So, gather your supplies, roll up your sleeves, and get ready to transform your space. We’re confident that you’ll be thrilled with the results. Happy organizing!
FAQ
Here are some frequently asked questions to help you successfully implement this DIY living room organization trick:
Q: What are the most essential supplies I’ll need for this DIY organization project?
A: The specific supplies will depend on your chosen organization methods, but some essentials include:
* **Storage containers:** Baskets, bins, boxes, and drawers are crucial for concealing clutter and organizing items. Choose containers that complement your décor and fit your storage spaces.
* **Shelving units:** Floating shelves, bookcases, and tiered shelves are excellent for maximizing vertical space and displaying items.
* **Hooks and hangers:** These are perfect for hanging coats, bags, scarves, and other items, keeping them off the floor and furniture.
* **Labels:** Labeling your storage containers will help you easily identify their contents and maintain order.
* **Cleaning supplies:** Before you start organizing, give your living room a thorough cleaning to remove dust, dirt, and debris.
* **Measuring tape:** Accurate measurements are essential for ensuring that your storage solutions fit properly in your space.
* **Decluttering tools:** Trash bags, donation boxes, and recycling bins will help you get rid of unwanted items.
Q: How do I decide what to keep, donate, or discard during the decluttering process?
A: Decluttering can be challenging, but here are some helpful guidelines:
* **The one-year rule:** If you haven’t used an item in the past year, consider donating or discarding it.
* **The sentimental value test:** If an item has sentimental value, ask yourself if it brings you joy or if it’s simply taking up space. If it brings you joy, find a special place to display it. If not, consider letting it go.
* **The functionality test:** If an item is broken or no longer serves its purpose, discard it.
* **The duplication test:** If you have multiple items that serve the same purpose, keep the best one and donate or discard the rest.
* **The “would I buy this again?” test:** If you wouldn’t buy the item again today, it’s probably time to let it go.
Q: How can I maximize vertical space in my living room if I have limited floor space?
A: Vertical space is your best friend when floor space is limited. Here are some ideas:
* **Install floating shelves:** Floating shelves are a stylish and space-saving way to display books, plants, and decorative items.
* **Use tall bookcases:** Tall bookcases can provide ample storage without taking up too much floor space.
* **Hang wall-mounted organizers:** Wall-mounted organizers are perfect for storing magazines, mail, and other small items.
* **Use vertical storage containers:** Tall, narrow storage containers can maximize vertical space in closets and cabinets.
* **Hang curtains high:** Hanging curtains closer to the ceiling can create the illusion of a taller room.
Q: What are some creative ways to hide clutter in my living room?
A: Hiding clutter is key to creating a visually appealing living room. Here are some ideas:
* **Use storage ottomans:** Storage ottomans provide comfortable seating and hidden storage for blankets, pillows, and other items.
* **Use baskets and bins:** Baskets and bins can be used to conceal clutter on shelves, under tables, and in corners.
* **Use decorative boxes:** Decorative boxes are perfect for storing small items like remote controls, keys, and chargers.
* **Use furniture with built-in storage:** Sofas, coffee tables, and end tables with built-in storage can provide hidden storage for a variety of items.
* **Use a room divider with storage:** A room divider with built-in shelves or drawers can provide both privacy and storage.
Q: How can I maintain an organized living room once I’ve decluttered and organized it?
A: Maintaining an organized living room requires consistent effort. Here are some tips:
* **Make it a habit to put things away immediately:** Don’t let clutter accumulate. Put things away as soon as you’re finished using them.
* **Designate a place for everything:** Everything in your living room should have a designated place. This will make it easier to put things away and prevent clutter from accumulating.
* **Declutter regularly:** Set aside a few minutes each week to declutter your living room. This will prevent clutter from building up and becoming overwhelming.
* **Involve the whole family:** Get everyone in the family involved in maintaining an organized living room. This will make it easier to keep the space tidy.
* **Reward yourself:** Reward yourself for maintaining an organized living room. This will help you stay motivated and committed to your organization goals.
Q: What if I have children? How can I incorporate their toys and belongings into the living room organization?
A: Organizing a living room with children requires a bit more creativity and planning. Here are some tips:
* **Designate a specific area for toys:** Create a designated play area in the living room, using rugs, playmats, or furniture to define the space.
* **Use toy storage containers:** Baskets, bins, and toy chests are essential for storing toys and keeping them organized.
* **Rotate toys regularly:** Rotate toys regularly to keep children engaged and prevent them from becoming overwhelmed. Store the toys that are not in use in a closet or storage room.
* **Involve children in the organization process:** Teach children how to put away their toys and belongings. Make it a fun and engaging activity.
* **Use furniture with built-in toy storage:** Ottomans, coffee tables, and benches with built-in toy storage can provide hidden storage for toys and other children’s items.
By following these tips and adapting them to your specific needs and preferences, you can create an organized and inviting living room that you and your family will enjoy for years to come. Remember, the key is to be patient, persistent, and creative. Good luck!


Leave a Comment