

Mushroom Growing Recycled Cans: Imagine harvesting fresh, delicious mushrooms right from your kitchen counter, all thanks to something you were about to toss in the recycling bin! Sounds too good to be true? Well, get ready to be amazed because this DIY project is not only incredibly easy but also a fantastic way to reduce waste and enjoy the fruits (or fungi!) of your labor.
The practice of cultivating mushrooms has ancient roots, dating back centuries in various cultures. From the medicinal uses in traditional Chinese medicine to the culinary delights in European cuisine, mushrooms have always held a special place in human history. Now, you can participate in this age-old tradition in a modern, eco-friendly way.
In today’s world, sustainability is more important than ever. We’re all looking for ways to reduce our environmental impact, and this mushroom growing recycled cans project is a perfect example of how small changes can make a big difference. Plus, let’s be honest, who wouldn’t love to save money on groceries and have a constant supply of fresh, organic mushrooms at their fingertips? This DIY trick is perfect for urban dwellers with limited space, budget-conscious foodies, and anyone who wants to add a touch of green to their home. So, grab those empty cans, and let’s get growing!

Grow Mushrooms in Recycled Cans: A Fun and Sustainable DIY Project
Hey there, fellow DIY enthusiasts! Ever thought about growing your own gourmet mushrooms right in your kitchen? It’s easier than you think, and what’s even better, we’re going to do it using recycled cans! This project is not only a fun way to get fresh, delicious mushrooms, but it’s also a fantastic way to reduce waste and learn about the fascinating world of fungi. Let’s dive in!
What You’ll Need
Before we get started, let’s gather all the necessary materials. Don’t worry, most of these are easily accessible and budget-friendly.
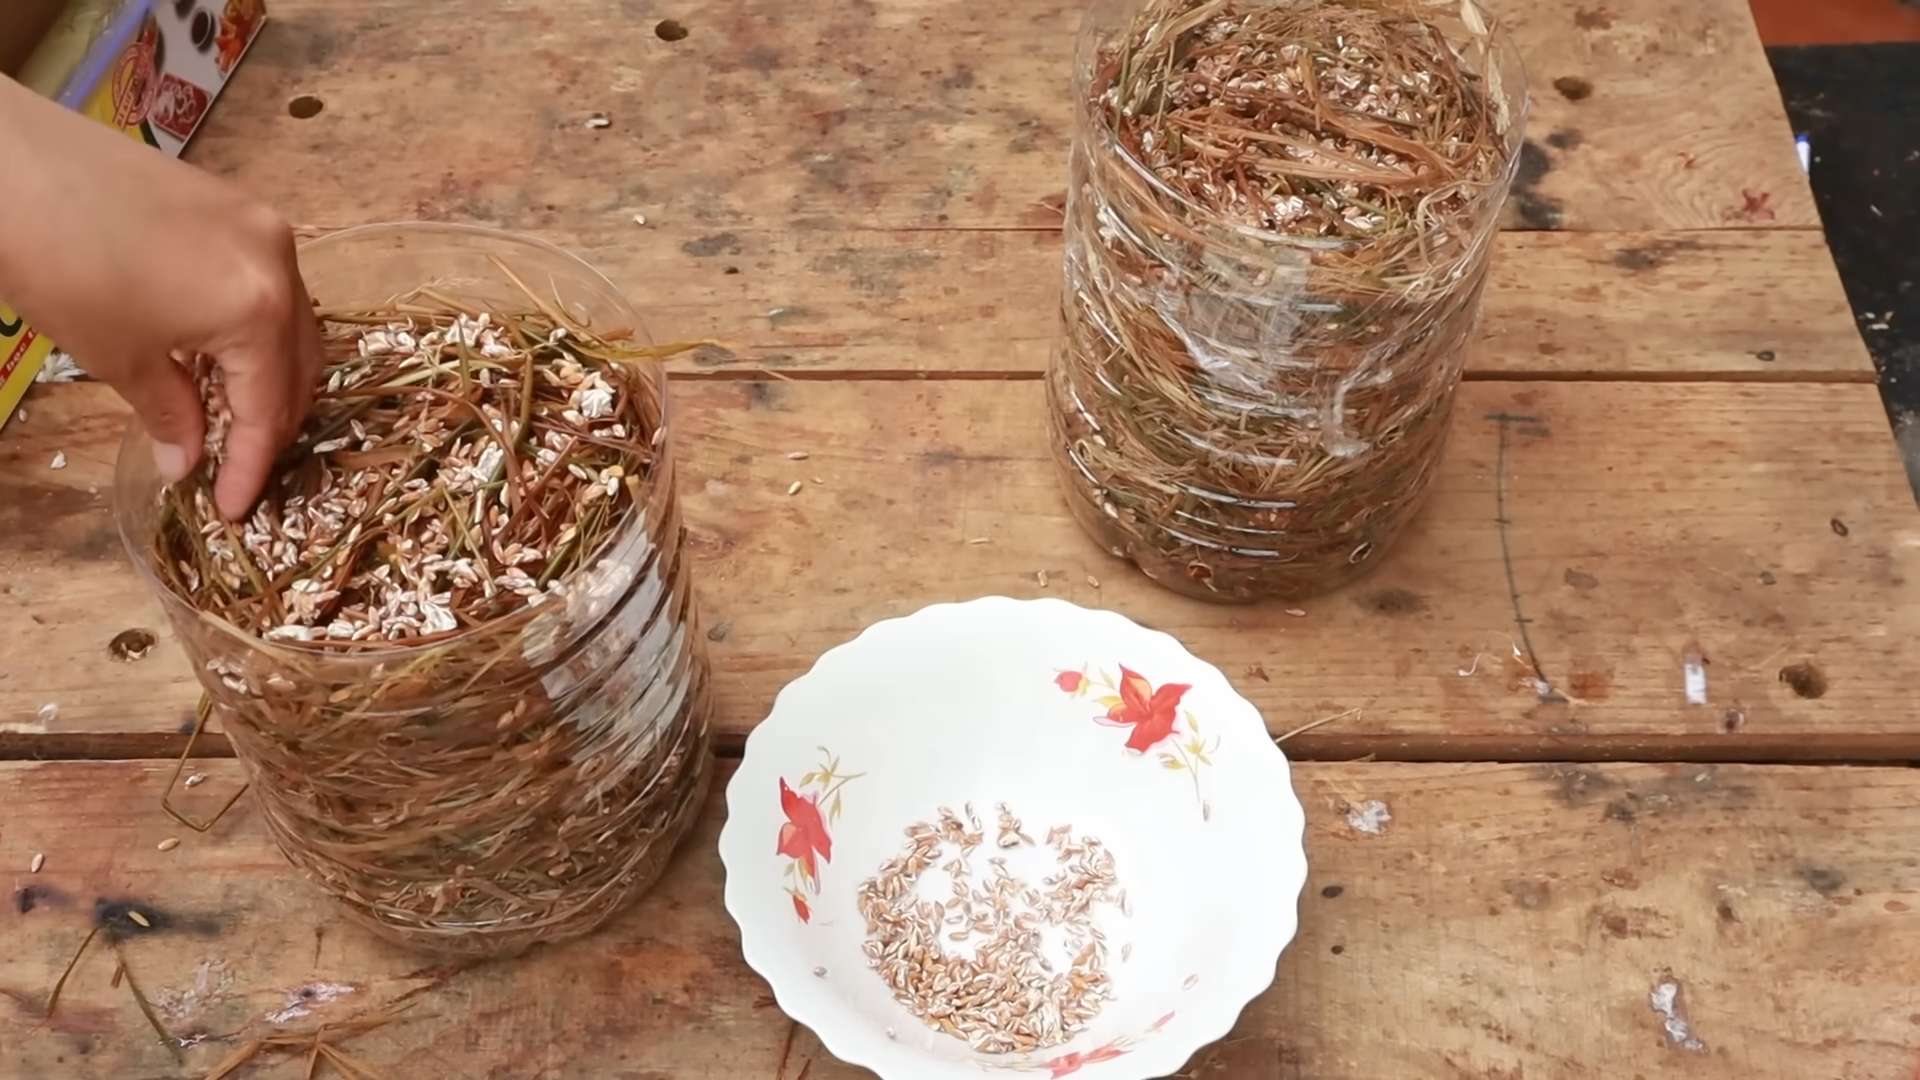
* **Recycled Cans:** Think large coffee cans, vegetable cans, or even paint cans (thoroughly cleaned, of course!). The size will determine how many mushrooms you can grow. Aim for cans that are at least 4 inches in diameter and 6 inches tall.
* **Mushroom Spawn:** This is the “seed” of the mushroom. You can purchase mushroom spawn online or at a local gardening supply store. Oyster mushrooms are a great choice for beginners because they are relatively easy to grow and tolerate a wider range of conditions. Other options include shiitake, lion’s mane, or even button mushrooms, depending on your preference and availability.
* **Substrate:** This is the material the mushrooms will grow on. For this project, we’ll use a mixture of pasteurized straw and coffee grounds. Straw provides the bulk and nutrients, while coffee grounds add nitrogen and help retain moisture.
* **Straw:** You can use wheat straw, oat straw, or even shredded paper (unprinted and free of chemicals). Make sure it’s clean and free of mold.
* **Coffee Grounds:** Used coffee grounds are perfect! Ask your local coffee shop if they have any to spare – they’re usually happy to get rid of them.
* **Spray Bottle:** For misting the mushrooms to keep them hydrated.
* **Gloves:** To keep your hands clean and prevent contamination.
* **Drill or Punch:** To create drainage holes in the cans.
* **Plastic Wrap or a Clear Plastic Bag:** To create a humid environment.
* **Rubbing Alcohol:** For sanitizing your work area and tools.
Preparing the Cans
The first step is to get our recycled cans ready for their new purpose: mushroom farms!
1. **Cleaning:** Thoroughly clean the cans with soap and water to remove any residue. If you’re using paint cans, make sure all the paint is removed, especially from the inside. Rinse them well and let them dry completely.
2. **Drainage Holes:** This is crucial to prevent waterlogging, which can lead to mold and ruin your mushroom crop. Using a drill or punch, create several drainage holes in the bottom of each can. I usually go for about 4-6 holes, evenly spaced.
3. **Sanitizing:** Wipe down the inside of the cans with rubbing alcohol to kill any potential contaminants. Let them air dry completely before moving on.
Preparing the Substrate
Now, let’s get the mushroom food ready! This involves pasteurizing the straw and mixing it with the coffee grounds.
1. **Pasteurizing the Straw:** Pasteurization kills off competing organisms that could hinder mushroom growth. There are a few ways to do this:
* **Hot Water Method:** This is my preferred method. Chop the straw into small pieces (2-3 inches long). Place the straw in a large pot or container and pour boiling water over it until it’s completely submerged. Let it soak for at least an hour, or even better, overnight. This will soften the straw and kill off any unwanted bacteria or fungi.
* **Steaming Method:** If you have a large steamer, you can steam the straw for about an hour. This is a gentler method that preserves more nutrients.
2. **Draining the Straw:** After pasteurization, drain the straw thoroughly. You want it to be moist but not soaking wet. Squeeze out any excess water. The straw should feel like a wrung-out sponge.
3. **Mixing with Coffee Grounds:** In a large container, mix the pasteurized straw with the used coffee grounds. A good ratio is about 4 parts straw to 1 part coffee grounds. Mix it well to ensure the coffee grounds are evenly distributed throughout the straw.
Inoculating the Cans
This is where the magic happens! We’re going to introduce the mushroom spawn to the substrate, allowing it to colonize and eventually produce mushrooms.
1. **Layering the Substrate and Spawn:** Start by placing a layer of the straw and coffee ground mixture at the bottom of the can, about 1-2 inches thick.
2. **Adding the Spawn:** Sprinkle a generous layer of mushroom spawn over the substrate. Don’t be shy! You want to make sure the spawn is in good contact with the straw.
3. **Repeating the Layers:** Continue layering the substrate and spawn, alternating between the two. The final layer should be a layer of the substrate. Leave about an inch of space at the top of the can.
4. **Gently Pressing Down:** Gently press down on the substrate to compact it slightly. This will help the spawn make better contact with the straw.
Incubation
Now comes the waiting game. We need to provide the right conditions for the mushroom spawn to colonize the substrate.
1. **Creating a Humid Environment:** Cover the top of the can with plastic wrap or place it inside a clear plastic bag. This will help retain moisture and create a humid environment, which is essential for mushroom growth.
2. **Finding the Right Location:** Place the can in a dark, cool, and humid location. A basement, closet, or even under the sink can work well. The ideal temperature is between 65-75°F (18-24°C).
3. **Monitoring and Misting:** Check the can regularly to make sure the substrate is still moist. If it starts to dry out, mist it lightly with a spray bottle. Avoid overwatering, as this can lead to mold.
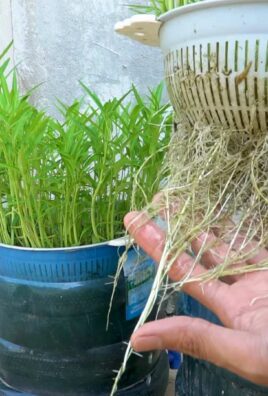
4. **Waiting for Colonization:** It will take several weeks for the mushroom spawn to fully colonize the substrate. You’ll know it’s happening when you see white, fuzzy mycelium (the vegetative part of the mushroom) spreading throughout the straw. This is a good sign!
Fruiting
Once the substrate is fully colonized, it’s time to trigger fruiting, which is when the mushrooms start to grow.
1. **Introducing Light and Fresh Air:** Move the can to a location with indirect light and good ventilation. Mushrooms need light to develop properly, but direct sunlight can dry them out. Fresh air is also important to prevent the buildup of carbon dioxide.
2. **Maintaining Humidity:** Continue to mist the mushrooms regularly to keep them hydrated. You can also increase humidity by placing a tray of water near the can or using a humidifier.
3. **Watching for Pinheads:** After a few days, you should start to see tiny mushroom “pinheads” forming on the surface of the substrate. These are the baby mushrooms!
4. **Harvesting:** The mushrooms will grow rapidly over the next few days. Harvest them when they are fully developed but before they start to drop spores. You can harvest them by gently twisting them off the substrate.
Troubleshooting
Sometimes things don’t go exactly as planned. Here are a few common problems and how to fix them:
* **Mold:** If you see green, black, or other colored mold growing on the substrate, it means there’s contamination. Unfortunately, you’ll need to discard the entire batch. To prevent mold, make sure to pasteurize the straw properly and sanitize your work area and tools.
* **Slow Colonization:** If the spawn is taking a long time to colonize the substrate, it could be due to low temperature, low humidity, or poor spawn quality. Make sure the temperature is within the ideal range, keep the substrate moist, and use fresh, high-quality spawn.
* **Small Mushrooms:** If the mushrooms are small and stunted, it could be due to lack of light, fresh air, or nutrients. Move the can to a location with more light and ventilation, and consider adding more coffee grounds to the substrate to provide additional nutrients.
* **No Mushrooms:** If you don’t see any mushrooms at all, it could be due to a number of factors, including poor spawn quality, improper substrate preparation, or unfavorable environmental conditions. Double-check all the steps and make sure you’re providing the right conditions for mushroom growth.
Enjoying Your Homegrown Mushrooms
Congratulations! You’ve successfully grown your own mushrooms in recycled cans. Now it’s time to enjoy the fruits (or rather, fungi) of your labor.
* **Cooking:** Freshly grown mushrooms are incredibly flavorful and versatile. You can sauté them, grill them, add them to soups and stews, or even use them as a topping for pizza.
* **Storage:** Store your harvested mushrooms in the refrigerator in a paper bag. They should last for several days.
* **Second Flush:** After harvesting the first flush of mushrooms, you can often get
Conclusion
So, there you have it! Transforming humble recycled cans into thriving mushroom farms is not just a fun project; it’s a sustainable, cost-effective, and incredibly rewarding way to enjoy fresh, delicious mushrooms right from your own home. We’ve walked you through the process, highlighting the simplicity and accessibility of this DIY method. Forget expensive mushroom growing kits or relying solely on store-bought options. This approach empowers you to take control of your food source, reduce waste, and connect with nature in a tangible way.
The beauty of this project lies in its adaptability. While we’ve focused on using oyster mushrooms, known for their ease of cultivation and rapid growth, don’t be afraid to experiment! You could try growing shiitake mushrooms, although they require a slightly different substrate and longer incubation period. Or perhaps explore the world of wine cap mushrooms, which can even be grown outdoors in a shaded area using wood chips and straw. The possibilities are truly endless.
Consider these variations to personalize your mushroom growing experience:
* Spice it up: Add spent coffee grounds to your substrate for an extra boost of nutrients and a richer flavor in your mushrooms.
* Vertical gardening: Stack multiple cans vertically to create a space-saving mushroom tower.
* Community project: Organize a mushroom growing workshop with friends or neighbors to share the knowledge and resources.
* Gift giving: A can of homegrown mushrooms makes a unique and thoughtful gift for foodies and gardening enthusiasts.
But the real magic happens when you actually try it. Don’t just read about it – do it! Gather your recycled cans, prepare your substrate, and embark on this exciting journey of cultivating your own mushrooms. The satisfaction of harvesting your first flush of homegrown mushrooms is unparalleled. It’s a testament to your resourcefulness, your commitment to sustainability, and your ability to create something amazing from something seemingly ordinary.
We are confident that this DIY mushroom growing method using recycled cans will not only provide you with a steady supply of fresh mushrooms but also inspire you to explore other sustainable living practices. It’s a small step towards a more eco-conscious lifestyle, one delicious mushroom at a time.
So, what are you waiting for? Grab those cans, get your hands dirty, and start growing! And most importantly, we want to hear about your experiences. Share your photos, tips, and challenges in the comments below. Let’s build a community of mushroom enthusiasts and inspire others to embrace the joy of homegrown food. Let us know what kind of mushroom growing you are doing and what challenges you are facing. Your feedback is invaluable, and we can’t wait to see what you create!
Frequently Asked Questions (FAQ)
What types of mushrooms are best suited for growing in recycled cans?
Oyster mushrooms (Pleurotus ostreatus) are generally considered the easiest and most rewarding for beginners. They are fast-growing, relatively tolerant of varying conditions, and produce abundant yields. Other options include shiitake mushrooms (Lentinula edodes), which require a more specialized substrate and longer incubation, and wine cap mushrooms (Stropharia rugosoannulata), which can be grown outdoors in wood chips and straw. The key is to research the specific needs of each mushroom species and ensure you can provide the appropriate environment.
What is the best substrate to use for growing mushrooms in cans?
A common and effective substrate for oyster mushrooms is pasteurized straw. You can chop the straw into small pieces (2-3 inches) and soak it in hot water (around 160-180°F) for an hour to kill off competing organisms. Allow the straw to cool and drain before mixing it with mushroom spawn. Other options include coffee grounds (which can be added to straw or used alone), sawdust, and cardboard. The ideal substrate will depend on the specific mushroom species you are growing.
How do I pasteurize the substrate properly?
Pasteurization is crucial to eliminate competing molds and bacteria that can hinder mushroom growth. For straw, the hot water method described above is effective. Ensure the water temperature is high enough to kill off unwanted organisms but not so high that it damages the straw. For other substrates like coffee grounds or sawdust, you can use a pressure cooker or oven to pasteurize them. Research the specific pasteurization requirements for each substrate to ensure optimal results.
How much mushroom spawn do I need for each can?
A general guideline is to use about 10-20% spawn by weight of the substrate. For example, if you have 1 pound of pasteurized straw, you would use 0.1-0.2 pounds of mushroom spawn. It’s better to err on the side of using slightly more spawn than less, as this will help the mushrooms colonize the substrate more quickly and effectively.
How long does it take for mushrooms to grow in recycled cans?
The time it takes for mushrooms to grow depends on several factors, including the mushroom species, the substrate, the temperature, and the humidity. Oyster mushrooms typically start pinning (forming small mushroom buds) within 1-2 weeks of inoculation and can be harvested within 3-5 days after pinning. Shiitake mushrooms take significantly longer, often requiring several months to fruit.
What are the ideal temperature and humidity conditions for growing mushrooms in cans?
Oyster mushrooms generally prefer temperatures between 60-75°F and high humidity (80-90%). You can maintain humidity by misting the cans regularly with water or placing them in a humidity tent or greenhouse. Shiitake mushrooms prefer cooler temperatures (50-65°F) and also require high humidity. Monitor the temperature and humidity levels regularly and adjust as needed to create the optimal growing environment.
How do I know when the mushrooms are ready to harvest?
Oyster mushrooms are ready to harvest when the caps are fully formed but before they start to release spores. The edges of the caps will still be slightly curled downwards. Shiitake mushrooms are ready to harvest when the caps have fully opened and the gills are visible. Harvest the mushrooms by gently twisting or cutting them off at the base of the stem.
Can I get multiple flushes of mushrooms from the same can?
Yes, you can typically get multiple flushes of mushrooms from the same can. After harvesting the first flush, allow the substrate to rest for a week or two and then rehydrate it by misting it with water. You may need to repeat this process several times to get additional flushes. The number of flushes you can get will depend on the quality of the substrate and the growing conditions.
What do I do with the spent substrate after harvesting the mushrooms?
The spent substrate is a valuable resource that can be used in several ways. You can add it to your compost pile, use it as mulch in your garden, or even feed it to your worms in a vermicomposting system. The spent substrate is rich in nutrients and beneficial microbes that can improve soil health and plant growth.
Are there any risks associated with growing mushrooms at home?
The main risk associated with growing mushrooms at home is the potential for contamination by molds or bacteria. To minimize this risk, it’s important to use sterile techniques when preparing the substrate and inoculating the spawn. Also, ensure proper ventilation to prevent the buildup of moisture, which can promote mold growth. If you are unsure about identifying a particular mushroom, it’s best to err on the side of caution and discard it. Always research the specific mushroom species you are growing and follow safe handling practices.
Leave a Comment