

Napa Cabbage Growing Hacks: Ever dreamt of harvesting crisp, juicy Napa cabbage right from your own backyard? I know I have! There’s something incredibly satisfying about nurturing your own food, and Napa cabbage, with its delicate flavor and versatility, is a fantastic choice. But let’s be honest, sometimes growing these beauties can feel like a bit of a challenge. That’s where these DIY tricks come in handy!
Napa cabbage, also known as Chinese cabbage, has a rich history deeply rooted in Asian cuisine. For centuries, it’s been a staple ingredient, prized for its mild taste and crunchy texture. From kimchi to stir-fries, its uses are endless. But you don’t need to be a seasoned gardener to enjoy the fruits (or rather, vegetables!) of your labor.
Many gardeners struggle with common Napa cabbage growing problems like bolting, pest infestations, and nutrient deficiencies. These issues can lead to disappointing harvests and a lot of frustration. That’s why I’ve compiled these simple, yet effective, Napa Cabbage Growing Hacks to help you overcome these hurdles and achieve a bountiful crop. These DIY solutions are designed to be easy to implement, even if you’re a beginner. So, get ready to roll up your sleeves and discover the secrets to successful Napa cabbage cultivation!
Napa Cabbage Growing Hacks: From Seed to Stir-Fry Success!
Okay, fellow garden enthusiasts! Let’s talk Napa cabbage. It’s delicious in stir-fries, slaws, and even kimchi, but growing it can sometimes feel like a battle against pests and bolting. But fear not! I’m here to share my tried-and-true Napa cabbage growing hacks that will have you harvesting beautiful, crisp heads in no time.
Choosing the Right Variety and Timing
First things first, variety and timing are key. Napa cabbage is a cool-season crop, meaning it thrives in cooler temperatures and longer days can trigger bolting (premature flowering).
* Variety Selection: Opt for bolt-resistant varieties. Some of my favorites include ‘Blues’, ‘Optiko’, and ‘China Pride’. These are specifically bred to withstand temperature fluctuations and resist bolting.
* Timing is Everything: Napa cabbage is best grown in spring or fall. For a spring crop, start seeds indoors 4-6 weeks before the last expected frost. For a fall crop, direct sow seeds in late summer, about 6-8 weeks before the first expected frost. I usually aim for a late July/early August sowing for my fall harvest.
* Succession Planting: To extend your harvest, consider succession planting. Sow a new batch of seeds every 2-3 weeks. This way, you’ll have a continuous supply of Napa cabbage throughout the season.
Preparing the Soil: Napa Cabbage’s Happy Place
Napa cabbage is a heavy feeder, meaning it needs nutrient-rich soil to thrive. Proper soil preparation is crucial for healthy growth and preventing common problems.
* Soil Type: Napa cabbage prefers well-drained, fertile soil with a pH between 6.0 and 7.5. If your soil is heavy clay or sandy, amend it with plenty of organic matter.
* Amendments: Before planting, amend the soil with compost, well-rotted manure, or other organic matter. I usually add a generous layer of compost (about 2-3 inches) and mix it thoroughly into the top 6-8 inches of soil.
* Fertilizer: Napa cabbage benefits from a balanced fertilizer. I like to use a slow-release organic fertilizer with an NPK ratio of around 10-10-10. Apply the fertilizer according to the package directions.
* Raised Beds: If you have heavy clay soil or poor drainage, consider growing Napa cabbage in raised beds. Raised beds provide better drainage and allow the soil to warm up faster in the spring.
Starting Seeds Indoors (Spring Crop)
If you’re starting seeds indoors for a spring crop, here’s what you need to do:
1. Gather Your Supplies: You’ll need seed starting trays or pots, seed starting mix, Napa cabbage seeds, a spray bottle, and a grow light (optional).
2. Sow the Seeds: Fill the seed starting trays or pots with seed starting mix. Moisten the mix with a spray bottle. Sow 2-3 seeds per cell or pot, about ¼ inch deep.
3. Provide Light and Warmth: Place the trays or pots in a warm location (around 70-75°F) and provide plenty of light. A grow light is ideal, but a sunny windowsill can also work.
4. Keep the Soil Moist: Keep the soil consistently moist, but not soggy. Water gently with a spray bottle as needed.
5. Thin the Seedlings: Once the seedlings have emerged and have a few true leaves, thin them to one seedling per cell or pot. Choose the strongest, healthiest seedling and snip off the others at the soil line.
6. Harden Off the Seedlings: Before transplanting the seedlings outdoors, you’ll need to harden them off. This means gradually exposing them to outdoor conditions over a period of 7-10 days. Start by placing the seedlings in a sheltered location for a few hours each day, gradually increasing the amount of time they spend outdoors.
Direct Sowing Seeds (Fall Crop)
For a fall crop, direct sowing is the way to go.
1. Prepare the Seedbed: Clear the planting area of weeds and debris. Amend the soil with compost and fertilizer as described above.
2. Sow the Seeds: Sow the seeds directly into the soil, about ¼ inch deep and 1-2 inches apart.
3. Water Gently: Water the seedbed gently to moisten the soil.
4. Keep the Soil Moist: Keep the soil consistently moist until the seeds germinate.
5. Thin the Seedlings: Once the seedlings have emerged and have a few true leaves, thin them to 12-18 inches apart.
Transplanting Seedlings (Spring Crop)
Once your seedlings are hardened off, it’s time to transplant them into the garden.
1. Choose a Cloudy Day: Transplanting is best done on a cloudy day to minimize stress on the seedlings.
2. Prepare the Planting Holes: Dig holes that are slightly larger than the root balls of the seedlings. Space the holes 12-18 inches apart.
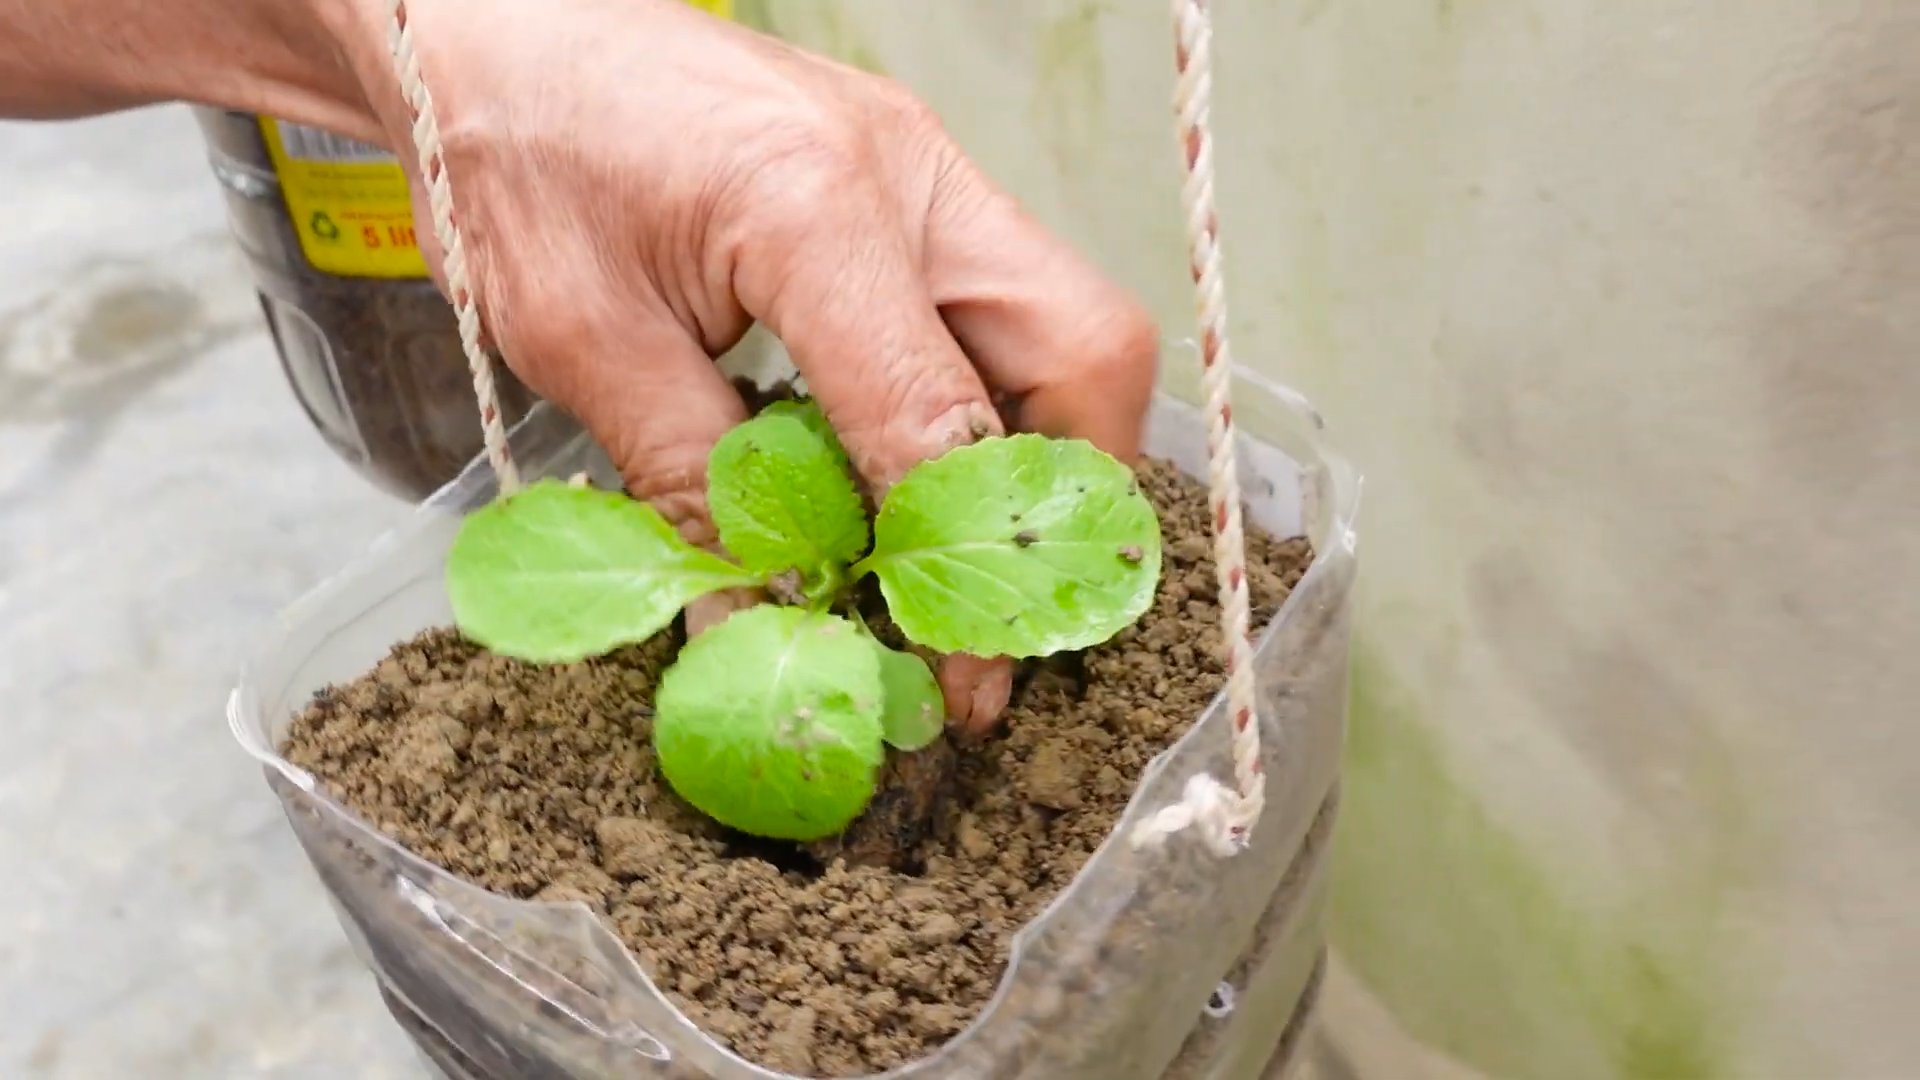
3. Gently Remove the Seedlings: Gently remove the seedlings from their trays or pots, being careful not to damage the roots.
4. Plant the Seedlings: Place the seedlings in the planting holes and backfill with soil. Gently firm the soil around the base of the plants.
5. Water Thoroughly: Water the seedlings thoroughly after planting.
6. Mulch: Apply a layer of mulch around the plants to help retain moisture and suppress weeds. I like to use straw or shredded leaves.
Watering and Fertilizing: Keeping Napa Cabbage Happy
Consistent watering and fertilization are essential for healthy Napa cabbage growth.
* Watering: Napa cabbage needs consistent moisture, especially during hot, dry weather. Water deeply and regularly, aiming for about 1-1.5 inches of water per week. Avoid overhead watering, as this can promote fungal diseases. Drip irrigation or soaker hoses are ideal.
* Fertilizing: Side-dress the plants with a nitrogen-rich fertilizer every 2-3 weeks. I like to use fish emulsion or compost tea. Follow the package directions for application rates.
Pest and Disease Control: Protecting Your Crop
Napa cabbage is susceptible to several pests and diseases, but with proper prevention and control measures, you can keep your crop healthy.
* Cabbage Worms: These are the larvae of cabbage white butterflies and can quickly decimate your Napa cabbage plants. Handpick them off the plants or use Bacillus thuringiensis (Bt), a biological insecticide.
* Flea Beetles: These tiny beetles can create small holes in the leaves. Cover the plants with row covers to prevent flea beetles from reaching them.
* Aphids: These small, sap-sucking insects can weaken the plants. Spray them off with a strong stream of water or use insecticidal soap.
* Slugs and Snails: These pests can chew large holes in the leaves. Handpick them off the plants or use slug bait.
* Clubroot: This fungal disease causes swollen, distorted roots. Prevent clubroot by practicing crop rotation and maintaining a soil pH between 6.0 and 7.5. If you have clubroot in your soil, avoid planting brassicas (cabbage, broccoli, cauliflower, etc.) in that area for several years.
* Downy Mildew: This fungal disease causes yellow spots on the upper surface of the leaves and a white, downy growth on the underside. Improve air circulation around the plants and avoid overhead watering to prevent downy mildew.
Row Covers: Your Secret Weapon
Row covers are lightweight fabric covers that protect your plants from pests and temperature extremes. They’re a game-changer for growing Napa cabbage!
* Pest Protection: Row covers create a physical barrier that prevents pests like cabbage worms, flea beetles, and aphids from reaching your plants.
* Temperature Regulation: Row covers can help protect your plants from frost and excessive heat.
* Installation: Simply drape the row cover over your plants and secure the edges with soil, rocks, or stakes. Make sure the row cover is loose enough to allow the plants to grow.
Harvesting: The Sweet Reward
Napa cabbage is ready to harvest when the heads are firm and compact.
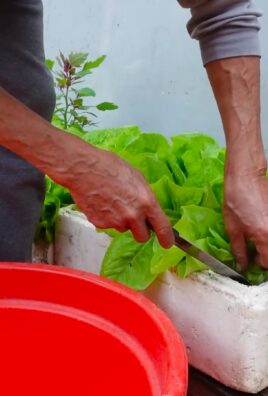
1. Check for Firmness: Gently squeeze the head. If it feels firm and solid, it’s ready to harvest.
2. Cut the Head: Use a sharp knife to cut the head from the base of the plant.
3. Remove Outer Leaves: Remove any damaged or discolored outer leaves.
4. Store Properly: Store Napa cabbage in the refrigerator for up to 2 weeks. Wrap it loosely in plastic wrap or a plastic bag.
Bolting Prevention: Keeping Your Cabbage Happy
Bolting is when your Napa cabbage prematurely flowers, making the leaves bitter and inedible.
Conclusion
So, there you have it! Growing your own Napa cabbage doesn’t have to be a daunting task. By implementing these simple yet effective DIY tricks, you’re not just increasing your chances of a bountiful harvest; you’re also connecting with nature and enjoying the satisfaction of nurturing your own food. The beauty of these methods lies in their adaptability. Whether you’re dealing with limited space, challenging soil conditions, or pesky pests, there’s a Napa cabbage growing hack here to help you overcome those hurdles.
Why is this a must-try? Because these aren’t just theoretical tips; they’re practical solutions born from experience. They address common challenges faced by home gardeners, offering tangible ways to improve your Napa cabbage yield and quality. Imagine the crisp, sweet flavor of your own homegrown Napa cabbage in your favorite stir-fries, salads, or kimchi. That’s the reward waiting for you!
Consider these variations to personalize your Napa cabbage growing experience:
* **Companion Planting Power:** Experiment with different companion plants. Marigolds can deter nematodes, while dill attracts beneficial insects. Observe how different combinations affect your Napa cabbage growth.
* **Soil Amendments Exploration:** Don’t be afraid to get your hands dirty and test different soil amendments. Compost tea can provide a nutrient boost, while aged manure improves soil structure.
* **Pest Control Alternatives:** If you’re looking for even more natural pest control options, try introducing beneficial nematodes to your soil or using diatomaceous earth around your plants.
* **Succession Planting:** To enjoy a continuous harvest, try succession planting. Sow new seeds every few weeks to ensure a steady supply of Napa cabbage throughout the growing season.
We wholeheartedly encourage you to try these Napa cabbage growing hacks. Start small, experiment, and adapt the techniques to suit your specific environment and needs. The journey of growing your own food is a rewarding one, filled with learning and delicious results.
But the most important part is sharing your experience! We want to hear about your successes, your challenges, and any variations you discover along the way. Did a particular companion plant work wonders for your Napa cabbage? Did you find a unique way to deter pests? Share your insights in the comments below! Your experiences can help other gardeners and contribute to a collective knowledge base of Napa cabbage growing wisdom. Let’s cultivate a community of thriving Napa cabbage growers!
Frequently Asked Questions (FAQ)
Q: What is the best time of year to plant Napa cabbage?
A: Napa cabbage is a cool-season crop, so the best time to plant it depends on your climate. In general, you should aim to plant it in early spring or late summer/early fall. For a spring crop, start seeds indoors 6-8 weeks before the last expected frost. For a fall crop, direct sow seeds in late summer or early fall, about 6-8 weeks before the first expected frost. Avoid planting during the hottest months of summer, as the heat can cause the cabbage to bolt (go to seed).
Q: How much sunlight does Napa cabbage need?
A: Napa cabbage needs at least 6 hours of sunlight per day to thrive. Choose a location in your garden that receives full sun for optimal growth. If you live in a particularly hot climate, some afternoon shade can be beneficial to prevent bolting.
Q: What kind of soil is best for growing Napa cabbage?
A: Napa cabbage prefers well-drained, fertile soil that is rich in organic matter. The ideal soil pH is between 6.0 and 7.5. Before planting, amend your soil with compost, aged manure, or other organic matter to improve its fertility and drainage.
Q: How often should I water Napa cabbage?
A: Napa cabbage needs consistent moisture to grow properly. Water deeply and regularly, especially during dry periods. Aim to keep the soil consistently moist but not waterlogged. Mulching around the plants can help retain moisture and suppress weeds.
Q: What are some common pests and diseases that affect Napa cabbage?
A: Napa cabbage can be susceptible to several pests and diseases, including cabbage worms, aphids, flea beetles, clubroot, and black rot. To prevent pest and disease problems, practice good garden hygiene, such as removing plant debris and rotating crops. Use row covers to protect plants from pests. If necessary, use organic pest control methods, such as insecticidal soap or neem oil. For diseases, choose disease-resistant varieties and ensure good air circulation.
Q: How do I harvest Napa cabbage?
A: Napa cabbage is ready to harvest when the head is firm and compact. The exact time will depend on the variety and growing conditions, but it typically takes about 70-80 days from planting. To harvest, cut the head at the base with a sharp knife.
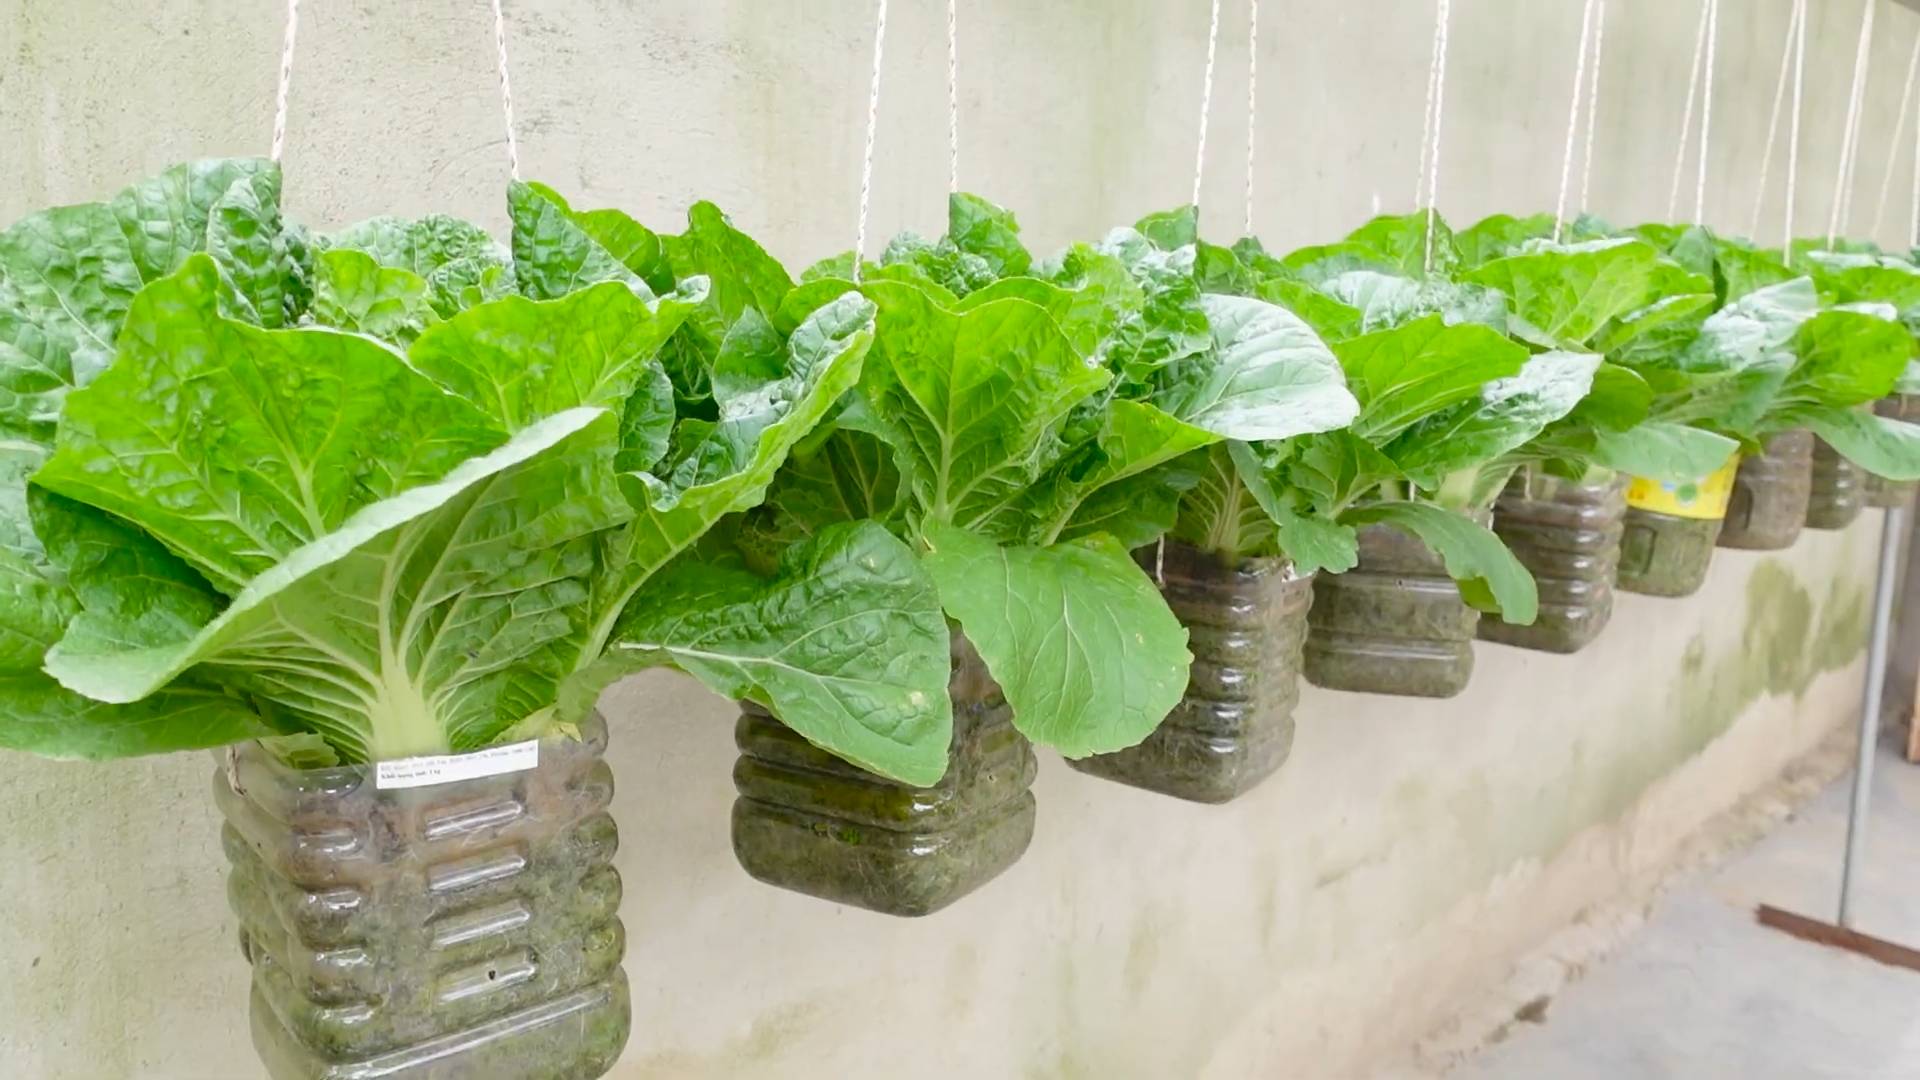
Q: Can I grow Napa cabbage in containers?
A: Yes, you can grow Napa cabbage in containers, but you’ll need to choose a large container (at least 12 inches in diameter) to accommodate the plant’s root system. Use a well-draining potting mix and provide regular watering and fertilization. Container-grown Napa cabbage may require more frequent watering than plants grown in the ground.
Q: How do I prevent Napa cabbage from bolting?
A: Bolting (going to seed) can be a problem with Napa cabbage, especially in hot weather. To prevent bolting, choose bolt-resistant varieties, plant at the appropriate time of year, and provide adequate water and shade during hot periods. Mulching around the plants can also help keep the soil cool.
Q: What are some good companion plants for Napa cabbage?
A: Good companion plants for Napa cabbage include:
* **Aromatic herbs:** Rosemary, sage, thyme, and oregano can deter pests.
* **Marigolds:** Repel nematodes and other pests.
* **Dill:** Attracts beneficial insects that prey on cabbage pests.
* **Clovers:** Fix nitrogen in the soil and suppress weeds.
* **Onions and garlic:** Deter cabbage moths.
Avoid planting Napa cabbage near other brassicas (e.g., broccoli, cauliflower, kale), as they can attract the same pests and diseases.
Q: How can I use Napa cabbage in cooking?
A: Napa cabbage is a versatile vegetable that can be used in a variety of dishes. It can be eaten raw in salads, stir-fried, steamed, or used to make kimchi. It has a mild, slightly sweet flavor and a crisp texture. It’s a great addition to soups, stews, and slaws.
Q: Is Napa cabbage growing organically difficult?
A: Not at all! In fact, Napa cabbage responds very well to organic growing methods. Focus on building healthy soil with compost and other organic amendments. Use natural pest control methods like row covers, insecticidal soap, and hand-picking pests. Choose disease-resistant varieties and practice crop rotation. With a little care and attention, you can easily grow delicious, organic Napa cabbage in your own backyard.
Leave a Comment