

Olive oil wood polish recipe: Ever looked at your dull, scratched wooden furniture and wished you could restore its shine without breaking the bank or resorting to harsh chemicals? I know I have! For centuries, people have been using natural ingredients to care for their homes, and olive oil has been a star player in that tradition. Think about it – olive oil, a staple in Mediterranean cultures for cooking and beauty, also holds the secret to beautifully polished wood.
This isn’t just some trendy DIY; it’s a return to simpler, more sustainable living. In a world saturated with commercial products, many of us are yearning for natural alternatives. That’s where this olive oil wood polish recipe comes in. It’s incredibly easy, cost-effective, and uses ingredients you likely already have in your pantry.
Why do you need this DIY trick? Because it’s a game-changer! It breathes new life into tired furniture, protects the wood from drying out, and leaves a gorgeous, natural sheen. Plus, you’ll avoid the harsh chemicals found in many commercial polishes, making it safer for your family and the environment. So, let’s ditch the store-bought stuff and get ready to create a stunning, all-natural wood polish that will have your furniture looking its absolute best!
DIY Olive Oil Wood Polish: Revive Your Furniture with Natural Shine!
Hey there, fellow DIY enthusiasts! Are your wooden furniture pieces looking a little dull and lifeless? Before you rush out to buy expensive commercial polishes filled with questionable chemicals, let me share a super simple, all-natural, and incredibly effective wood polish recipe using something you probably already have in your kitchen: olive oil!
This DIY olive oil wood polish is not only budget-friendly but also environmentally conscious. It’s perfect for reviving the natural beauty of your wood furniture, leaving it with a healthy, radiant glow. Plus, it’s safe for your family and pets!
What You’ll Need: The Essentials
Before we dive into the polishing process, let’s gather our supplies. This is a pretty straightforward project, so the list is short and sweet:
* Olive Oil: Extra virgin olive oil is my go-to, but any type of olive oil will work.
* Lemon Juice (or White Vinegar): This acts as a mild cleaner and helps cut through any grime. Plus, the lemon juice smells amazing!
* Soft Cloths: You’ll need at least two – one for applying the polish and another for buffing. Microfiber cloths are ideal because they’re super absorbent and won’t leave lint behind.
* Spray Bottle (Optional): This makes application a breeze, but you can also apply the polish directly to your cloth.
* Bowl or Small Container: For mixing the polish.
The Magic Ratio: Getting the Recipe Right
The key to a great wood polish is getting the proportions right. Here’s my tried-and-true recipe:
* 2 parts Olive Oil
* 1 part Lemon Juice (or White Vinegar)
So, for example, you could use 1/2 cup of olive oil and 1/4 cup of lemon juice. Adjust the quantities based on how much polish you think you’ll need. It’s always better to make a little less and then mix more if you run out.
Step-by-Step Guide: Polishing Like a Pro
Now for the fun part! Let’s get your furniture looking its best.
1. Prepare Your Furniture: Before you even think about applying the polish, you need to clean your furniture. Dust it thoroughly with a dry cloth or a vacuum cleaner with a soft brush attachment. Remove any loose debris or spills. If there are any stubborn stains, you might need to use a slightly damp cloth with a mild soap solution. Make sure the furniture is completely dry before proceeding.
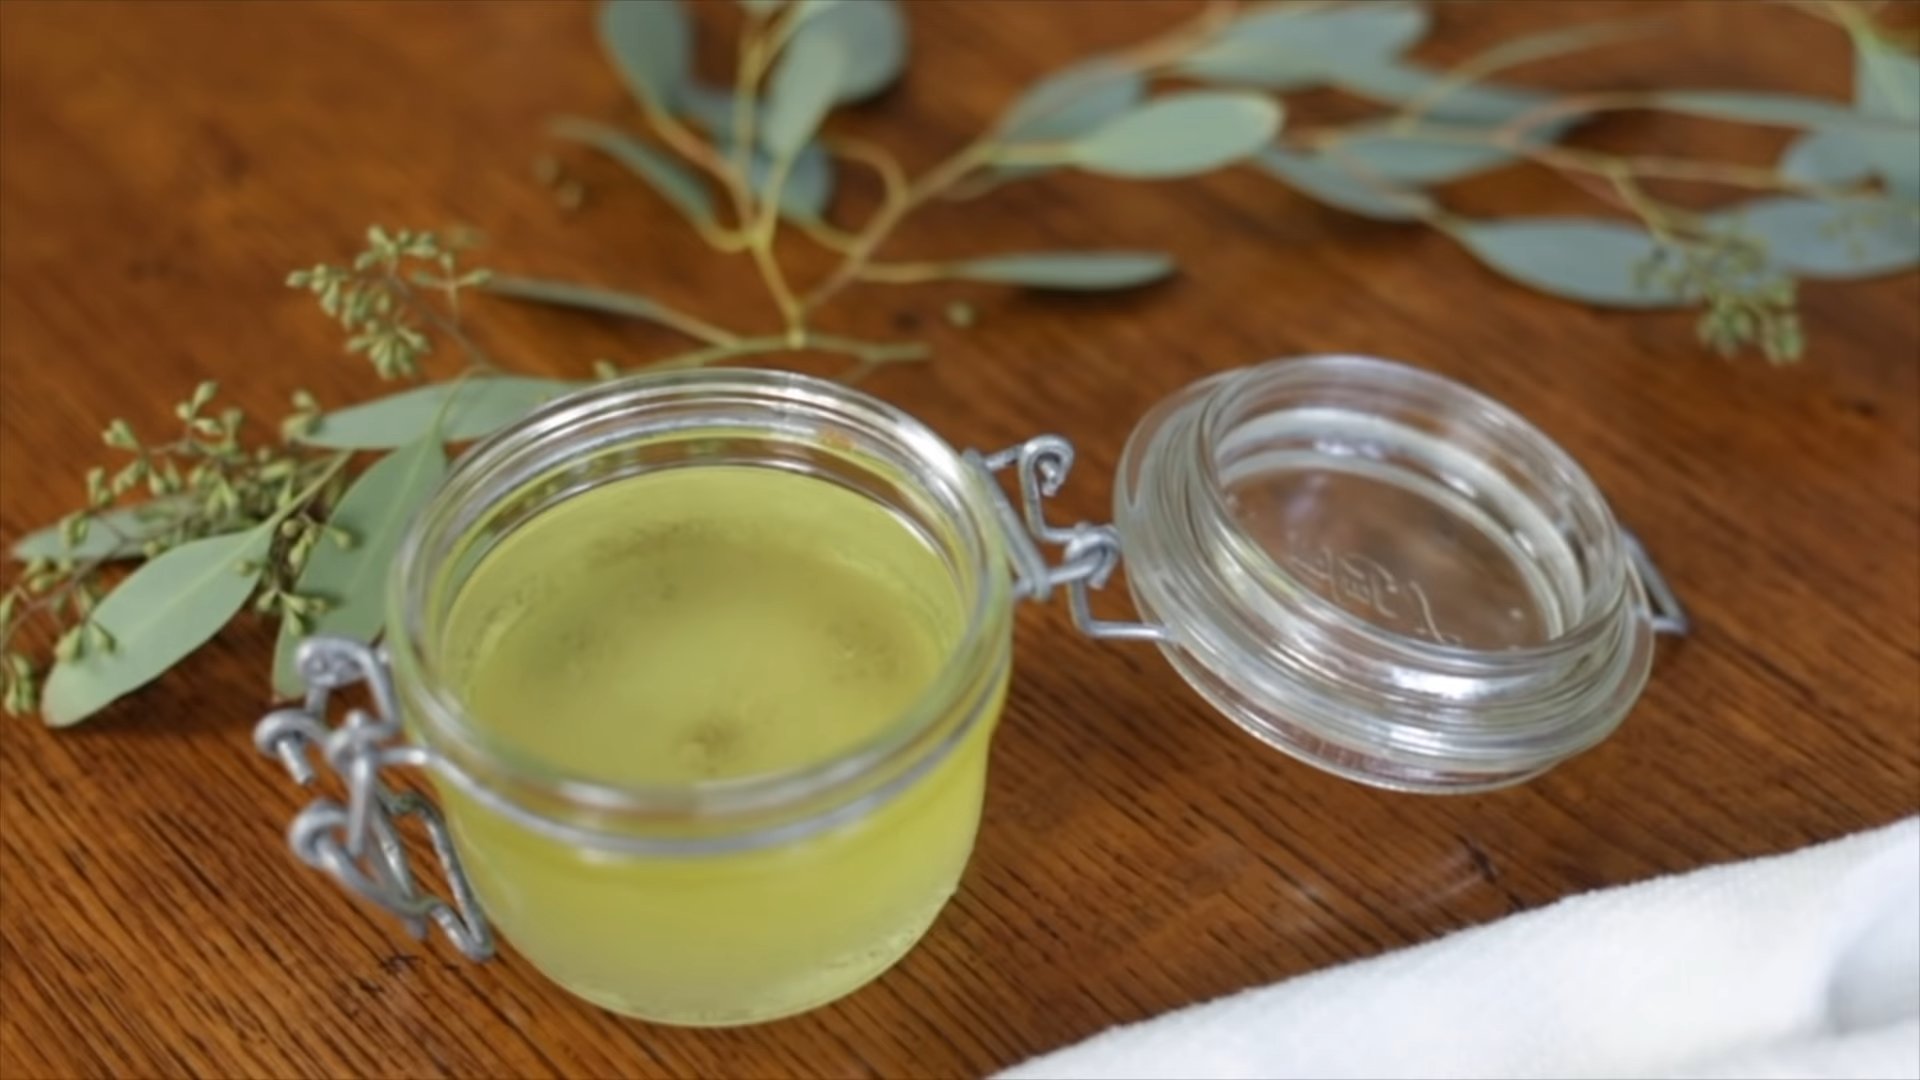
2. Mix the Polish: In your bowl or small container, combine the olive oil and lemon juice (or white vinegar). Stir well to ensure the ingredients are properly mixed. If you’re using a spray bottle, pour the mixture into it.
3. Test in an Inconspicuous Area: This is crucial! Before applying the polish to the entire piece of furniture, test it in a hidden area, like the back of a leg or underneath a tabletop. This will ensure that the polish doesn’t react negatively with the wood finish. Apply a small amount of polish, let it sit for a few minutes, and then wipe it off. Check for any discoloration, stickiness, or other adverse effects. If everything looks good, you can proceed to the next step.
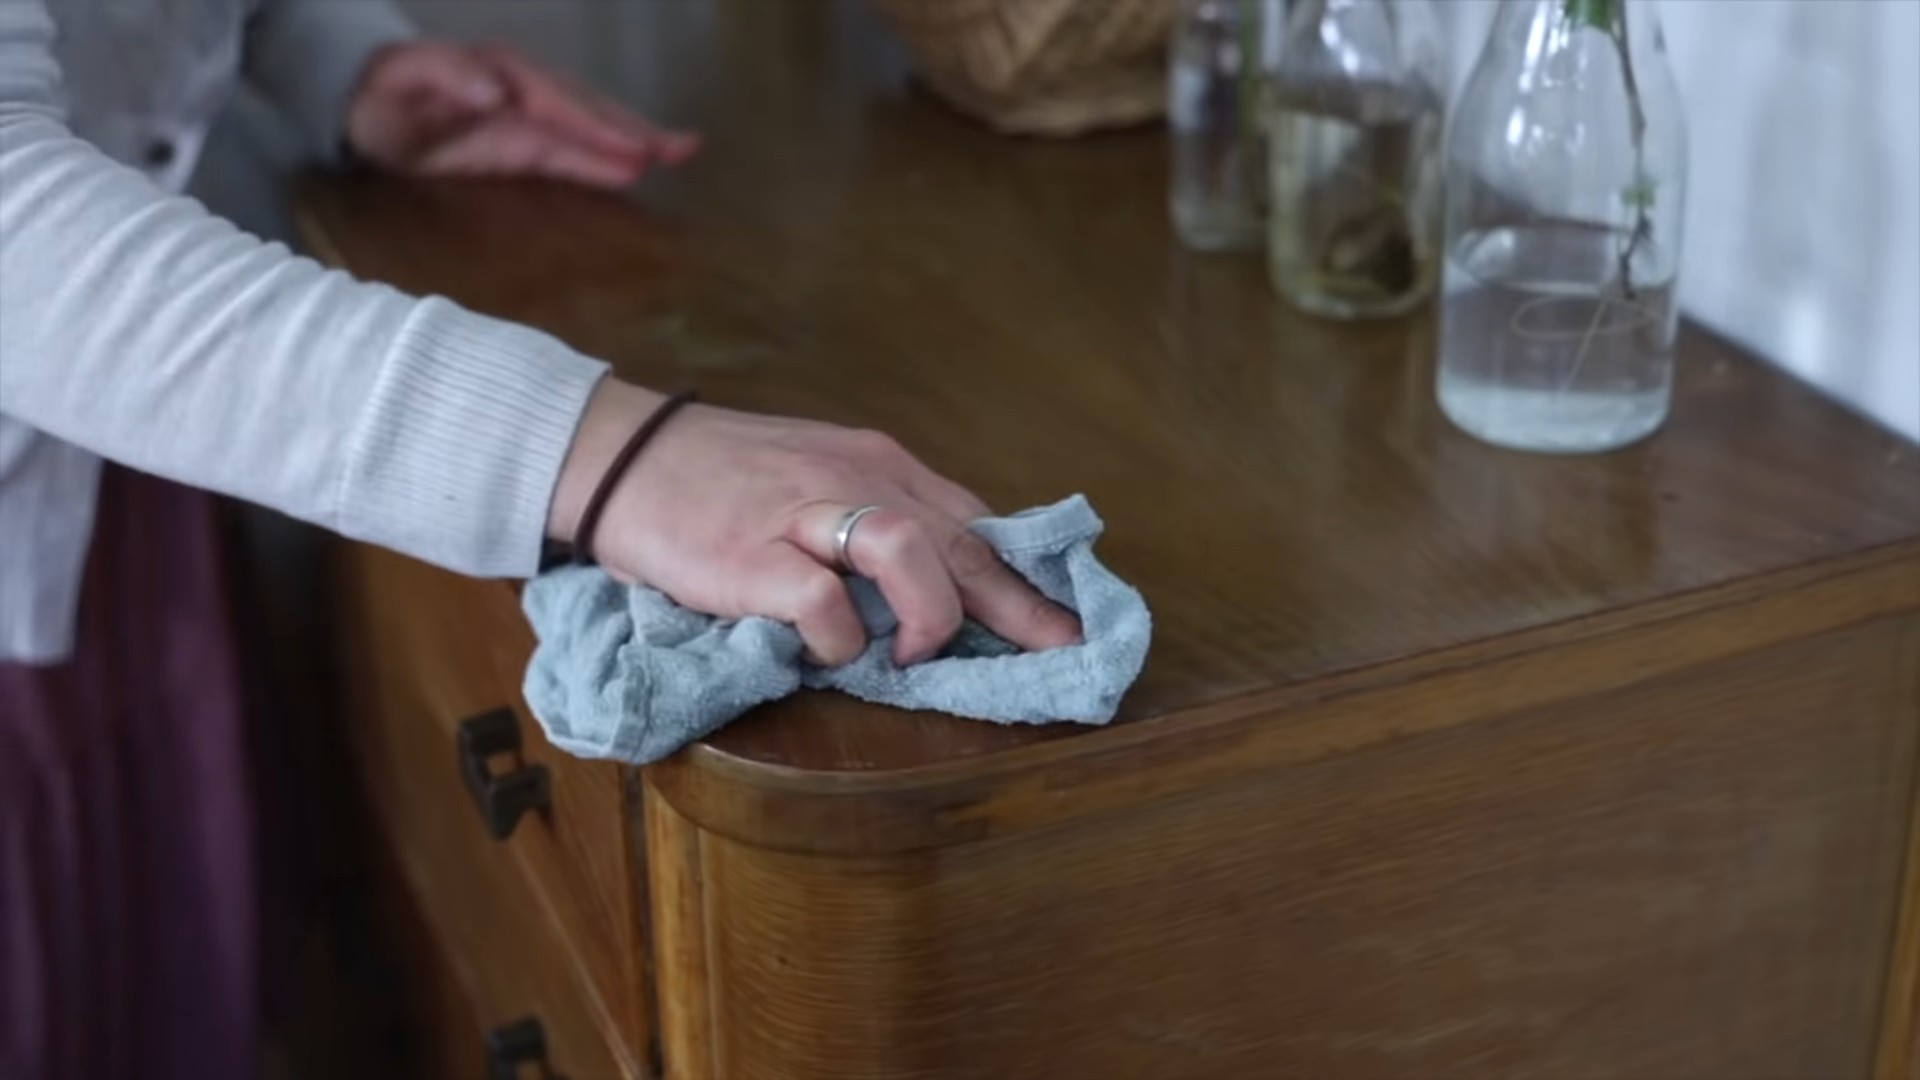
4. Apply the Polish: Now, it’s time to apply the polish to the rest of the furniture. If you’re using a spray bottle, lightly mist the surface of the furniture. If you’re using a cloth, dampen it with the polish and then apply it to the furniture in a thin, even layer. Work in small sections, following the grain of the wood.
5. Let it Sit (Briefly): Allow the polish to sit on the surface of the furniture for a few minutes. This will give the oil time to penetrate the wood and moisturize it. Don’t let it sit for too long, though, or it might become sticky. I usually wait about 5-10 minutes.
6. Buff to a Shine: This is where the magic happens! Take your clean, dry cloth and buff the furniture in a circular motion. Apply gentle pressure to remove any excess polish and bring out the natural shine of the wood. Continue buffing until the surface is smooth and glossy.
7. Repeat if Necessary: If your furniture is particularly dry or damaged, you might need to repeat the polishing process. Wait a few hours between applications to allow the wood to fully absorb the oil.
Dealing with Specific Wood Types
While this olive oil polish is generally safe for most wood types, there are a few things to keep in mind:
* Hardwoods (Oak, Maple, Walnut): These woods are typically very durable and can handle the olive oil polish without any issues.
* Softwoods (Pine, Cedar, Fir): Softwoods are more porous than hardwoods, so they might absorb the oil more quickly. Be careful not to over-apply the polish, and make sure to buff thoroughly to remove any excess.
* Antique Furniture: If you’re polishing antique furniture, it’s always a good idea to consult with a professional before using any type of polish. Antique finishes can be delicate and easily damaged.
* Painted or Varnished Furniture: This polish is best suited for unfinished or lightly finished wood. If your furniture is heavily painted or varnished, the polish might not be able to penetrate the surface and provide the desired results.
Troubleshooting: Common Issues and Solutions
Even with the best intentions, things don’t always go according to plan. Here are a few common issues you might encounter and how to fix them:
* Sticky Residue: If your furniture feels sticky after polishing, it means you’ve used too much polish or haven’t buffed it thoroughly enough. Use a clean, dry cloth to buff the surface again, applying more pressure this time. You can also try wiping the surface with a slightly damp cloth and then buffing it dry.
* Dull Finish: If your furniture still looks dull after polishing, it could be because the wood is very dry and needs more moisture. Try repeating the polishing process, allowing the oil to sit on the surface for a longer period of time before buffing.
* Discoloration: If you notice any discoloration after applying the polish, it could be a sign that the polish is reacting negatively with the wood finish. Stop using the polish immediately and consult with a professional.
* Lingering Odor: The lemon juice or vinegar smell should dissipate quickly. If it lingers, ensure proper ventilation in the room. Airing out the furniture can also help.
Maintaining Your Newly Polished Furniture
Once you’ve revived your furniture with this amazing olive oil polish, you’ll want to keep it looking its best. Here are a few tips for maintaining your furniture’s shine:
* Dust Regularly: Dust your furniture at least once a week to prevent dirt and grime from building up.
* Avoid Harsh Cleaners: When cleaning your furniture, avoid using harsh chemicals or abrasive cleaners. Stick to mild soap and water.
* Protect from Sunlight: Prolonged exposure to direct sunlight can fade and damage wood finishes. Try to keep your furniture out of direct sunlight or use curtains or blinds to filter the light.
* Re-Polish as Needed: Depending on the condition of your furniture and how often you use it, you might need to re-polish it every few months.
Why This Works: The Science Behind the Shine
You might be wondering why olive oil works so well as a wood polish. Here’s the science behind it:
* Moisturizing Properties: Olive oil is a natural moisturizer that penetrates the wood fibers, preventing them from drying out and cracking.
* Protective Barrier: The oil creates a protective barrier on the surface of the wood, shielding it from scratches, stains, and other damage.
* Enhances Natural Beauty: Olive oil enhances the natural beauty of the wood grain, bringing out its rich color and texture.
* Lemon Juice (or Vinegar) Benefits: The lemon juice or vinegar acts as a mild cleaner, removing dirt and grime without damaging the wood finish. It also helps to cut through any greasy residue left by the olive oil.
Safety First: Precautions to Take
While this DIY olive oil wood polish is generally safe, it’s always a good idea to take a few precautions:
* Ventilation: Work in a well-ventilated area to avoid inhaling any fumes.
* Skin Sensitivity: If you have sensitive skin, wear gloves to protect your hands from the olive oil and lemon juice.
* Flammability: Olive oil is flammable, so keep it away from open flames and heat sources.
* Storage: Store the polish in a cool, dry place away from children and pets.
Beyond Furniture: Other Uses for Olive Oil Polish
This DIY olive oil polish isn’t just for furniture! You can also use it to:
* Polish Wood Floors: Use a mop or cloth to apply the polish to your wood floors, then buff them
Conclusion
So, there you have it! This simple, all-natural olive oil wood polish recipe is more than just a cleaning solution; it’s a revitalizing treatment for your beloved wooden furniture. Forget harsh chemicals and expensive store-bought products. With just two ingredients you likely already have in your pantry – olive oil and lemon juice – you can breathe new life into dull, scratched, and tired wood surfaces.
Why is this DIY trick a must-try? Because it’s effective, economical, and eco-friendly. It’s a win-win-win! The olive oil nourishes the wood, penetrating deep to moisturize and prevent drying and cracking. The lemon juice acts as a gentle cleaner and disinfectant, cutting through grime and leaving behind a fresh, subtle scent. Plus, you’re avoiding the potentially harmful chemicals found in many commercial polishes, making it safer for your family and the environment.
But the beauty of this recipe lies in its versatility. Feel free to experiment with variations to suit your specific needs and preferences. For a deeper clean, add a teaspoon of white vinegar to the mixture. For a more intense shine, buff the wood vigorously after applying the polish. If you prefer a different scent, substitute the lemon juice with a few drops of your favorite essential oil, such as lavender, cedarwood, or orange. Remember to always test a small, inconspicuous area first to ensure compatibility.
This olive oil wood polish is particularly effective on antique furniture, wooden tables, chairs, cabinets, and even wooden floors (use sparingly on floors to avoid slipperiness!). It’s a fantastic way to preserve the natural beauty and character of your wooden pieces, ensuring they last for generations to come.
We wholeheartedly encourage you to give this DIY olive oil wood polish a try. It’s a simple, satisfying project that yields remarkable results. You’ll be amazed at how easily you can transform your dull, lifeless wood into gleaming, revitalized surfaces.
Don’t just take our word for it! We’re eager to hear about your experiences. Share your before-and-after photos, tips, and variations in the comments below. Let’s build a community of DIY enthusiasts who are passionate about preserving and protecting the beauty of wood. We believe that everyone can achieve professional-looking results with this easy and affordable method. So, grab your olive oil, lemon juice, and a soft cloth, and get ready to witness the magic of this natural wood polish! We are confident that you will love the results.
Frequently Asked Questions (FAQ)
What type of olive oil should I use for this wood polish?
Extra virgin olive oil is generally recommended for its purity and moisturizing properties. However, you can also use regular olive oil or even light olive oil. The key is to ensure that the olive oil is of good quality and free from any additives or impurities. Avoid using flavored olive oils, as they may leave a residue or affect the color of the wood.
How often should I use this olive oil wood polish?
The frequency of polishing depends on the condition of your wood and how often it’s exposed to dust and dirt. For general maintenance, polishing once a month is usually sufficient. If your wood is particularly dry or damaged, you may want to polish it more frequently, such as every two weeks. Avoid over-polishing, as this can lead to a buildup of oil and a dull appearance.
Can I use this olive oil wood polish on all types of wood?
This olive oil wood polish is generally safe for most types of wood, including hardwood, softwood, and veneer. However, it’s always a good idea to test a small, inconspicuous area first to ensure compatibility. Avoid using this polish on unfinished wood, as it may absorb too much oil and become sticky. Also, be cautious when using it on antique furniture, as some finishes may be delicate and require special care. If you’re unsure, consult with a professional furniture restorer.
What is the best way to apply the olive oil wood polish?
The best way to apply the polish is to use a soft, lint-free cloth. Dip the cloth into the polish and wring out any excess. Apply the polish to the wood in a circular motion, working in small sections. Allow the polish to sit for a few minutes to penetrate the wood. Then, use a clean, dry cloth to buff the wood until it shines. Be sure to remove any excess polish to prevent a sticky or greasy residue.
How do I store the leftover olive oil wood polish?
Store any leftover polish in an airtight container in a cool, dark place. The polish should last for several months. If the polish separates, simply shake it well before using.
What if my wood is already very oily or greasy?
If your wood is already oily or greasy, you may need to clean it before applying the olive oil wood polish. You can use a mild soap and water solution to remove any surface dirt and grime. Be sure to dry the wood thoroughly before polishing. You can also use a degreasing cleaner specifically designed for wood.
Can I use this polish on wood floors?
Yes, you can use this olive oil wood polish on wood floors, but use it sparingly. Apply a very thin layer of polish to a small area and buff it thoroughly. Be sure to remove any excess polish to prevent slipperiness. It’s also a good idea to test a small, inconspicuous area first to ensure compatibility. Consider using a floor-specific wood cleaner and polish for regular maintenance.
What if my wood has scratches? Will this polish remove them?
This olive oil wood polish can help to minimize the appearance of minor scratches by moisturizing the wood and blending the edges of the scratches. However, it will not remove deep scratches. For deep scratches, you may need to use a wood filler or consult with a professional furniture restorer.
Can I add essential oils to the olive oil wood polish?
Yes, you can add a few drops of your favorite essential oil to the polish for a pleasant scent. Lavender, cedarwood, orange, and lemon essential oils are all good choices. Be sure to use pure essential oils and avoid using synthetic fragrances. Add only a few drops of essential oil, as too much can be overpowering.
My wood looks dull after polishing. What did I do wrong?
If your wood looks dull after polishing, you may have used too much polish or not buffed it thoroughly enough. Try using a clean, dry cloth to buff the wood again. Be sure to remove any excess polish. You may also need to use a different type of cloth or apply more pressure when buffing. Sometimes, the wood may need a second application of polish after the first one has fully absorbed.
Is this olive oil wood polish safe for children and pets?
Yes, this olive oil wood polish is generally safe for children and pets, as it’s made with natural ingredients. However, it’s always a good idea to keep the polish out of reach of children and pets. If your child or pet ingests the polish, contact a medical professional or veterinarian.
Can I use this polish on painted wood?
No, this olive oil wood polish is not recommended for painted wood. The oil can damage the paint and cause it to peel or crack. Use a cleaner specifically designed for painted wood.


Leave a Comment