

Planting Pointed Cabbage might seem daunting, but trust me, it’s a rewarding experience that brings fresh, homegrown goodness right to your table! Have you ever dreamt of strolling through your own backyard, snipping off the perfect cabbage head for a delicious slaw or stir-fry? Well, dream no more! This DIY guide is packed with simple tricks and hacks to help you successfully cultivate these unique, cone-shaped cabbages, even if you’re a complete beginner.
Cabbage, in general, has a rich history, dating back to ancient times. It was a staple food in many cultures, prized for its nutritional value and ability to be stored for long periods. While the pointed variety might not have the same ancient lineage as its rounder cousins, it shares that same hearty resilience and delicious flavor. And let’s be honest, there’s something incredibly satisfying about growing your own food, connecting with nature, and knowing exactly where your meals come from.
But why planting pointed cabbage specifically? Well, beyond its unique shape and slightly sweeter taste, it’s often more compact than other cabbage varieties, making it perfect for smaller gardens or even container gardening. Plus, with rising grocery costs and concerns about pesticides, growing your own produce is a fantastic way to save money and ensure you’re eating healthy, organic food. I’m here to guide you through every step, from choosing the right seeds to harvesting your beautiful, pointed cabbages. So, grab your gardening gloves, and let’s get started!
Planting Pointed Cabbage: A Gardener’s Guide
Hey there, fellow gardening enthusiasts! Today, I’m going to walk you through the process of planting pointed cabbage. It’s a rewarding experience, and nothing beats the taste of homegrown veggies. Pointed cabbage, with its sweet and tender leaves, is a fantastic addition to any garden. Let’s get our hands dirty!
Choosing the Right Variety and Location
Before we even think about planting, let’s talk about variety and location. These two factors are crucial for a successful harvest.
* Variety Selection: There are several varieties of pointed cabbage to choose from. Some popular ones include ‘Hispi’, ‘Caraflex’, and ‘Sweetheart’. Consider your local climate and the length of your growing season when making your selection. ‘Hispi’ is a reliable early variety, while ‘Caraflex’ is known for its sweetness. ‘Sweetheart’ is a classic choice, producing compact, pointed heads.
* Sunlight: Cabbage needs at least 6 hours of direct sunlight per day. Choose a location in your garden that receives plenty of sunshine.
* Soil: Well-drained soil is essential. Cabbage prefers soil that is rich in organic matter. A slightly acidic to neutral pH (6.0 to 7.0) is ideal.
* Crop Rotation: Avoid planting cabbage in the same spot where other brassicas (like broccoli, cauliflower, or kale) were grown in the previous year. This helps prevent the buildup of soilborne diseases.
Preparing the Soil
Good soil preparation is the foundation of a healthy cabbage crop. Here’s how I get my soil ready:
* Clearing the Area: Remove any weeds, rocks, or debris from the planting area.
* Amending the Soil: This is where the magic happens! Incorporate plenty of compost or well-rotted manure into the soil. This will improve drainage, add nutrients, and provide a good environment for root growth. I usually add about 2-3 inches of compost and work it in thoroughly.
* Checking the pH: Use a soil testing kit to check the pH level. If the soil is too acidic (below 6.0), add lime to raise the pH. If it’s too alkaline (above 7.0), add sulfur to lower the pH. Follow the instructions on the soil testing kit and any amendments you use.
* Creating a Planting Bed: Rake the soil to create a smooth, level planting bed. This will make it easier to plant the seedlings at the correct depth and spacing.
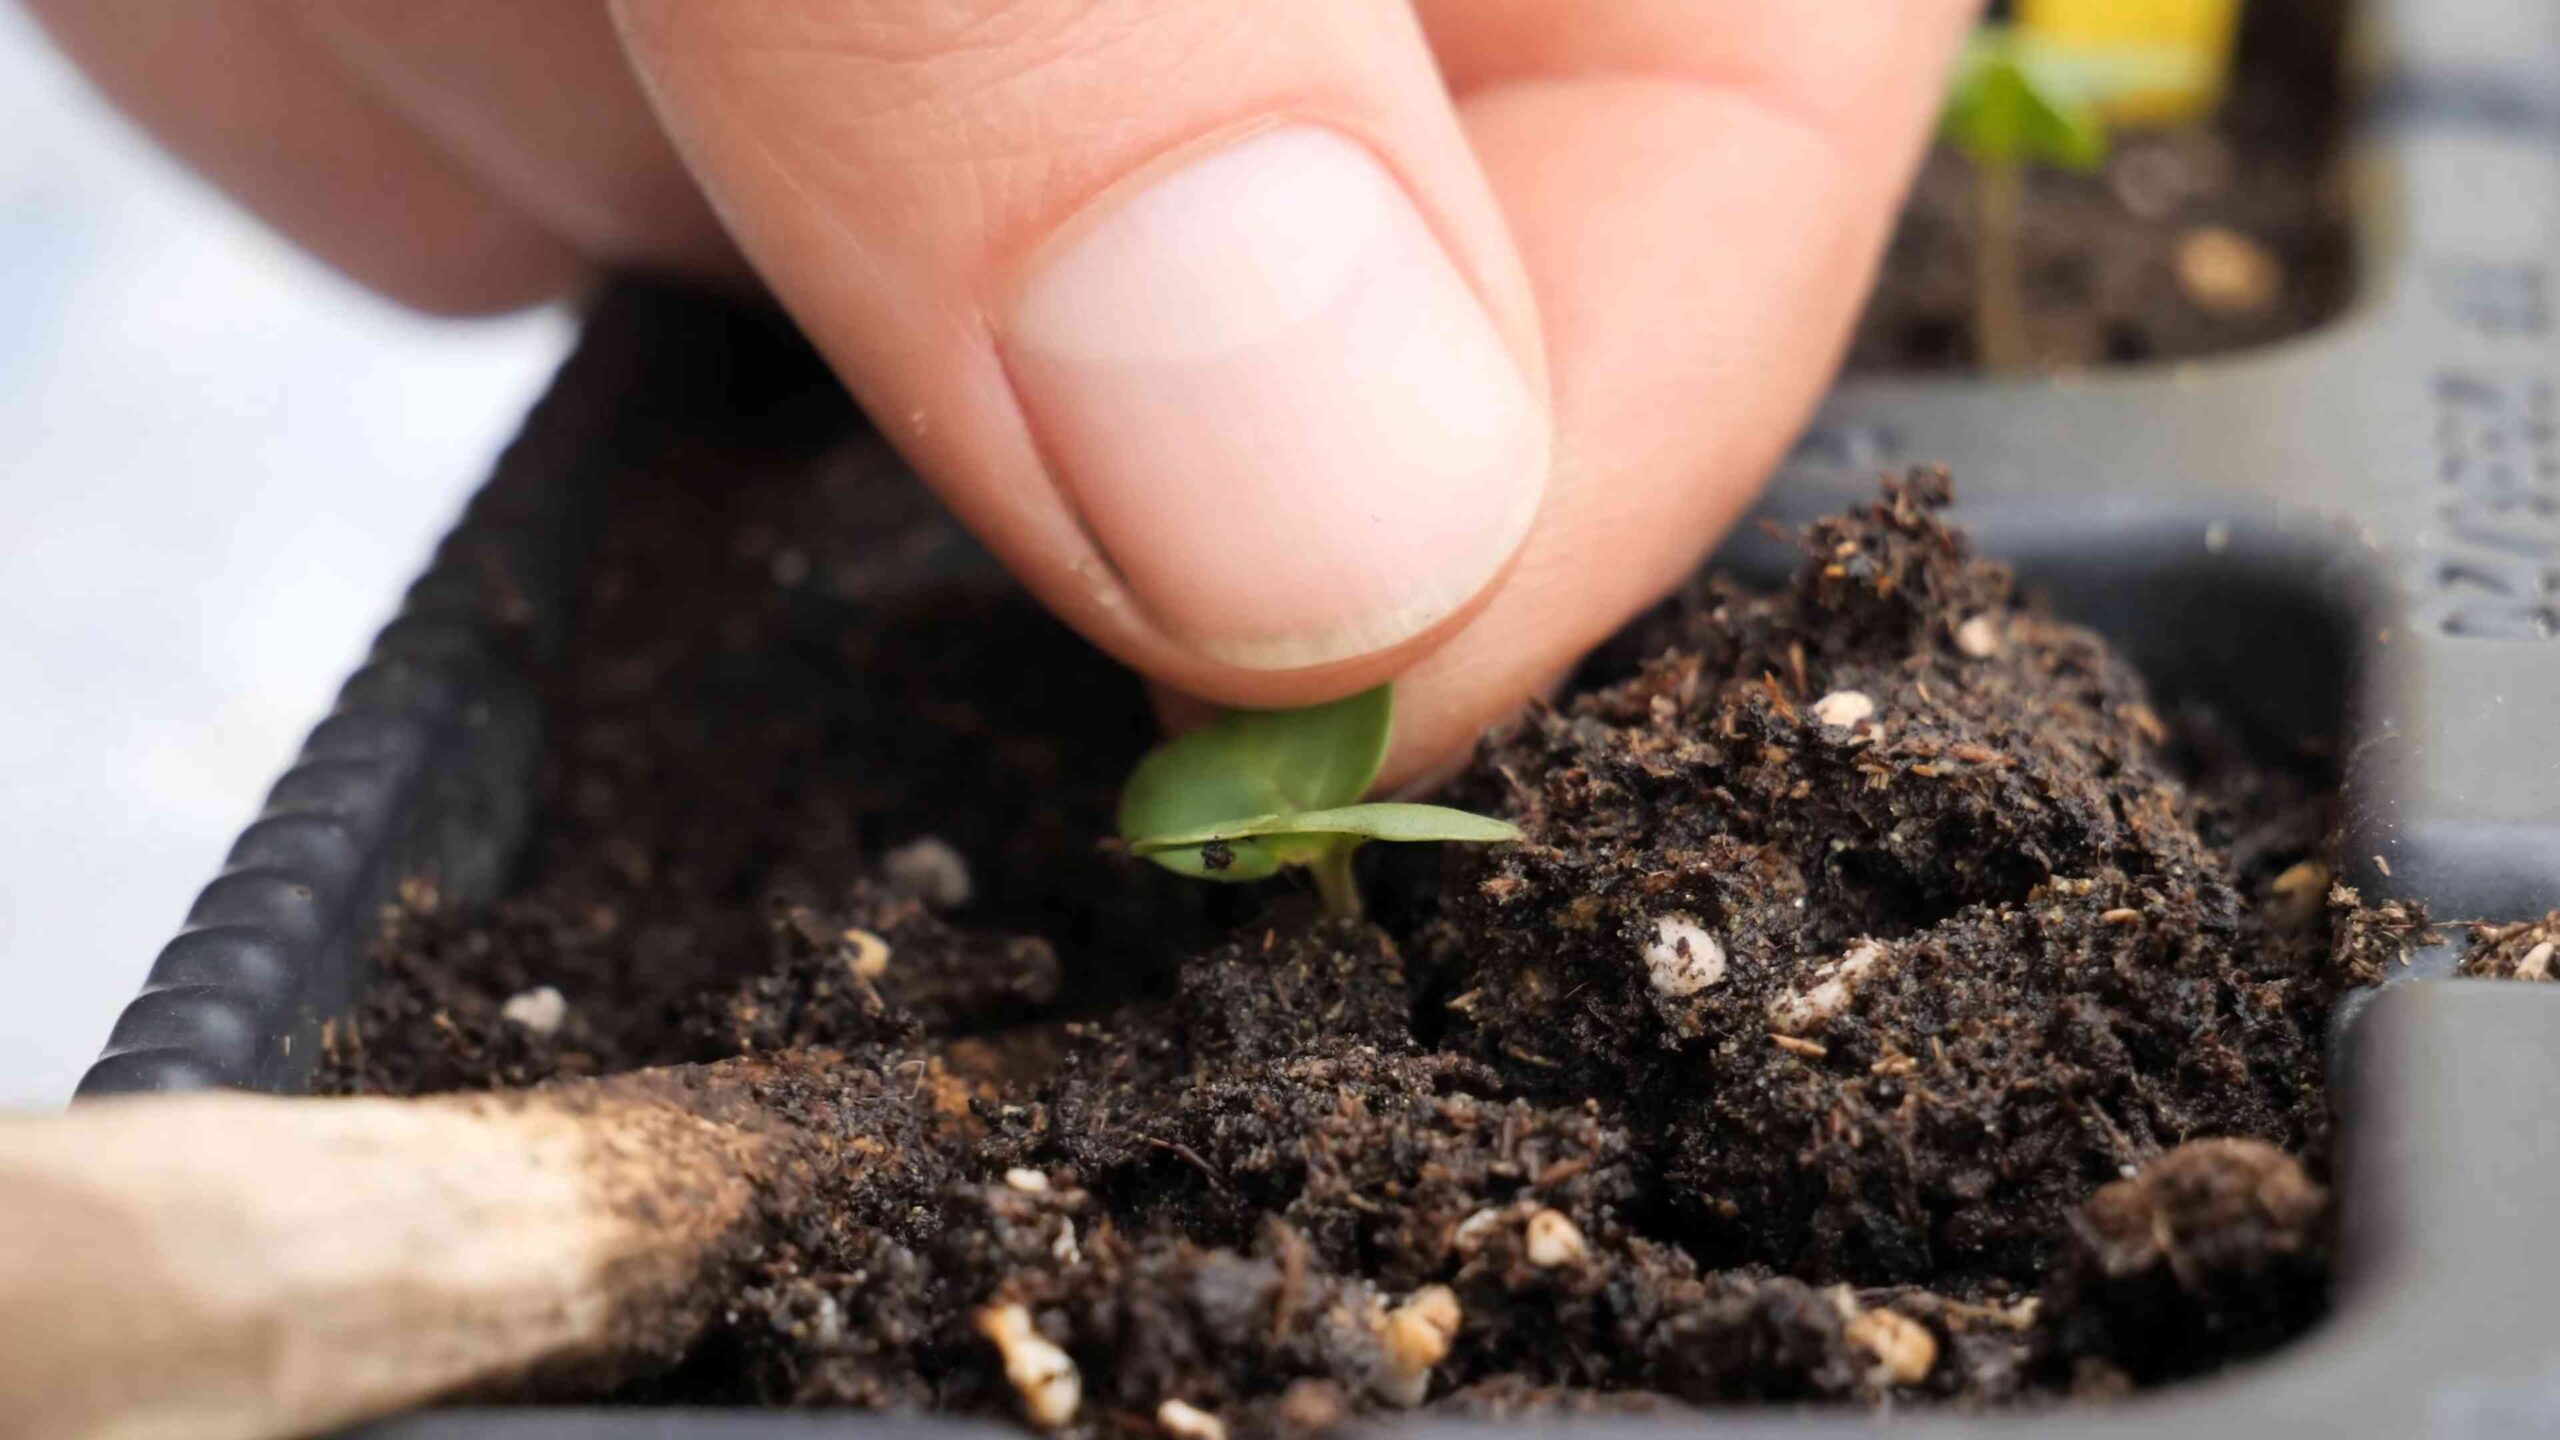
Starting from Seed or Transplants
You have two options: starting from seed or using transplants. I’ve done both, and each has its advantages.
* Starting from Seed: This gives you more control over the entire process and can be more economical. Start seeds indoors about 6-8 weeks before the last expected frost.
* Use seed starting trays or small pots filled with seed starting mix.
* Sow the seeds about ¼ inch deep.
* Keep the soil moist but not soggy.
* Provide plenty of light, either from a sunny window or a grow light.
* Once the seedlings have a few true leaves, thin them out, leaving only the strongest seedling in each pot.
* Using Transplants: This is a quicker and easier option, especially if you’re short on time or space. You can purchase transplants from a local nursery or garden center.
* Choose healthy-looking transplants with sturdy stems and green leaves.
* Avoid plants that are root-bound or have signs of disease or pests.
Planting the Cabbage
Now for the exciting part – getting those cabbage plants in the ground!
1. Harden Off Transplants: If you’re using transplants, it’s crucial to harden them off before planting. This means gradually exposing them to outdoor conditions over a period of 7-10 days. Start by placing them in a sheltered location for a few hours each day, gradually increasing the amount of time they spend outdoors. This will help them adjust to the sun, wind, and temperature changes.
2. Spacing: Space the cabbage plants about 12-18 inches apart in rows that are 24-36 inches apart. This will give them enough room to grow and mature. Pointed cabbage varieties tend to be smaller than other types, so you can get away with slightly closer spacing.
3. Planting Depth: Dig a hole that is deep enough to accommodate the root ball of the transplant. Gently remove the transplant from its container and loosen the roots slightly. Place the transplant in the hole and backfill with soil, making sure the top of the root ball is level with the soil surface.
4. Watering: Water the newly planted cabbage thoroughly. This will help settle the soil around the roots and get the plants off to a good start.
5. Mulching: Apply a layer of mulch around the cabbage plants. This will help retain moisture, suppress weeds, and regulate soil temperature. I like to use straw or shredded leaves as mulch.
Caring for Your Cabbage Plants
Once your cabbage plants are in the ground, it’s important to provide them with the care they need to thrive.
* Watering: Cabbage needs consistent moisture, especially during hot, dry weather. Water deeply and regularly, aiming for about 1 inch of water per week. Avoid overhead watering, as this can promote fungal diseases. Drip irrigation is a great option for cabbage.
* Fertilizing: Cabbage is a heavy feeder, so it needs plenty of nutrients. Fertilize every 2-3 weeks with a balanced fertilizer or a fertilizer specifically formulated for vegetables. Follow the instructions on the fertilizer label. You can also side-dress with compost or well-rotted manure.
* Weeding: Keep the area around the cabbage plants free of weeds. Weeds compete with the cabbage for water and nutrients. Hand-pull weeds or use a hoe to cultivate the soil. Be careful not to damage the cabbage roots.
* Pest Control: Cabbage can be susceptible to several pests, including cabbage worms, aphids, and flea beetles.
* Cabbage Worms: These are the larvae of cabbage white butterflies. They can quickly devour the leaves of your cabbage plants. Hand-pick them off the plants or use a biological insecticide like Bacillus thuringiensis (Bt).
* Aphids: These small, sap-sucking insects can weaken cabbage plants. Spray them with a strong stream of water or use insecticidal soap.
* Flea Beetles: These tiny beetles can create small holes in the leaves of cabbage plants. Cover the plants with row covers to prevent flea beetles from reaching them.
* Disease Control: Cabbage can also be affected by several diseases, including black rot and clubroot.
* Black Rot: This bacterial disease can cause yellowing and wilting of the leaves. Plant disease-resistant varieties and practice crop rotation to prevent black rot.
* Clubroot: This fungal disease causes swollen, distorted roots. Raise the soil pH to 7.0 or higher and practice crop rotation to prevent clubroot.
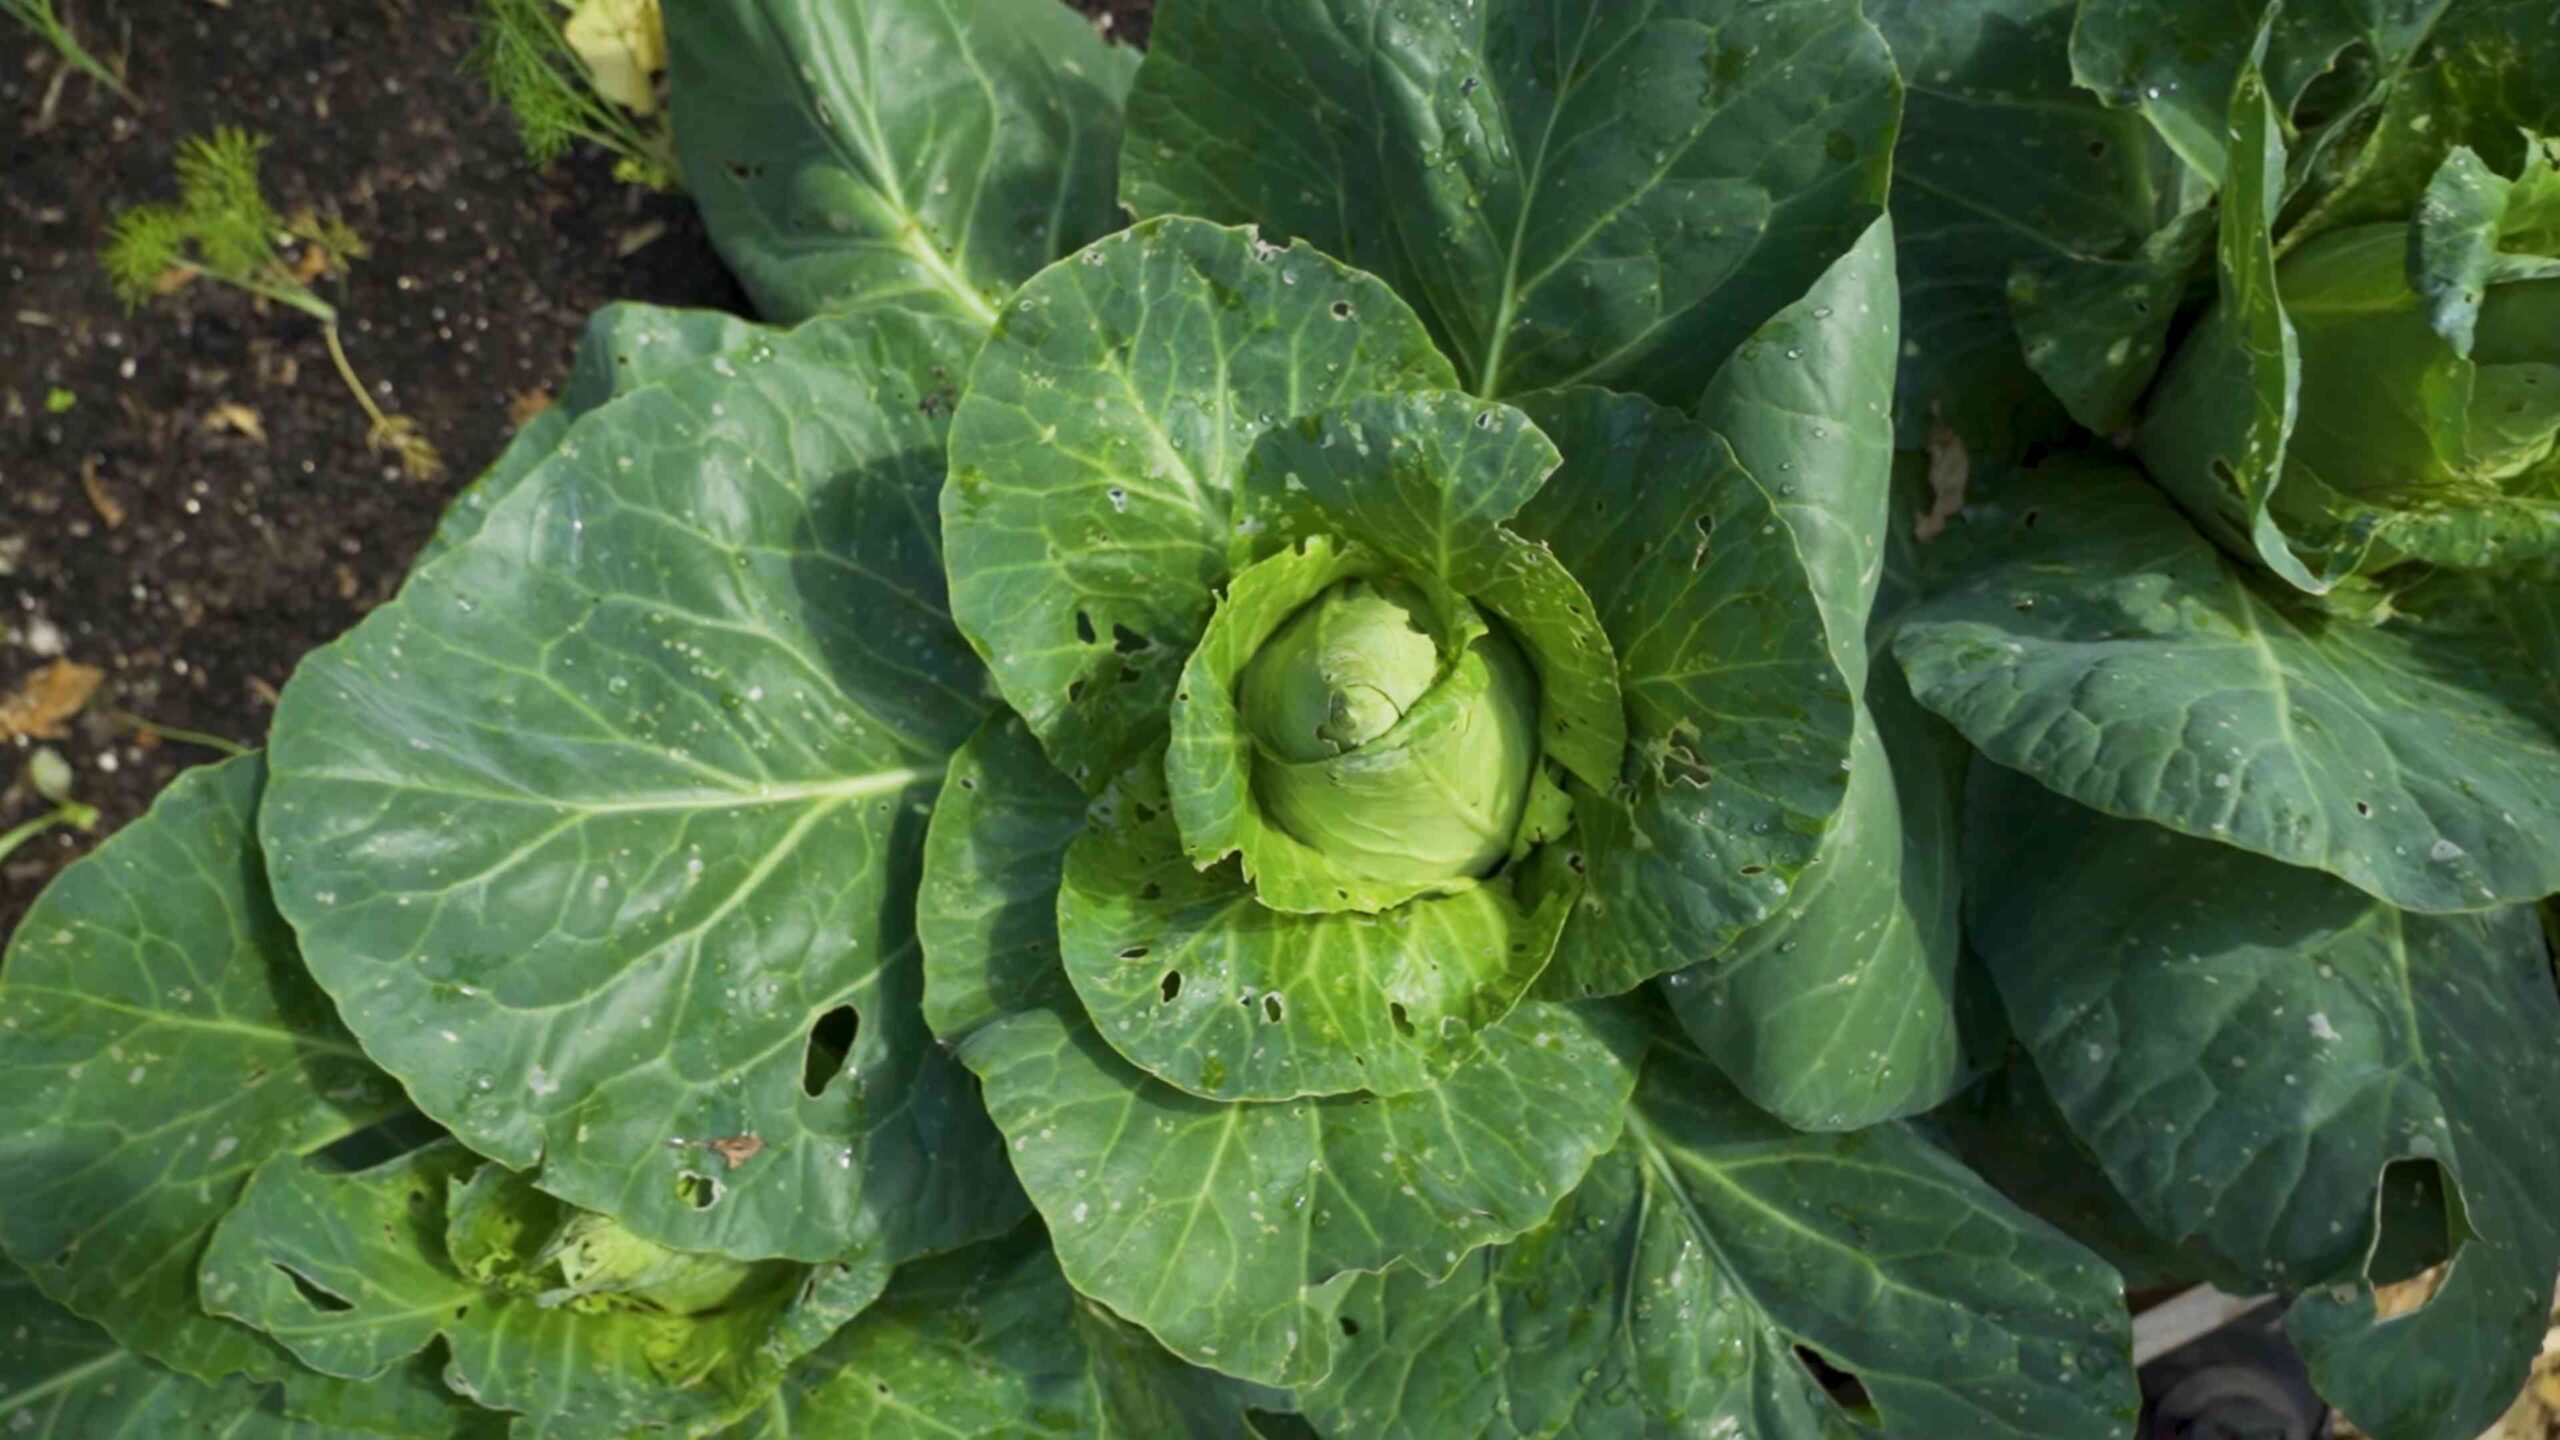
Harvesting Your Pointed Cabbage
The moment we’ve all been waiting for! Harvesting your homegrown pointed cabbage is incredibly satisfying.
* Timing: Pointed cabbage is typically ready to harvest in 60-80 days from transplanting. The heads should be firm and compact.
* Method: Use a sharp knife to cut the cabbage head from the stem. Leave a few outer leaves on the plant, as these can provide some protection for the remaining stem.
* Storage: Store harvested cabbage in a cool, dry place. It can last for several weeks in the refrigerator.
Troubleshooting
Even with the best planning, things can sometimes go wrong. Here are a few common problems and how to address them:
* Heads Not Forming: This can be caused by a lack of nutrients, insufficient sunlight, or inconsistent watering. Make sure your cabbage plants are getting enough fertilizer, sunlight, and water.
* Splitting Heads: This can happen when the cabbage heads grow too quickly after a period of drought. Water regularly and consistently to prevent splitting.
* Pest Infestations: Regularly inspect your cabbage plants for pests and take action promptly.
Enjoying Your Harvest
Now that you’ve harvested your pointed cabbage, it’s time to enjoy the fruits (or rather, vegetables!) of your labor. Pointed cabbage is delicious raw in salads, coleslaw, or slaws. It can also be cooked in stir-fries, soups, or stews. I personally love it lightly steamed with a little butter and salt.
Happy gardening, and I hope you enjoy your delicious homegrown pointed cabbage!
Conclusion
So, there you have it! Planting pointed cabbage isn’t just about growing another vegetable; it’s about cultivating a rewarding experience, a connection to nature, and a source of fresh, delicious produce right in your own backyard. We’ve walked through the essential steps, from selecting the right variety and preparing your soil to nurturing your seedlings and harvesting your bounty. The beauty of this process lies in its simplicity and the incredible satisfaction of watching a tiny seed transform into a vibrant, cone-shaped cabbage head.
Why is this DIY trick a must-try? Because it empowers you to control the quality of your food, reduce your carbon footprint, and enjoy the unparalleled flavor of homegrown vegetables. Store-bought cabbage simply can’t compare to the crispness and sweetness of a pointed cabbage you’ve nurtured yourself. Plus, it’s a fantastic way to get your hands dirty, relieve stress, and connect with the natural world.
But the journey doesn’t end here! Feel free to experiment with different varieties of pointed cabbage to discover your personal favorite. Consider companion planting with herbs like rosemary or thyme to deter pests and enhance the flavor of your cabbage. You could even try succession planting, sowing seeds every few weeks, to ensure a continuous harvest throughout the growing season. For those in colder climates, explore using cold frames or row covers to extend your growing season and protect your plants from frost. If you’re short on space, pointed cabbage can even thrive in containers, making it accessible to urban gardeners as well.
Don’t be afraid to get creative and adapt these techniques to suit your specific needs and environment. The most important thing is to get started and learn from your experiences. Every garden is unique, and every gardener has their own style.
We wholeheartedly encourage you to give planting pointed cabbage a try. It’s a project that’s both manageable for beginners and rewarding for experienced gardeners. Imagine the satisfaction of serving a salad made with cabbage you grew yourself, or sharing your homegrown harvest with friends and family.
And once you’ve embarked on this gardening adventure, we’d love to hear about your experiences! Share your tips, triumphs, and challenges in the comments below. Let’s create a community of pointed cabbage enthusiasts, sharing knowledge and inspiring each other to grow the best possible crop. Your insights could be invaluable to other gardeners just starting out. So, grab your seeds, prepare your soil, and get ready to experience the joy of planting pointed cabbage! Happy gardening!
Frequently Asked Questions (FAQ)
What is the best time of year to plant pointed cabbage?
The ideal time to plant pointed cabbage depends on your climate. In general, it’s best to plant in early spring for a summer harvest or late summer for a fall/winter harvest. For spring planting, start seeds indoors 6-8 weeks before the last expected frost. For fall planting, sow seeds directly into the garden in late summer, giving them enough time to mature before the first frost. Check your local frost dates for the most accurate timing.
How much sunlight does pointed cabbage need?
Pointed cabbage thrives in full sun, requiring at least 6 hours of direct sunlight per day. If you live in a particularly hot climate, some afternoon shade can be beneficial to prevent the leaves from scorching. Insufficient sunlight can lead to leggy growth and smaller heads.
What kind of soil is best for growing pointed cabbage?
Pointed cabbage prefers well-drained, fertile soil that is rich in organic matter. The ideal soil pH is between 6.0 and 7.0. Before planting, amend your soil with compost or well-rotted manure to improve drainage, fertility, and water retention. Avoid heavy clay soils, as they can become waterlogged and hinder root growth.
How often should I water my pointed cabbage plants?
Water your pointed cabbage plants regularly, especially during dry periods. Aim to keep the soil consistently moist but not waterlogged. Water deeply at the base of the plants, avoiding wetting the foliage, which can increase the risk of fungal diseases. Mulching around the plants can help retain moisture and suppress weeds.
What are some common pests and diseases that affect pointed cabbage?
Pointed cabbage can be susceptible to various pests and diseases, including cabbage worms, aphids, flea beetles, clubroot, and black rot. Regularly inspect your plants for signs of infestation or disease. Use organic pest control methods, such as handpicking pests, using insecticidal soap, or applying Bacillus thuringiensis (Bt) for cabbage worms. To prevent diseases, practice crop rotation, ensure good air circulation, and avoid overhead watering.
How do I know when my pointed cabbage is ready to harvest?
Pointed cabbage is typically ready to harvest when the head is firm and compact. The exact size and shape will vary depending on the variety. Gently squeeze the head to check for firmness. If it feels solid, it’s likely ready to harvest. Use a sharp knife to cut the head from the stem, leaving a few outer leaves intact.
Can I grow pointed cabbage in containers?
Yes, pointed cabbage can be successfully grown in containers, making it a great option for gardeners with limited space. Choose a large container (at least 12 inches in diameter) with drainage holes. Use a high-quality potting mix and provide regular watering and fertilization. Container-grown cabbage may require more frequent watering than those grown in the ground.
How can I prevent my pointed cabbage from splitting?
Splitting can occur when cabbage heads grow too quickly after a period of drought or heavy rain. To prevent splitting, ensure consistent watering throughout the growing season. If heavy rain is expected, consider harvesting the cabbage heads slightly earlier.
What are some good companion plants for pointed cabbage?
Companion planting can help deter pests, attract beneficial insects, and improve the overall health of your cabbage plants. Good companion plants for pointed cabbage include:
* **Aromatic herbs:** Rosemary, thyme, sage, and mint can repel cabbage moths and other pests.
* **Marigolds:** These flowers attract beneficial insects and deter nematodes.
* **Nasturtiums:** These flowers attract aphids away from your cabbage plants.
* **Dill:** This herb attracts beneficial insects that prey on cabbage worms.
* **Legumes:** Beans and peas can fix nitrogen in the soil, benefiting your cabbage plants.
Can I save seeds from my pointed cabbage plants?
Saving seeds from pointed cabbage can be a bit challenging, as cabbage is a biennial plant, meaning it typically flowers and produces seeds in its second year. You’ll need to overwinter your cabbage plants in a cool, protected location and allow them to flower the following spring. Cross-pollination can also be an issue, so it’s best to isolate your cabbage plants from other members of the Brassica family to ensure true-to-type seeds.

Leave a Comment