

Red Wine Stain Removal DIY: Oh no! That dreaded moment when a splash of vibrant red wine lands where it shouldn’t – on your favorite rug, your crisp white shirt, or even worse, your grandmother’s antique tablecloth! We’ve all been there, haven’t we? That sinking feeling as you watch the crimson tide spread, thinking your beloved item is ruined forever. But don’t despair! Before you resign yourself to a permanent stain, let me tell you, there’s hope!
Throughout history, dealing with stains has been a constant battle. From ancient Romans using lye to lift discoloration from their togas to modern-day stain removers, people have always sought effective solutions. Red wine, with its deep pigments, has always been a particularly formidable foe. But fear not, because I’m about to share some amazing DIY tricks that will empower you to tackle those pesky red wine stains like a pro!
Why do you need these red wine stain removal DIY hacks? Because life is too short to worry about spilled wine! Whether it’s a clumsy guest, a celebratory toast gone awry, or just a simple accident, spills happen. And instead of stressing and potentially damaging your precious belongings with harsh chemicals, I’m going to show you how to use common household items to effectively and safely lift those stains. These methods are not only budget-friendly but also environmentally conscious, allowing you to enjoy your favorite red without the fear of permanent damage. So, let’s dive in and learn how to conquer those red wine stains with these simple, yet effective, DIY solutions!
DIY Red Wine Stain Removal: A Comprehensive Guide
Okay, so you’ve spilled red wine. Don’t panic! We’ve all been there. The key is to act fast and use the right techniques. I’m going to walk you through several proven methods to tackle that dreaded red wine stain, from fresh spills to those stubborn, set-in marks. Let’s get started!
Tackling Fresh Red Wine Stains
The quicker you act, the better your chances of completely removing the stain. These methods are best for stains that are still wet.
* Blot, Don’t Rub: This is the golden rule! Rubbing will only spread the stain and push it deeper into the fibers. Use a clean cloth or paper towel to gently blot the stain, working from the outside in.
* Salt Power: Salt is a fantastic absorbent. Cover the stain generously with a thick layer of salt. Let it sit for several hours, or even overnight, to absorb the wine. You’ll see the salt turn pink as it soaks up the stain.
* Boiling Water Method: This works best on sturdy fabrics like tablecloths or denim. Stretch the stained fabric taut over a bowl or pot and carefully pour boiling water through the stain from a height. The force of the water helps to flush out the wine.
* Club Soda Savior: Club soda is a classic remedy. Pour club soda directly onto the stain and blot with a clean cloth. The carbonation helps to lift the stain. Repeat as needed.
* White Wine to the Rescue: It sounds counterintuitive, but white wine can actually help dilute the red wine stain. Pour white wine over the red wine stain, then blot with a clean cloth.
Step-by-Step Instructions for Fresh Stains:
1. Act Immediately: As soon as the spill happens, grab a clean cloth or paper towel.
2. Blot the Stain: Gently blot the stain, working from the outside edges towards the center. Avoid rubbing!
3. Choose Your Weapon: Select one of the methods above (salt, boiling water, club soda, or white wine).
4. Apply Your Chosen Method:
* Salt: Cover the stain completely with a thick layer of salt. Let it sit for several hours or overnight. Vacuum up the salt.
* Boiling Water: Stretch the fabric over a bowl and carefully pour boiling water through the stain. Be careful not to burn yourself!
* Club Soda: Pour club soda directly onto the stain and blot with a clean cloth. Repeat as needed.
* White Wine: Pour white wine over the red wine stain and blot with a clean cloth.
5. Launder as Usual: After treating the stain, launder the item as usual, following the care instructions on the label. Make sure the stain is completely gone before drying, as heat can set the stain.
Dealing with Set-In Red Wine Stains
Okay, so you didn’t get to the stain right away? Don’t worry, all hope isn’t lost! These methods are designed to tackle those more stubborn, set-in stains.
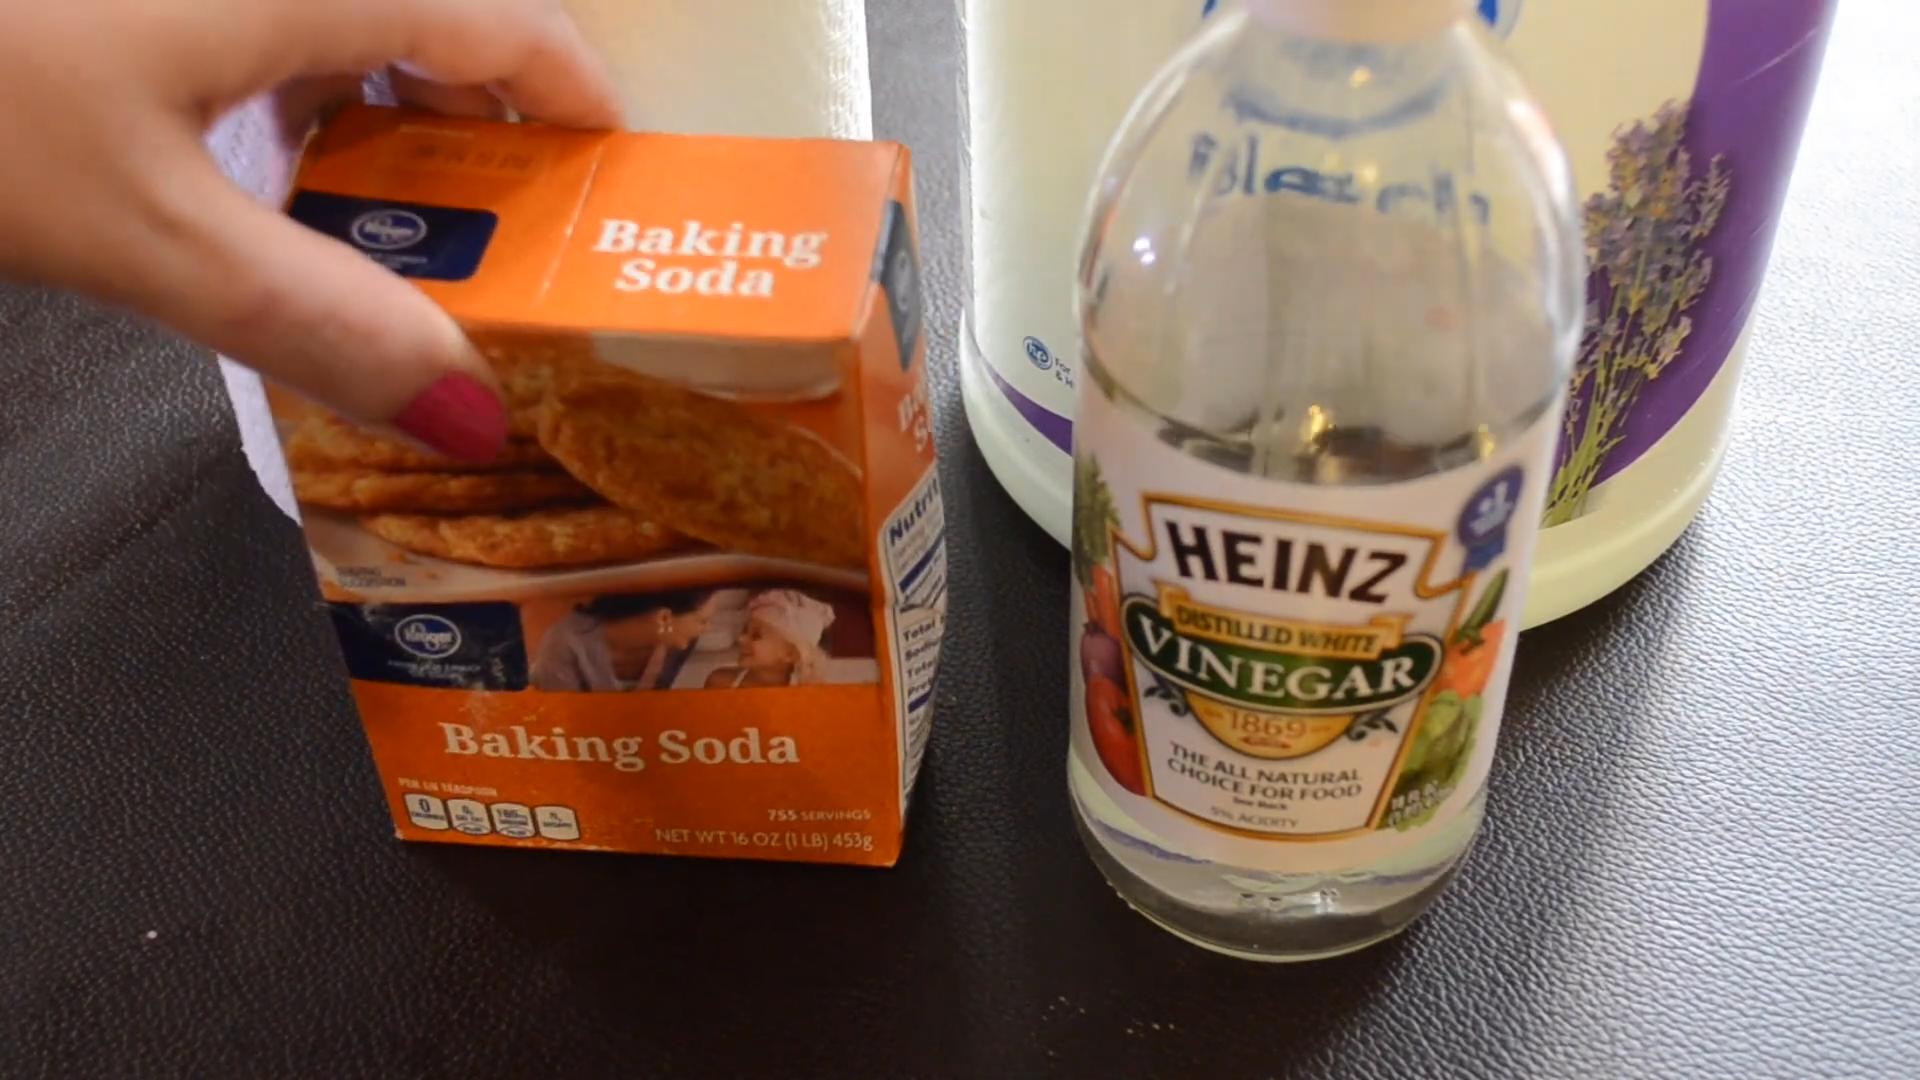
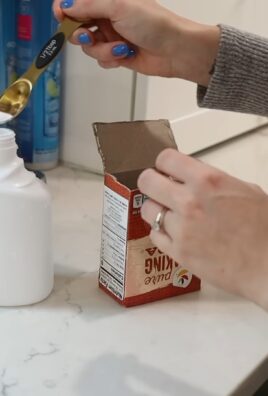
* Baking Soda Paste: Baking soda is a natural stain remover and deodorizer. Make a paste of baking soda and water (about a 3:1 ratio) and apply it to the stain. Let it dry completely, then vacuum or brush away the residue.
* Hydrogen Peroxide and Dish Soap: This combination is a powerful stain fighter. Mix equal parts hydrogen peroxide (3%) and dish soap (the clear kind, not the creamy kind). Apply the mixture to the stain and let it sit for 20-30 minutes. Blot with a clean cloth and rinse with cold water. Always test this method on an inconspicuous area first, as hydrogen peroxide can lighten some fabrics.
* Vinegar Power: Vinegar is another natural cleaning agent. Mix equal parts white vinegar and water in a spray bottle. Spray the solution onto the stain and let it sit for 5-10 minutes. Blot with a clean cloth and rinse with cold water.
* Commercial Stain Removers: There are many commercial stain removers specifically designed for red wine stains. Follow the instructions on the product label carefully.
Step-by-Step Instructions for Set-In Stains:
1. Assess the Stain: Determine how old and set-in the stain is. This will help you choose the most appropriate method.
2. Choose Your Weapon: Select one of the methods above (baking soda paste, hydrogen peroxide and dish soap, vinegar, or a commercial stain remover).
3. Apply Your Chosen Method:
* Baking Soda Paste: Mix baking soda and water to form a paste. Apply the paste to the stain and let it dry completely. Vacuum or brush away the residue.
* Hydrogen Peroxide and Dish Soap: Mix equal parts hydrogen peroxide and dish soap. Test on an inconspicuous area first! Apply the mixture to the stain and let it sit for 20-30 minutes. Blot with a clean cloth and rinse with cold water.
* Vinegar: Mix equal parts white vinegar and water in a spray bottle. Spray the solution onto the stain and let it sit for 5-10 minutes. Blot with a clean cloth and rinse with cold water.
* Commercial Stain Remover: Follow the instructions on the product label carefully.
4. Rinse and Repeat (If Necessary): After treating the stain, rinse the area with cold water. If the stain is still visible, repeat the process.
5. Launder as Usual: Launder the item as usual, following the care instructions on the label. Again, make sure the stain is completely gone before drying.
Specific Fabric Considerations
Different fabrics require different approaches. Here’s a quick guide:
* Carpet: For carpet, blot the stain immediately. Use a carpet cleaner or a mixture of vinegar and water. You can also try the salt method.
* Upholstery: Similar to carpet, blot the stain and use an upholstery cleaner or a mixture of vinegar and water. Always test on a hidden area first!
* Delicate Fabrics (Silk, Wool): For delicate fabrics, it’s best to consult a professional cleaner. However, you can try blotting the stain with a clean cloth and cold water. Avoid harsh chemicals.
* Washable Fabrics (Cotton, Linen): These fabrics are generally more forgiving. You can use any of the methods described above.
Preventative Measures
Okay, so you’ve successfully removed the stain (hopefully!). Now, let’s talk about preventing future spills.
* Use Stain-Resistant Tablecloths: Consider using tablecloths or placemats that are stain-resistant.
* Drink Responsibly: Okay, this one’s obvious, but it’s worth mentioning!
* Keep Cleaning Supplies Handy: Have a stain removal kit readily available for quick action.
* Consider a Wine Stain Shield: There are products available that can be sprayed on fabrics to make them more stain-resistant.
Troubleshooting Common Issues
* The Stain Won’t Come Out: If you’ve tried multiple methods and the stain is still visible, it may be time to consult a professional cleaner.
* The Fabric is Damaged: If you’ve used a harsh chemical or scrubbed too vigorously, you may have damaged the fabric. In this case, there’s not much you can do.
* The Stain Has Set Permanently: Sometimes, despite your best efforts, a stain will set permanently. In this case, you may need to consider replacing the item.
Extra Tips and Tricks
* Lemon Juice: Lemon juice can be used as a natural bleaching agent. Apply lemon juice to the stain and let it sit in the sun for a few hours. Rinse with cold water. Use with caution, as lemon juice can lighten some fabrics.
* Shaving Cream: Believe it or not, shaving cream can sometimes remove stains. Apply shaving cream to the stain and let it sit for 30 minutes. Blot with a clean cloth and rinse with cold water.
* Always Test in an Inconspicuous Area: Before using any cleaning solution, always test it on a hidden area of the fabric to make sure it doesn’t damage or discolor the material.
I hope these tips and tricks help you conquer those pesky red wine stains! Remember, acting quickly and using the right techniques are key to success. Good luck!

Conclusion
So, there you have it! This simple, yet incredibly effective, DIY red wine stain removal trick is a game-changer for anyone who enjoys a glass of Merlot or Cabernet Sauvignon. No longer do you need to panic at the sight of a crimson spill threatening your favorite rug, tablecloth, or blouse. This method, utilizing readily available household ingredients, offers a powerful and affordable alternative to expensive stain removers that often contain harsh chemicals.
The beauty of this DIY solution lies in its simplicity and accessibility. You likely already have everything you need in your pantry or bathroom. Forget rushing to the store or waiting for a delivery; you can tackle that stain immediately, increasing your chances of complete removal. And let’s be honest, who doesn’t love a good DIY project that saves money and delivers exceptional results?
But don’t just take our word for it. We encourage you to try this red wine stain removal technique for yourself. Experiment with slight variations to find what works best for your specific fabric and the age of the stain. For instance, for particularly stubborn stains, you might try pre-treating the area with a paste of baking soda and water before applying the salt or boiling water method. Or, if you’re dealing with a delicate fabric, consider using club soda instead of boiling water, blotting gently instead of pouring directly.
Remember, the key is to act quickly and be patient. Some stains may require multiple treatments, but with persistence, you can often achieve remarkable results. And that feeling of satisfaction when you successfully rescue a cherished item from the clutches of a red wine stain? Priceless!
We’re confident that this DIY trick will become your go-to solution for red wine mishaps. But more than that, we want to hear about your experiences! Share your before-and-after photos, your tips and tricks, and any variations you’ve discovered in the comments below. Let’s create a community of stain-fighting experts and help each other keep our homes and wardrobes looking their best. So go ahead, uncork that bottle of red with confidence, knowing you have a secret weapon in your arsenal. Cheers to stain-free living!
Frequently Asked Questions (FAQs)
What makes this DIY red wine stain removal method so effective?
This DIY method works because it leverages the absorbent properties of common household items like salt, baking soda, and the flushing action of boiling water or club soda. Salt and baking soda draw the wine out of the fabric fibers before it has a chance to set permanently. Boiling water, when used carefully, can help to loosen the stain and flush it away. Club soda’s carbonation also aids in lifting the stain. The combination of these elements provides a multi-pronged approach to tackling red wine stains.
Is this DIY method safe for all types of fabrics?
While this method is generally safe for most common fabrics like cotton, linen, and polyester, it’s always best to test it on an inconspicuous area first. Delicate fabrics like silk, wool, and velvet may require a more gentle approach. For these materials, consider using club soda or a specialized stain remover designed for delicate fabrics. Avoid using boiling water on delicate fabrics as it can damage the fibers. When in doubt, consult a professional cleaner.
What if I don’t have salt or baking soda on hand? Are there any alternatives?
Yes, there are a few alternatives you can try. Cornstarch is another excellent absorbent that can be used in place of salt or baking soda. You can also try using white vinegar, which has mild acidic properties that can help to break down the stain. However, be sure to dilute the vinegar with water before applying it to the fabric. Another option is to use a mixture of dish soap and hydrogen peroxide. Mix one part dish soap with two parts hydrogen peroxide and apply it to the stain. Let it sit for a few minutes, then blot it with a clean cloth. Always test any alternative method on an inconspicuous area first.
How quickly do I need to act after spilling red wine to effectively remove the stain?
The sooner you act, the better your chances of completely removing the stain. Fresh stains are much easier to treat than old, set-in stains. Ideally, you should address the stain within minutes of the spill. If you can’t treat it immediately, blot up as much of the excess wine as possible with a clean cloth or paper towel to prevent it from spreading and setting deeper into the fibers.
What if the stain is old and has already set? Will this DIY method still work?
While fresh stains are easier to remove, this DIY method can still be effective on older stains, although it may require more effort and multiple treatments. For set-in stains, try soaking the affected area in cold water for several hours or overnight before applying the salt or baking soda. You may also need to use a stronger stain remover in conjunction with this DIY method. Consider using a stain remover specifically designed for red wine stains and following the manufacturer’s instructions carefully.
Can I use this method on colored fabrics? Will it cause fading?
While this method is generally safe for colored fabrics, there is always a risk of fading, especially with darker or more delicate dyes. It’s crucial to test the method on an inconspicuous area first to ensure that it doesn’t cause any discoloration. If you notice any fading, stop immediately and consider using a color-safe stain remover or consulting a professional cleaner.
How do I use the boiling water method safely and effectively?
The boiling water method should be used with caution, especially on delicate fabrics. First, stretch the stained fabric taut over a bowl or pot, securing it with a rubber band if necessary. Then, carefully pour boiling water from a height of about one foot above the stain, allowing the water to flush through the fabric and into the bowl. Be careful not to burn yourself. The force of the water helps to dislodge the stain. Repeat the process until the stain is gone or significantly reduced. After treating the stain, launder the fabric as usual.
What if the stain is on a carpet or upholstery? Can I still use this method?
Yes, you can use this method on carpets and upholstery, but you’ll need to adapt it slightly. Instead of pouring boiling water directly onto the stain, try using a spray bottle to apply the club soda or a mixture of water and vinegar. Blot the area gently with a clean cloth, working from the outside of the stain towards the center. Avoid rubbing, as this can spread the stain. You can also sprinkle salt or baking soda onto the stain, let it sit for several hours or overnight, and then vacuum it up. Repeat the process as needed. For stubborn stains, consider using a carpet or upholstery cleaner specifically designed for red wine stains.
After using this DIY method, do I still need to wash the item?
Yes, it’s always a good idea to wash the item after using this DIY method to remove any remaining residue and ensure that the stain is completely gone. Follow the care instructions on the garment or fabric label. If the stain is still visible after washing, repeat the DIY treatment before drying the item. Drying a stained item can set the stain permanently.
Where can I share my experiences and tips for red wine stain removal?
We encourage you to share your experiences and tips in the comments section below this article! We’d love to hear about your successes, challenges, and any variations you’ve discovered. You can also share your before-and-after photos to inspire others. Let’s create a community of stain-fighting experts and help each other keep our homes and wardrobes looking their best.
Leave a Comment