

Toothbrush Grout Cleaning Tips: Are you tired of staring at dingy, discolored grout lines that seem impossible to clean? I know I was! It felt like no matter how much I scrubbed, those stubborn stains just wouldn’t budge. But what if I told you the secret weapon to sparkling grout has been hiding in your bathroom all along?
Believe it or not, the humble toothbrush is a grout-cleaning champion! While modern cleaning products offer various solutions, the toothbrush method harkens back to simpler times when resourceful homeowners relied on ingenuity and readily available tools. Think of it as a modern twist on old-fashioned elbow grease, but with a tool perfectly designed for the job.
Why is this DIY trick so essential? Because clean grout dramatically improves the overall look of your home. It’s the small detail that makes a huge difference. Grimy grout can make even the cleanest tiles look dirty, impacting your home’s aesthetic and potentially harboring mold and mildew. Plus, learning effective toothbrush grout cleaning tips saves you money on expensive cleaning services and harsh chemicals. I’m excited to share my favorite methods and show you how to achieve professional-looking results with minimal effort!
DIY Toothbrush Grout Cleaning: A Sparkling Solution!
Okay, so you’re staring at your tiled surfaces, and that grout is looking less than stellar, right? Don’t worry, we’ve all been there! Before you reach for those harsh chemicals, let’s try a simple, effective, and budget-friendly solution: your trusty old toothbrush! I’m going to walk you through how to use a toothbrush to get your grout looking fresh and clean again. It’s surprisingly effective, and honestly, a little bit therapeutic!
Why a Toothbrush?
You might be thinking, “A toothbrush? Really?” But trust me, the small head and firm bristles of a toothbrush are perfect for getting into those narrow grout lines. It allows you to apply targeted pressure and scrub away grime without damaging your tiles. Plus, it’s a great way to repurpose those old toothbrushes instead of just tossing them!
What You’ll Need:
* An old toothbrush (or several, depending on the size of your area)
* Your chosen cleaning solution (more on that below!)
* A small bowl or container for your cleaning solution
* Clean water
* A sponge or cloth for wiping
* Optional: Rubber gloves (to protect your hands)
* Optional: Eye protection (especially if using stronger cleaning solutions)
Choosing Your Cleaning Solution:
The best cleaning solution for your grout depends on how dirty it is and what kind of tiles you have. Here are a few options, starting with the gentlest:
* Warm Water and Dish Soap: This is a great starting point for lightly soiled grout. It’s gentle and effective for everyday dirt and grime.
* Baking Soda Paste: Mix baking soda with a little water to form a paste. This is a mild abrasive that can help lift stains.
* Vinegar and Water: Mix equal parts white vinegar and water. Vinegar is a natural disinfectant and can help dissolve mineral deposits. Important: Avoid using vinegar on natural stone tiles like marble or granite, as it can etch the surface.
* Baking Soda and Vinegar: This creates a fizzy reaction that can help loosen stubborn dirt. Apply baking soda to the grout lines, then spray with vinegar. Let it fizz for a few minutes before scrubbing. Important: Be careful when mixing baking soda and vinegar, as it can create pressure in a closed container.
* Commercial Grout Cleaner: If all else fails, you can use a commercial grout cleaner. Be sure to read the instructions carefully and test it in an inconspicuous area first.
Step-by-Step Grout Cleaning Guide:
Okay, let’s get down to business! Here’s how to clean your grout with a toothbrush:
1. Prepare Your Area: Start by sweeping or vacuuming the area to remove any loose dirt or debris. This will prevent you from just pushing the dirt around while you’re scrubbing.
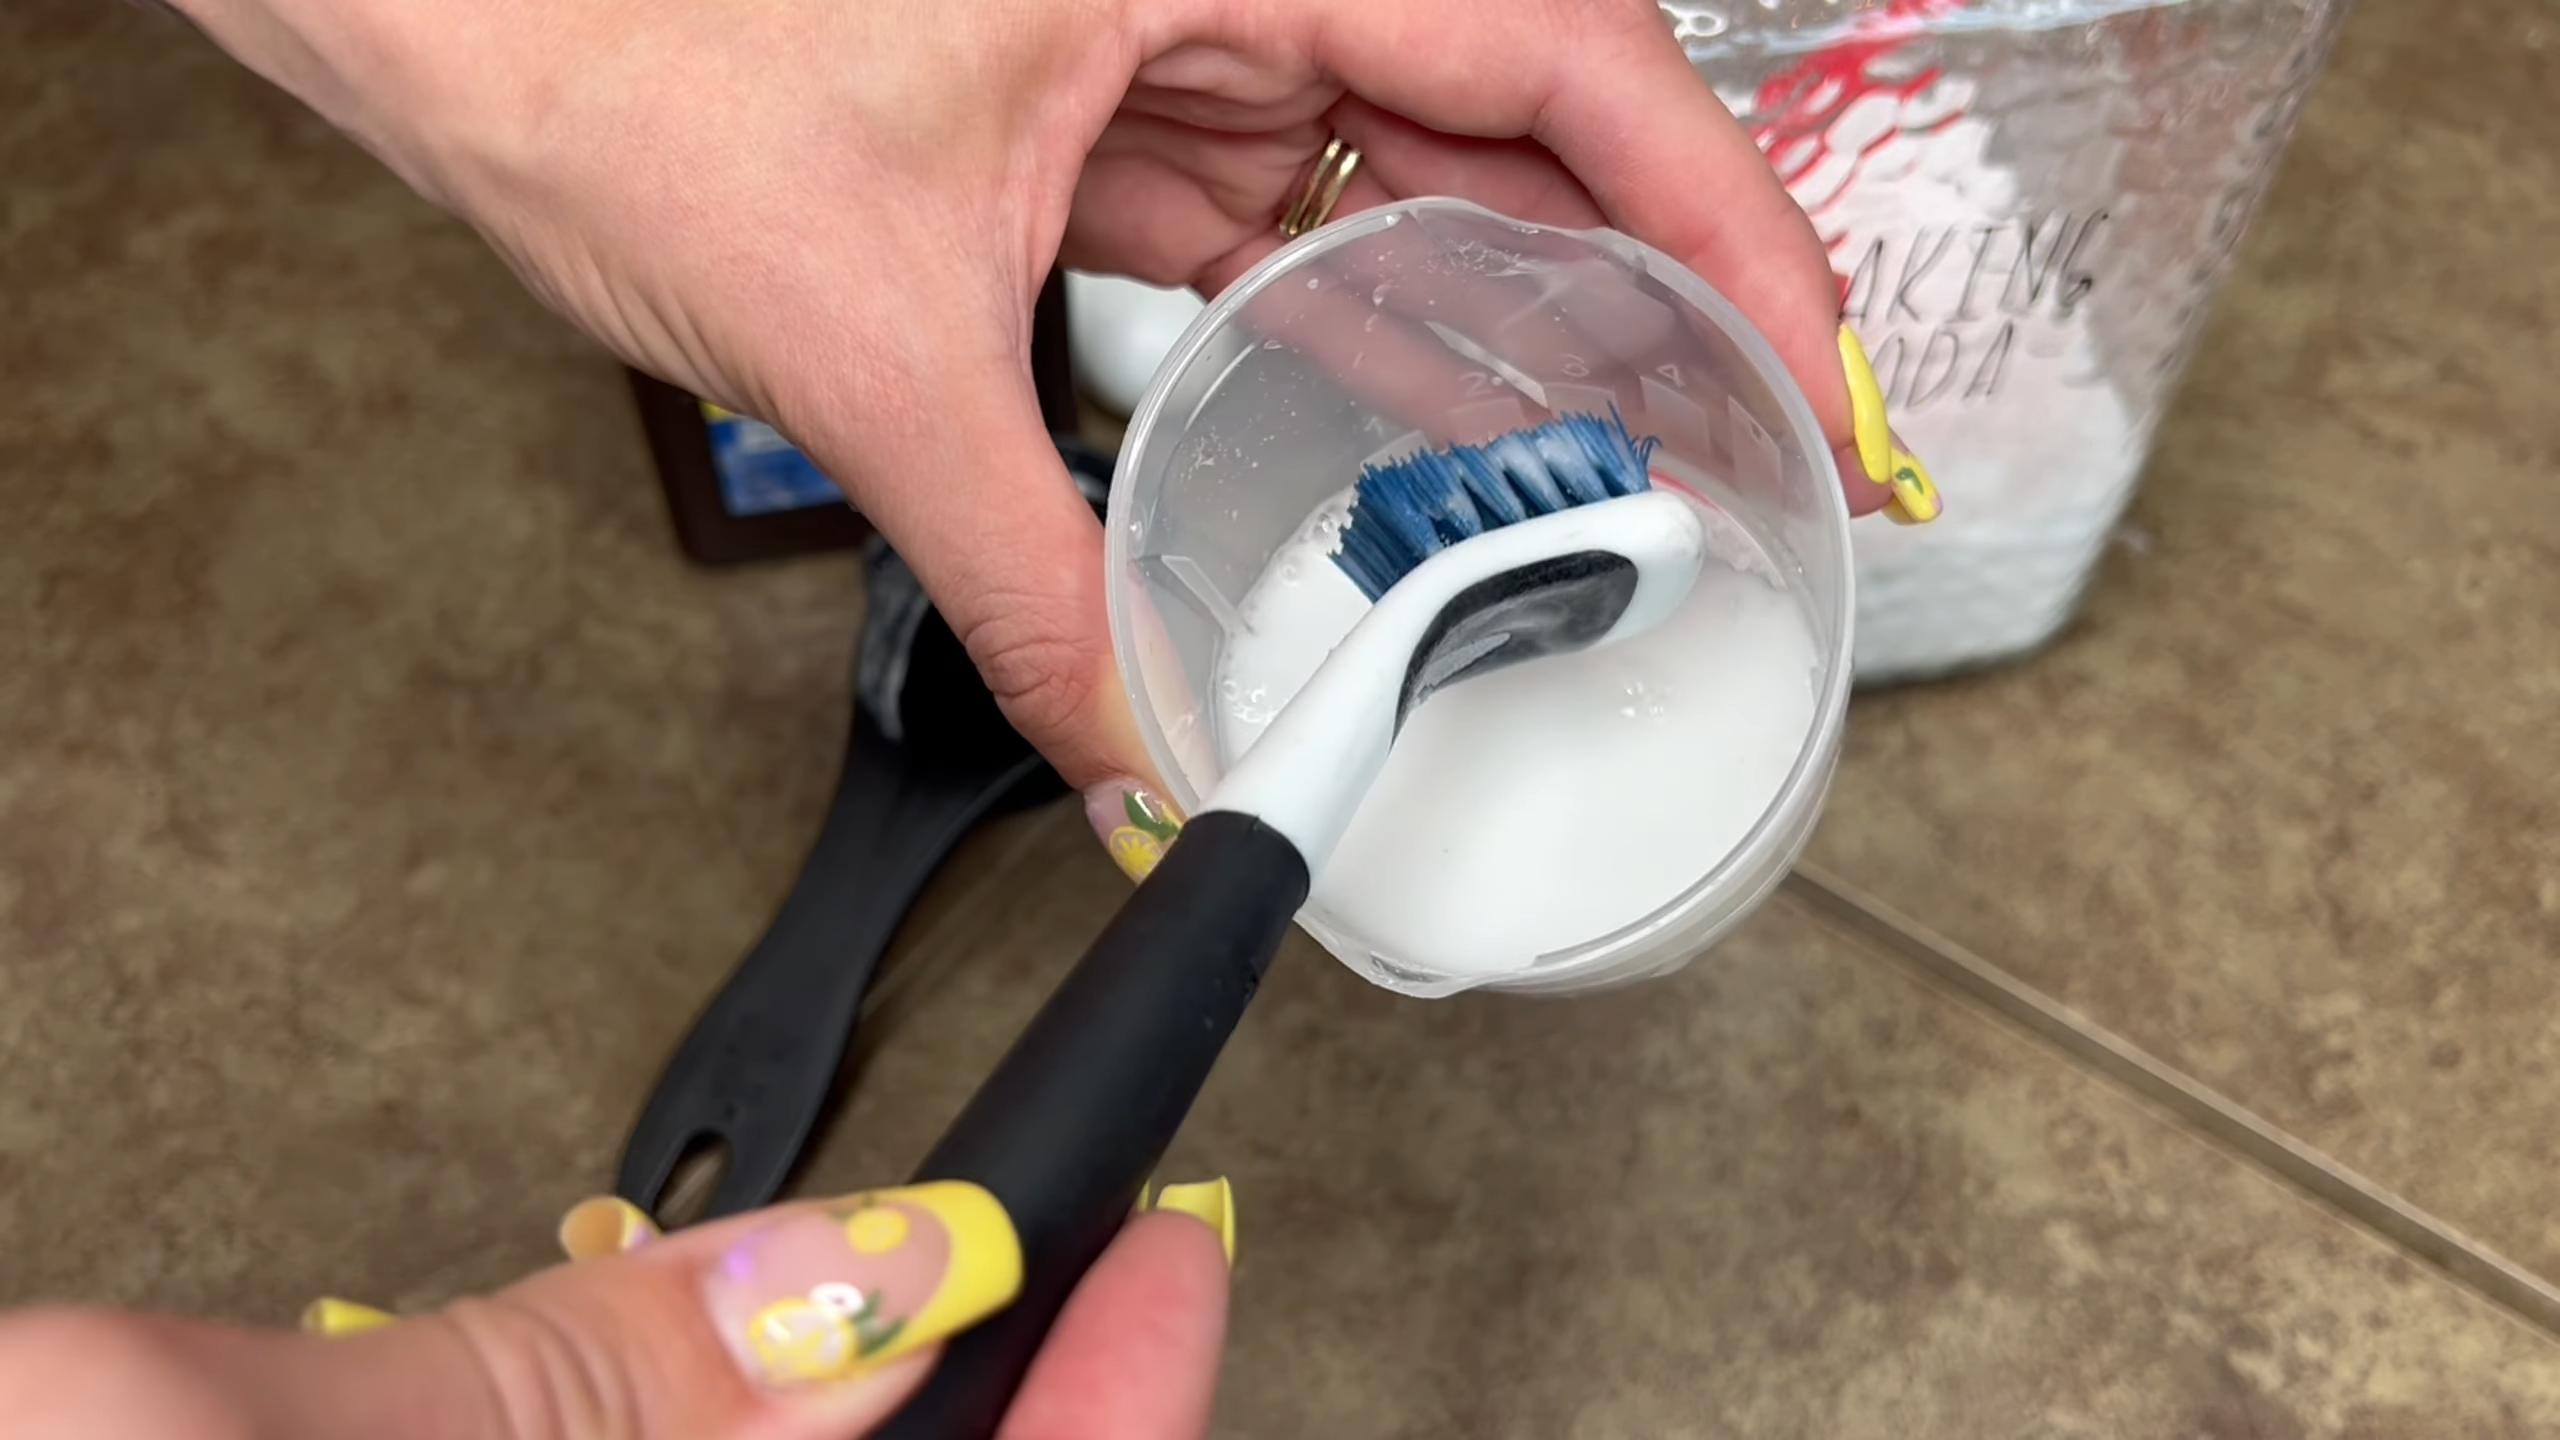
2. Mix Your Cleaning Solution: Choose your cleaning solution based on the severity of the staining and the type of tile you have. Mix it in a small bowl or container.
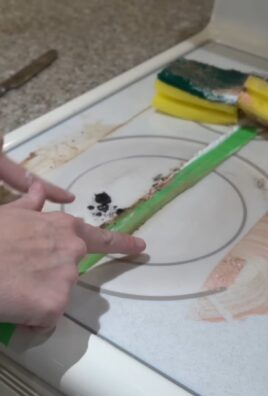
3. Dip Your Toothbrush: Dip your toothbrush into the cleaning solution, making sure the bristles are well-saturated.
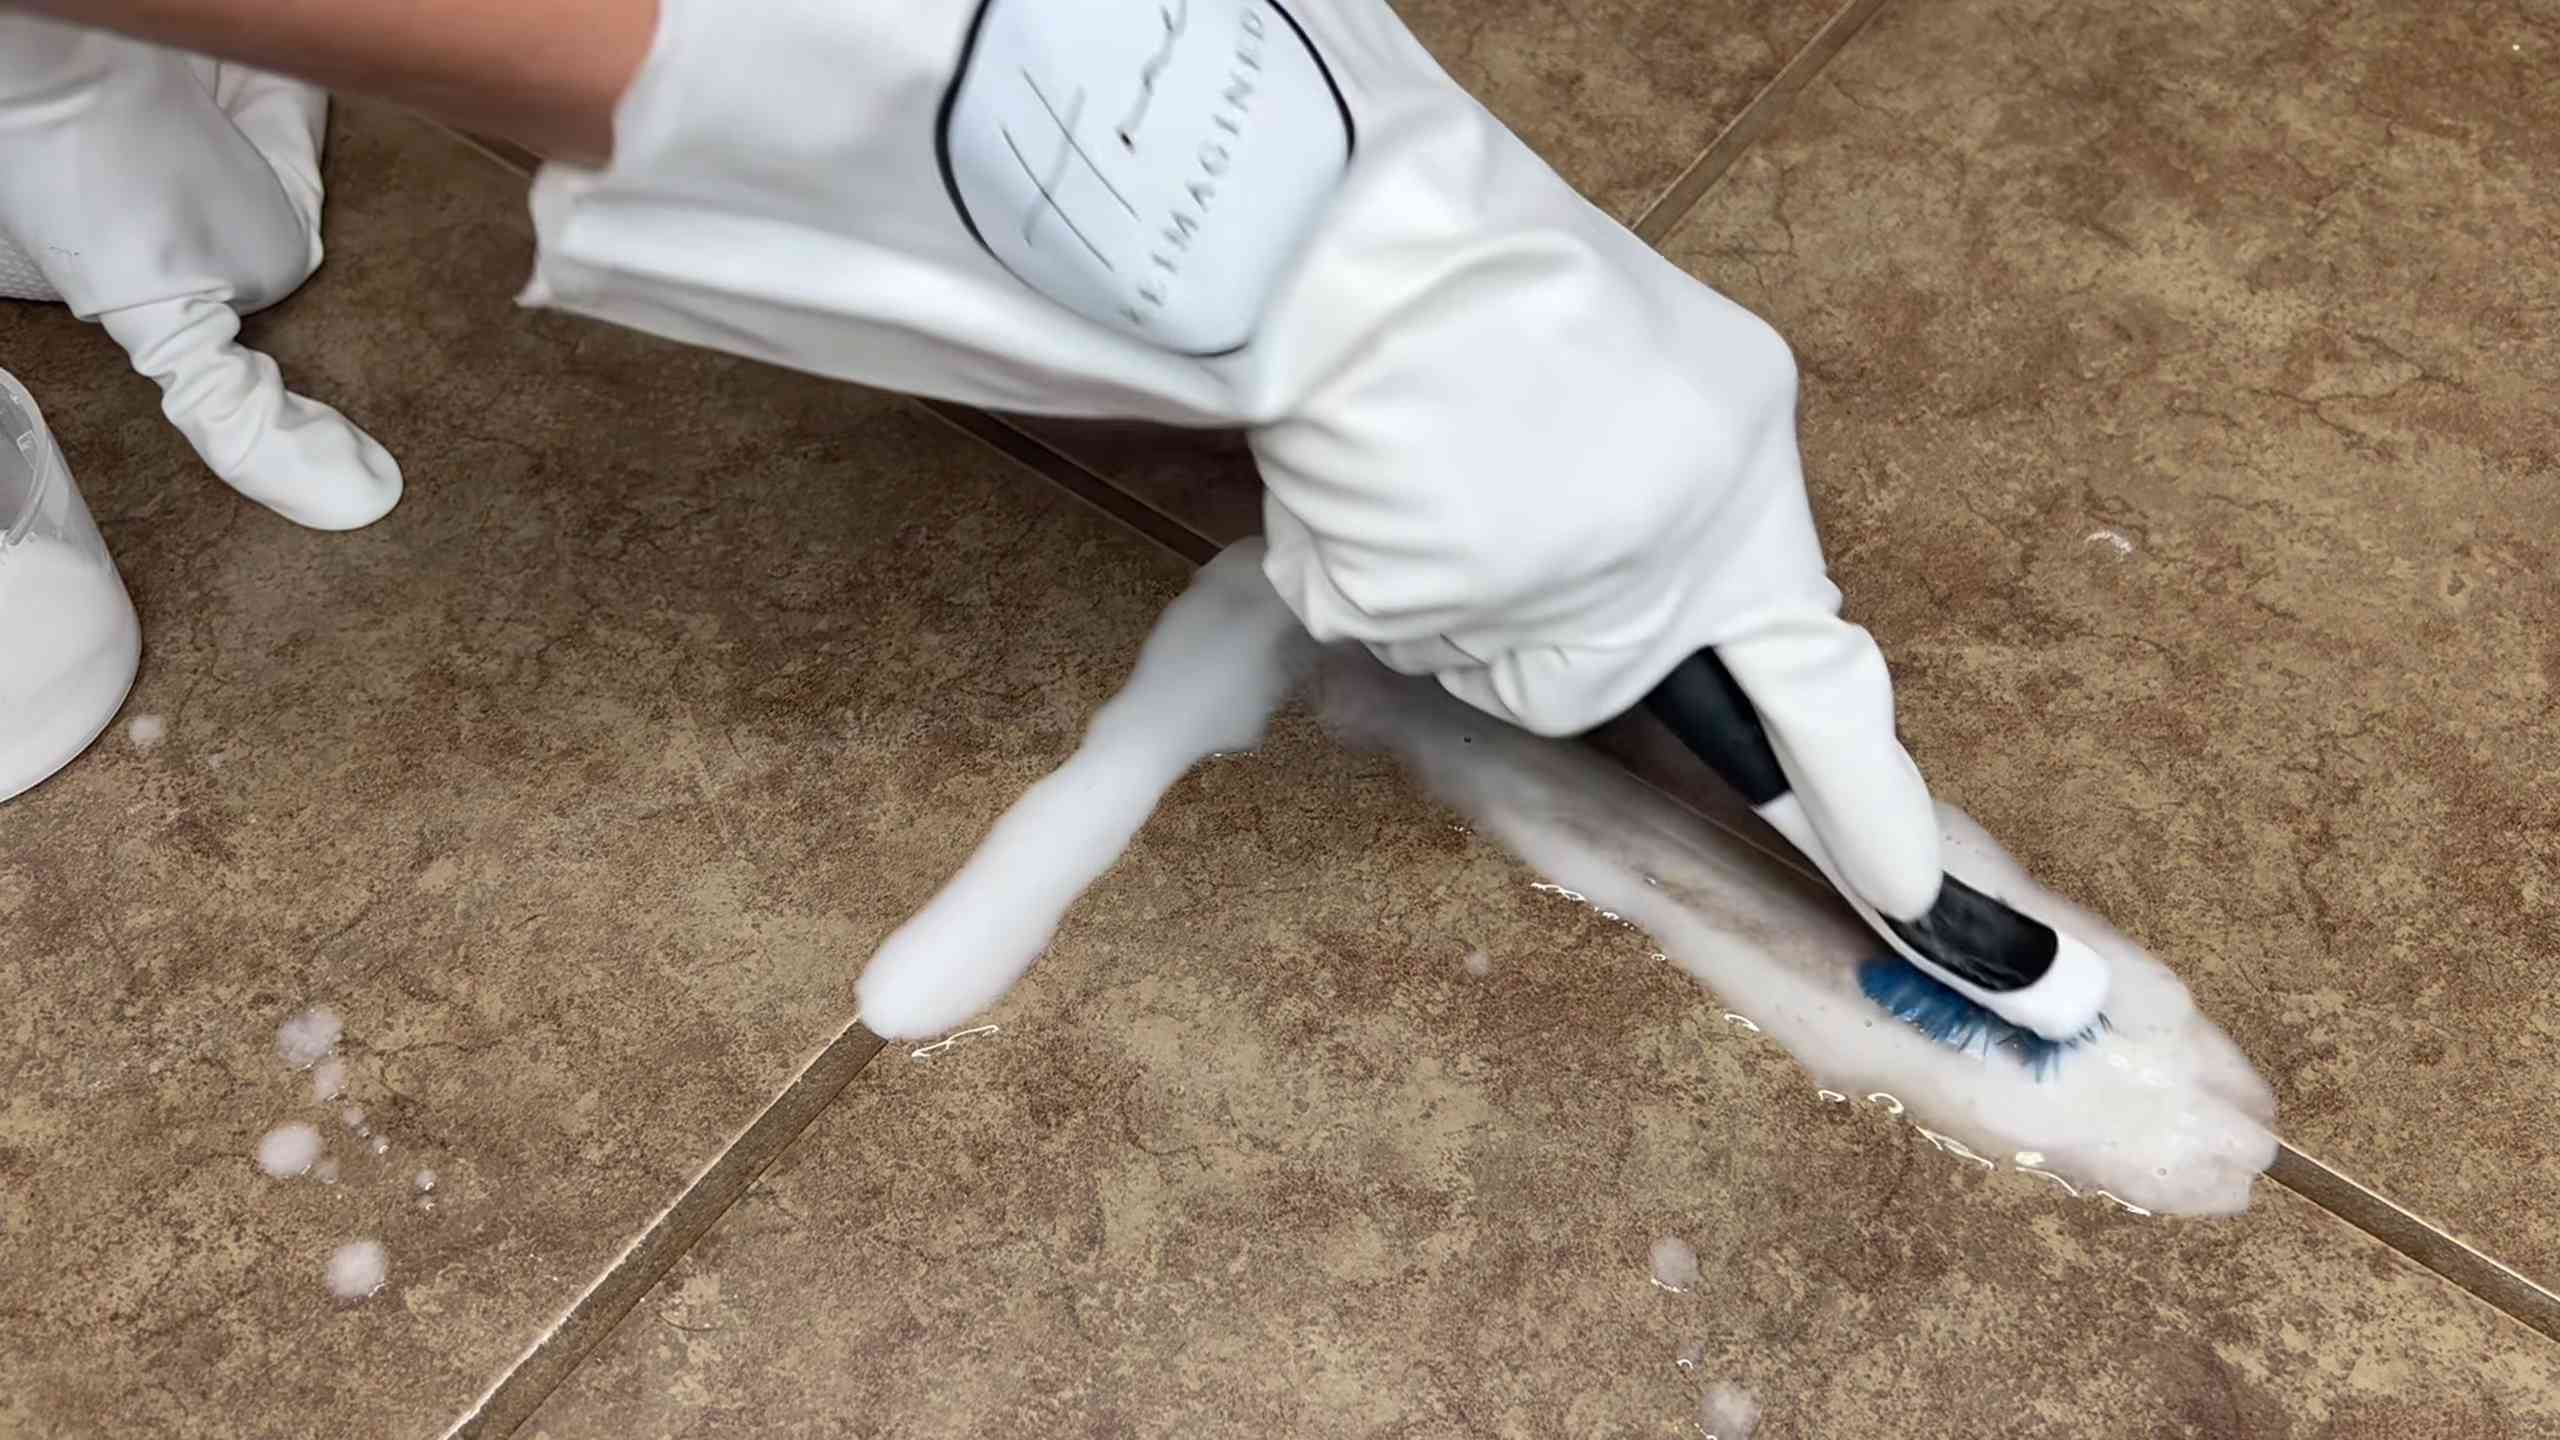
4. Scrub the Grout: Now, the fun part! Use the toothbrush to scrub the grout lines with firm, back-and-forth motions. Focus on one small area at a time. Apply enough pressure to loosen the dirt, but be careful not to damage the tiles. I like to work in small sections, about a foot or two at a time.
5. Let it Sit (Optional): For tougher stains, you can let the cleaning solution sit on the grout for a few minutes before scrubbing. This will give it time to penetrate the dirt and grime. I usually let it sit for about 5-10 minutes, but don’t let it dry completely.
6. Rinse with Clean Water: Once you’ve scrubbed the grout, rinse the area with clean water. You can use a sponge or cloth to wipe away the dirty water. Make sure to remove all traces of the cleaning solution.
7. Dry the Area: Use a clean towel or cloth to dry the area thoroughly. This will help prevent water spots and mildew growth.
8. Repeat as Needed: If the grout is still dirty, repeat the process until it’s clean. You may need to use a stronger cleaning solution or scrub more vigorously for stubborn stains.
Dealing with Stubborn Stains:
Sometimes, you’ll encounter grout stains that just won’t budge. Here are a few tips for dealing with those stubborn spots:
* Baking Soda Paste Power: For really tough stains, make a thick paste of baking soda and water. Apply it to the grout lines, let it sit for 30 minutes, and then scrub with your toothbrush.
* Hydrogen Peroxide: Hydrogen peroxide is a mild bleaching agent that can help lighten stains. Apply it directly to the grout lines, let it sit for 10-15 minutes, and then scrub. Important: Test hydrogen peroxide in an inconspicuous area first to make sure it doesn’t discolor your tiles.
* Steam Cleaning: A steam cleaner can be a powerful tool for cleaning grout. The hot steam can help loosen dirt and grime without the need for harsh chemicals.
* Grout Pen: If your grout is permanently stained or discolored, you can use a grout pen to restore its color. These pens are available in a variety of colors to match your grout.
Preventing Future Grout Stains:
Once you’ve cleaned your grout, you’ll want to keep it looking its best. Here are a few tips for preventing future grout stains:
* Seal Your Grout: Sealing your grout will help protect it from stains and water damage. Apply a grout sealer according to the manufacturer’s instructions.
* Wipe Up Spills Immediately: The sooner you wipe up spills, the less likely they are to stain your grout.
* Ventilate Your Bathroom: Proper ventilation will help prevent mildew growth in your bathroom. Run the exhaust fan during and after showers.
* Clean Regularly: Regular cleaning will help prevent dirt and grime from building up on your grout. I try to give my grout a quick scrub every week or two.
Safety First!
Before you start cleaning, here are a few safety precautions to keep in mind:
* Wear Gloves: Protect your hands from harsh chemicals by wearing rubber gloves.
* Protect Your Eyes: If you’re using stronger cleaning solutions, wear eye protection to prevent splashes.
* Ventilate the Area: Make sure the area is well-ventilated to avoid inhaling fumes.
* Test in an Inconspicuous Area: Before using any cleaning solution, test it in an inconspicuous area to make sure it doesn’t damage your tiles.
* Keep Out of Reach of Children and Pets: Store cleaning solutions out of reach of children and pets.
A Few Extra Tips and Tricks:
* Use Different Toothbrushes: I like to have a few different toothbrushes on hand – one for general cleaning, one for stubborn stains, and one for applying grout sealer.
* Angle Your Toothbrush: When scrubbing, angle your toothbrush to get into the corners of the grout lines.
* Don’t Be Afraid to Experiment: Try different cleaning solutions and techniques to find what works best for your grout.
* Take Breaks: Cleaning grout can be tiring, so take breaks as needed.
* Enjoy the Results! Once you’re finished, step back and admire your sparkling clean grout!
So there you have it! Cleaning grout with a toothbrush is a simple, effective, and affordable way to keep your tiled surfaces looking their best. With a little elbow grease and the right cleaning solution, you can say goodbye to dirty grout and hello to a sparkling clean home! Happy cleaning!
Conclusion
So, there you have it! Transforming your dingy, discolored grout with a simple toothbrush and a few household ingredients is not just a cleaning hack; it’s a revelation. We’ve shown you how to reclaim the sparkling clean surfaces you deserve, without resorting to harsh chemicals or expensive professional services. This DIY toothbrush grout cleaning method is a game-changer for anyone looking to brighten their bathroom or kitchen without breaking the bank or sacrificing their precious time.
Why is this a must-try? Because it’s effective, affordable, and readily accessible. You likely already have everything you need sitting in your pantry and bathroom cabinet. Forget about those overpowering chemical fumes and the elbow grease required by traditional cleaning methods. This approach is gentle yet powerful, targeting the grime and mildew that stubbornly cling to your grout lines.
But the beauty of this method lies in its adaptability. Feel free to experiment with variations to find what works best for your specific grout and the level of staining you’re dealing with. For instance, if you’re tackling particularly stubborn stains, consider pre-treating the grout with a paste of baking soda and water for a few hours before scrubbing. Or, if you prefer a more natural approach, try using a solution of vinegar and water, remembering to ventilate the area well. Lemon juice can also be a fantastic natural brightener, especially for lighter-colored grout.
For those with colored grout, exercise caution when using acidic solutions like vinegar or lemon juice, as they may cause fading over time. Always test a small, inconspicuous area first to ensure colorfastness. A milder solution of dish soap and warm water might be a better option for colored grout, followed by a thorough rinse.
Don’t underestimate the power of the toothbrush itself! An old electric toothbrush head can be a real time-saver, providing extra scrubbing power with minimal effort. Just be sure to use a head specifically designated for cleaning, not the one you use on your teeth!
Ultimately, the key to success with this DIY toothbrush grout cleaning trick is consistency. Regular maintenance, even just a quick scrub every week or two, will prevent buildup and keep your grout looking its best. Think of it as a preventative measure, rather than a major overhaul.
We are confident that once you try this method, you’ll be amazed by the results. The satisfaction of seeing those grout lines transform from dull and dirty to bright and clean is truly rewarding. So, grab your toothbrush, gather your supplies, and get ready to experience the joy of sparkling grout!
We encourage you to try this simple yet effective method and share your experiences with us. Let us know what variations you tried, what worked best for you, and any tips or tricks you discovered along the way. Your feedback will help us refine this method and make it even more accessible to others. Share your before-and-after photos on social media and tag us! We can’t wait to see your sparkling clean grout!
Frequently Asked Questions (FAQ)
What kind of toothbrush should I use?
An old toothbrush is perfect for this task! You don’t need anything fancy. In fact, using a new toothbrush would be a waste. Look for one with firm bristles that can effectively scrub away grime. An electric toothbrush with a small, round head can also work wonders, especially for larger areas. Just make sure to dedicate that toothbrush head solely for cleaning purposes.
What cleaning solutions are safe to use on grout?
Several cleaning solutions are safe and effective for grout cleaning. Baking soda is a great natural abrasive and deodorizer. Vinegar is a powerful disinfectant and can help dissolve mineral deposits. Dish soap is a gentle cleanser that can remove grease and grime. Hydrogen peroxide is a mild bleach that can help brighten grout. For tougher stains, you can try a commercial grout cleaner, but always follow the manufacturer’s instructions and test in an inconspicuous area first. Remember to always ventilate the area well when using any cleaning solution.
How often should I clean my grout?
The frequency of grout cleaning depends on the location and usage of the tiled area. In high-traffic areas like bathrooms and kitchens, you should aim to clean your grout at least once a month. For areas that don’t see as much use, such as guest bathrooms, you can clean the grout every few months. Regular spot cleaning can also help prevent buildup and keep your grout looking its best.
Can I use bleach to clean my grout?
While bleach can be effective at whitening grout, it’s important to use it with caution. Bleach can be harsh and can damage certain types of grout. It can also release harmful fumes, so it’s crucial to ventilate the area well and wear gloves and eye protection. If you choose to use bleach, dilute it with water and test it in an inconspicuous area first. Avoid using bleach on colored grout, as it can cause fading.
How do I prevent grout from getting dirty in the first place?
Prevention is key to keeping your grout clean and sparkling. Seal your grout regularly to protect it from stains and moisture. Wipe up spills immediately to prevent them from soaking into the grout. Use a squeegee after showering to remove excess water and prevent mildew growth. Consider using a grout pen to touch up any areas that are starting to look dingy. And, of course, regular cleaning with a mild detergent and water can go a long way in preventing buildup.
What if my grout is severely stained?
If your grout is severely stained, you may need to take more drastic measures. Try making a paste of baking soda and hydrogen peroxide and applying it to the grout. Let it sit for several hours or even overnight before scrubbing with a toothbrush. For extremely stubborn stains, you may need to use a commercial grout cleaner specifically designed for removing tough stains. In some cases, the only solution may be to remove and replace the grout.
Is it safe to use vinegar on all types of grout?
While vinegar is a great natural cleaner, it’s important to be cautious when using it on grout. Vinegar is acidic and can etch or damage certain types of grout, especially those made from natural stone. Always test vinegar in an inconspicuous area first to ensure it doesn’t cause any damage. If you’re unsure, it’s best to use a milder cleaning solution, such as dish soap and water.
How can I make my own grout cleaner?
Making your own grout cleaner is easy and affordable. Here are a few recipes you can try:
* **Baking Soda Paste:** Mix baking soda with water to form a thick paste. Apply the paste to the grout, let it sit for a few minutes, and then scrub with a toothbrush.
* **Vinegar and Water Solution:** Mix equal parts vinegar and water in a spray bottle. Spray the solution onto the grout, let it sit for a few minutes, and then scrub with a toothbrush.
* **Dish Soap and Water Solution:** Mix a few drops of dish soap with warm water in a spray bottle. Spray the solution onto the grout, let it sit for a few minutes, and then scrub with a toothbrush.
What are the benefits of using a toothbrush for grout cleaning?
Using a toothbrush for grout cleaning offers several benefits. The small size and angled bristles of a toothbrush allow you to reach into tight spaces and effectively scrub away grime. Toothbrushes are also gentle enough to avoid damaging the grout. Plus, they’re inexpensive and readily available. This method allows for targeted cleaning, ensuring you’re focusing on the grout lines and not unnecessarily scrubbing the surrounding tiles.
Leave a Comment